
「やっべえ!寝坊した!!!」
「二度寝したらもう11時かよ・・・」
こんな経験をしたことはありませんか?
寝坊した日は予定が総崩れになりますよね。
「ダラダラして休日が終わった、」
と後悔しないために1日の始まりは確実に目覚めたいですよね?
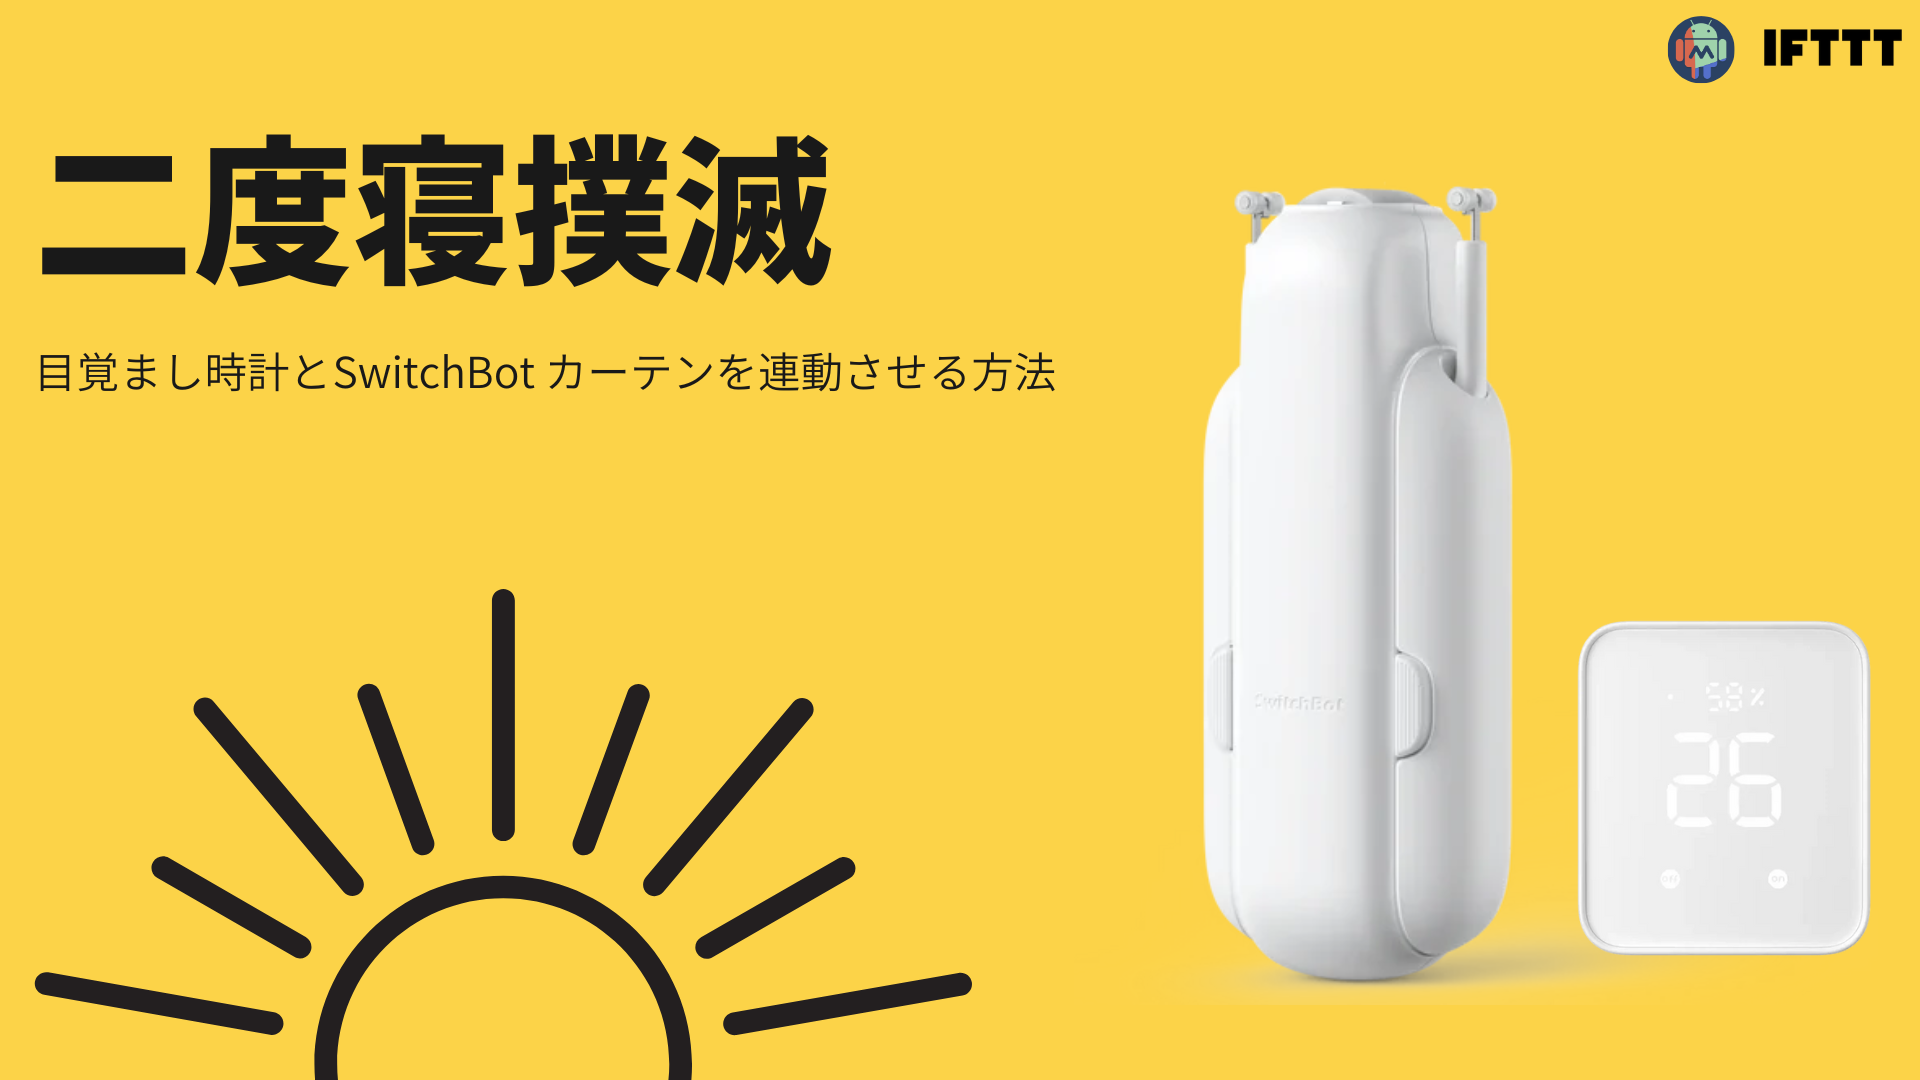
今回は、目覚まし時計アプリとSwitchBotカーテンを連動させ、アラームが鳴ったらカーテンを自動で開ける方法をご紹介します。
※注意※
Andoroidユーザー向け記事です!
iPhoneユーザーの方が読んでも役立ちません!すみません!
※注意※
IFTTT(有料サービス)を使用します!
こんなのに金かけたくねえよ!って方は読んでも意味がありません!

この記事で紹介する方法を使えば確実に目覚めます。
一度設定すれば、目覚まし時計が鳴るとカーテンが自動的に開くのでとても楽チンです。
 タイマニ
タイマニカーテン開ける手間もハブける!
用意するもの
用意するものは次の3つです。
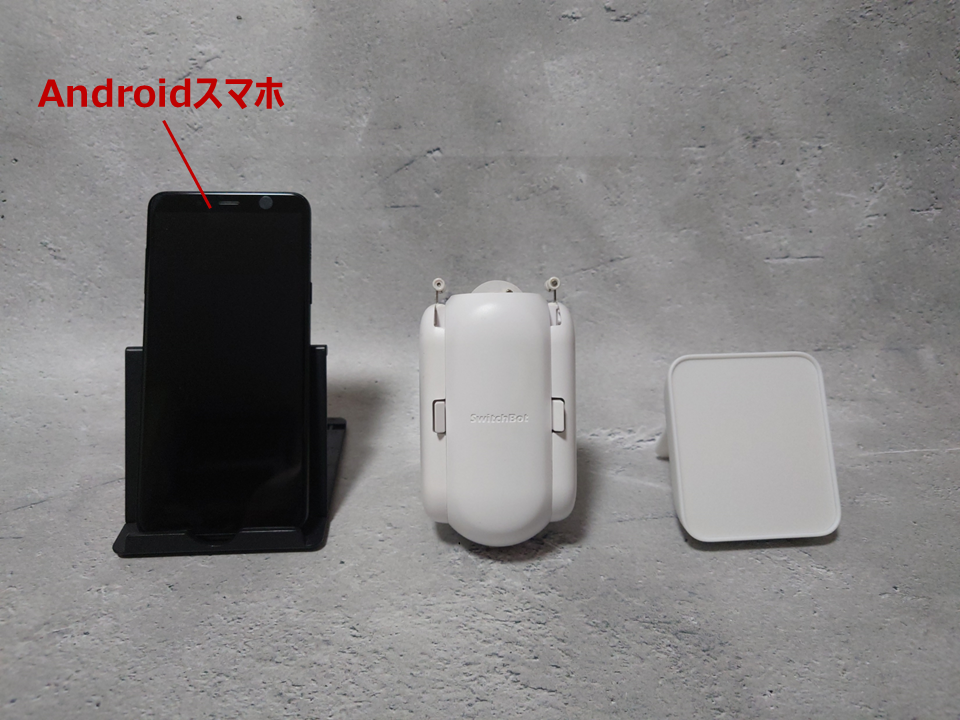
- Andoroidスマホ
(MacroDroid・IFTTT・AMdroid) - SwitchBot カーテン
- SwitchBot ハブ

▼SwitchBotカーテンは旧型でもOK!▼


▼SwitchBotハブは安い方でもOK!▼

MacroDroidというアプリを使用するため、Androidスマホが必要となります。
MacroDroid
「○○したら、□□する。」という一連の流れを自動実行するアプリです。
今回は「目覚まし時計が鳴る→カーテンを開ける。」をこのアプリで行います。
IFTTT
MacroDroidと同様に「○○したら、□□する。」という一連の流れを自動実行するアプリです。
SwitchBotカーテンと連動することができます。
AMdroid
MacroDroidと連動可能な目覚まし時計です。
▼仕組みはこんな感じです▼
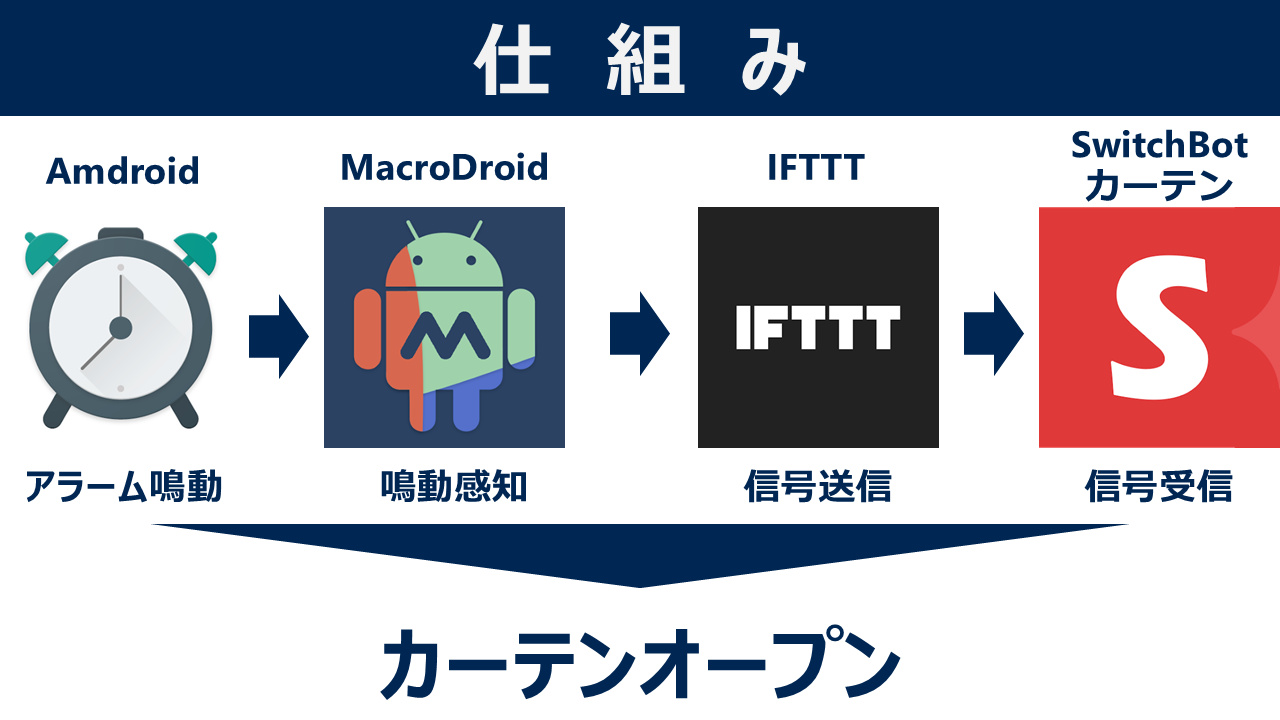
設定方法
SwitchBot カーテンの設定
まずは、カーテンを開けるための設定をします。
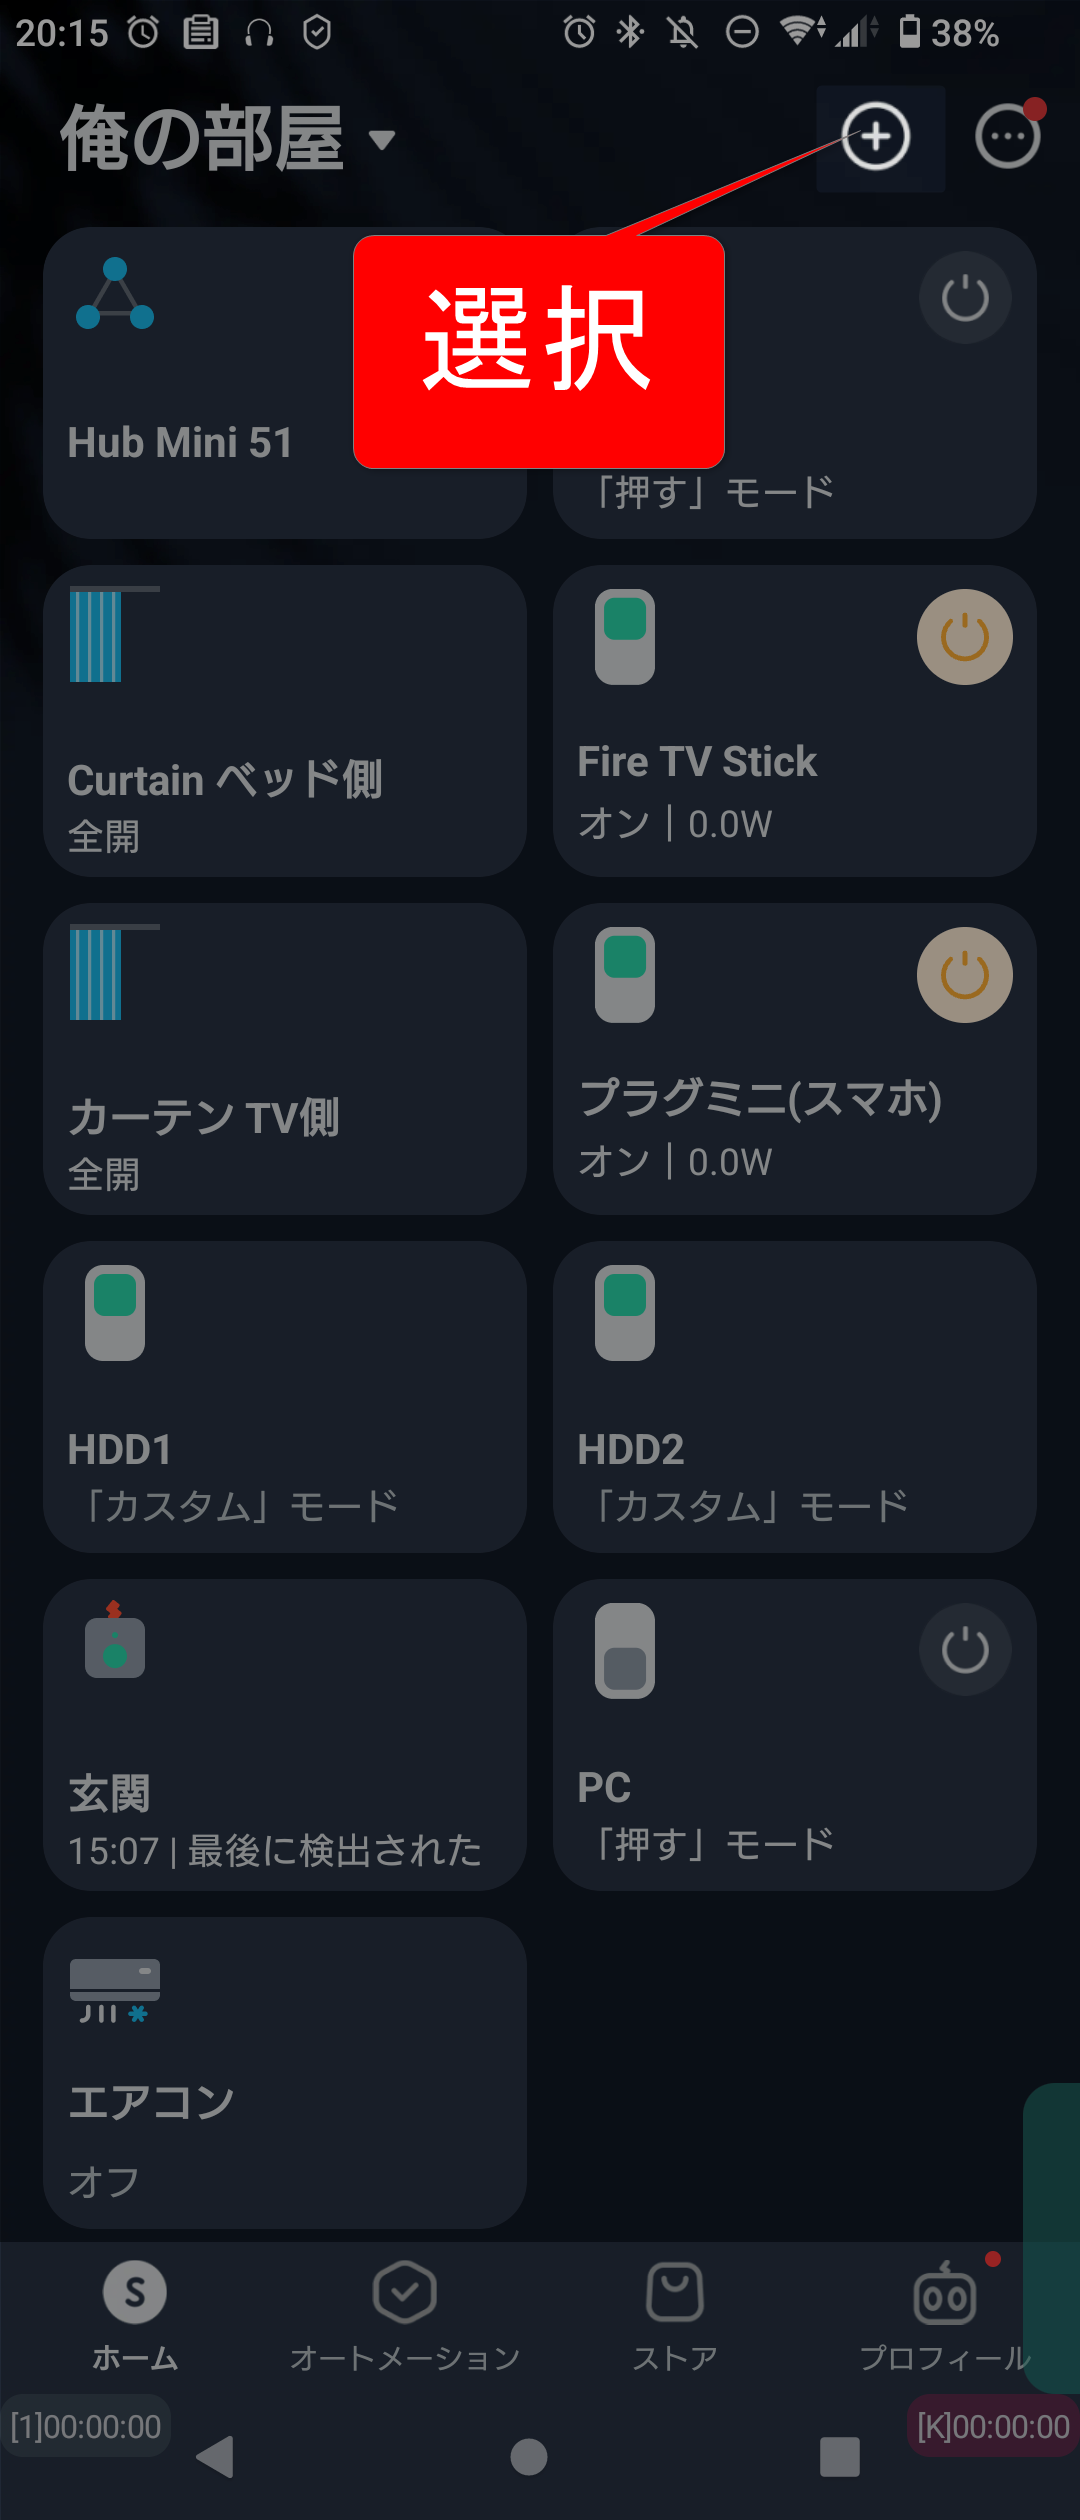
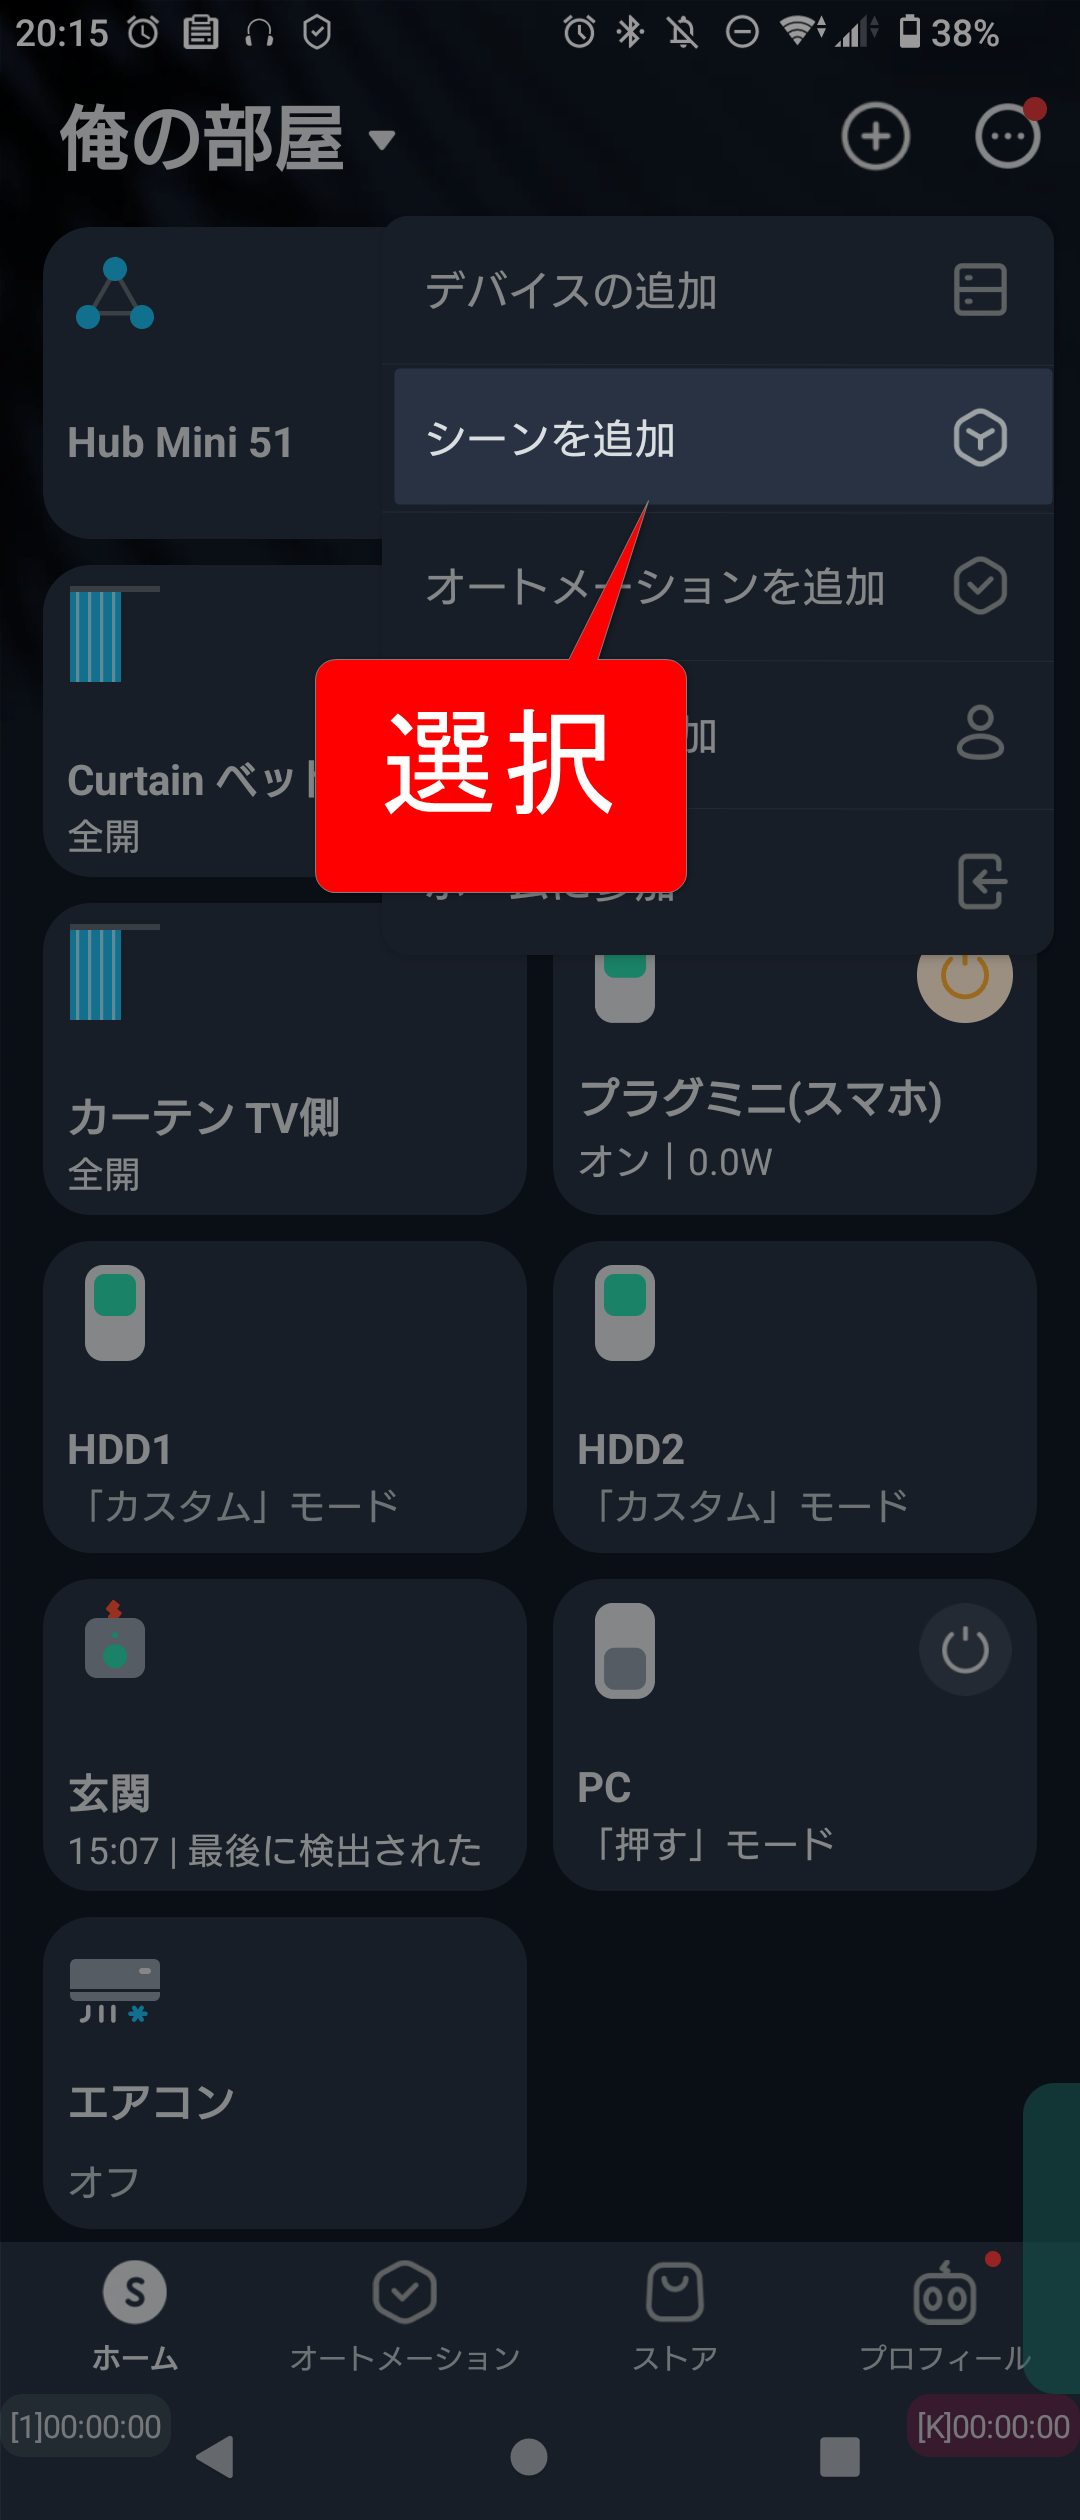
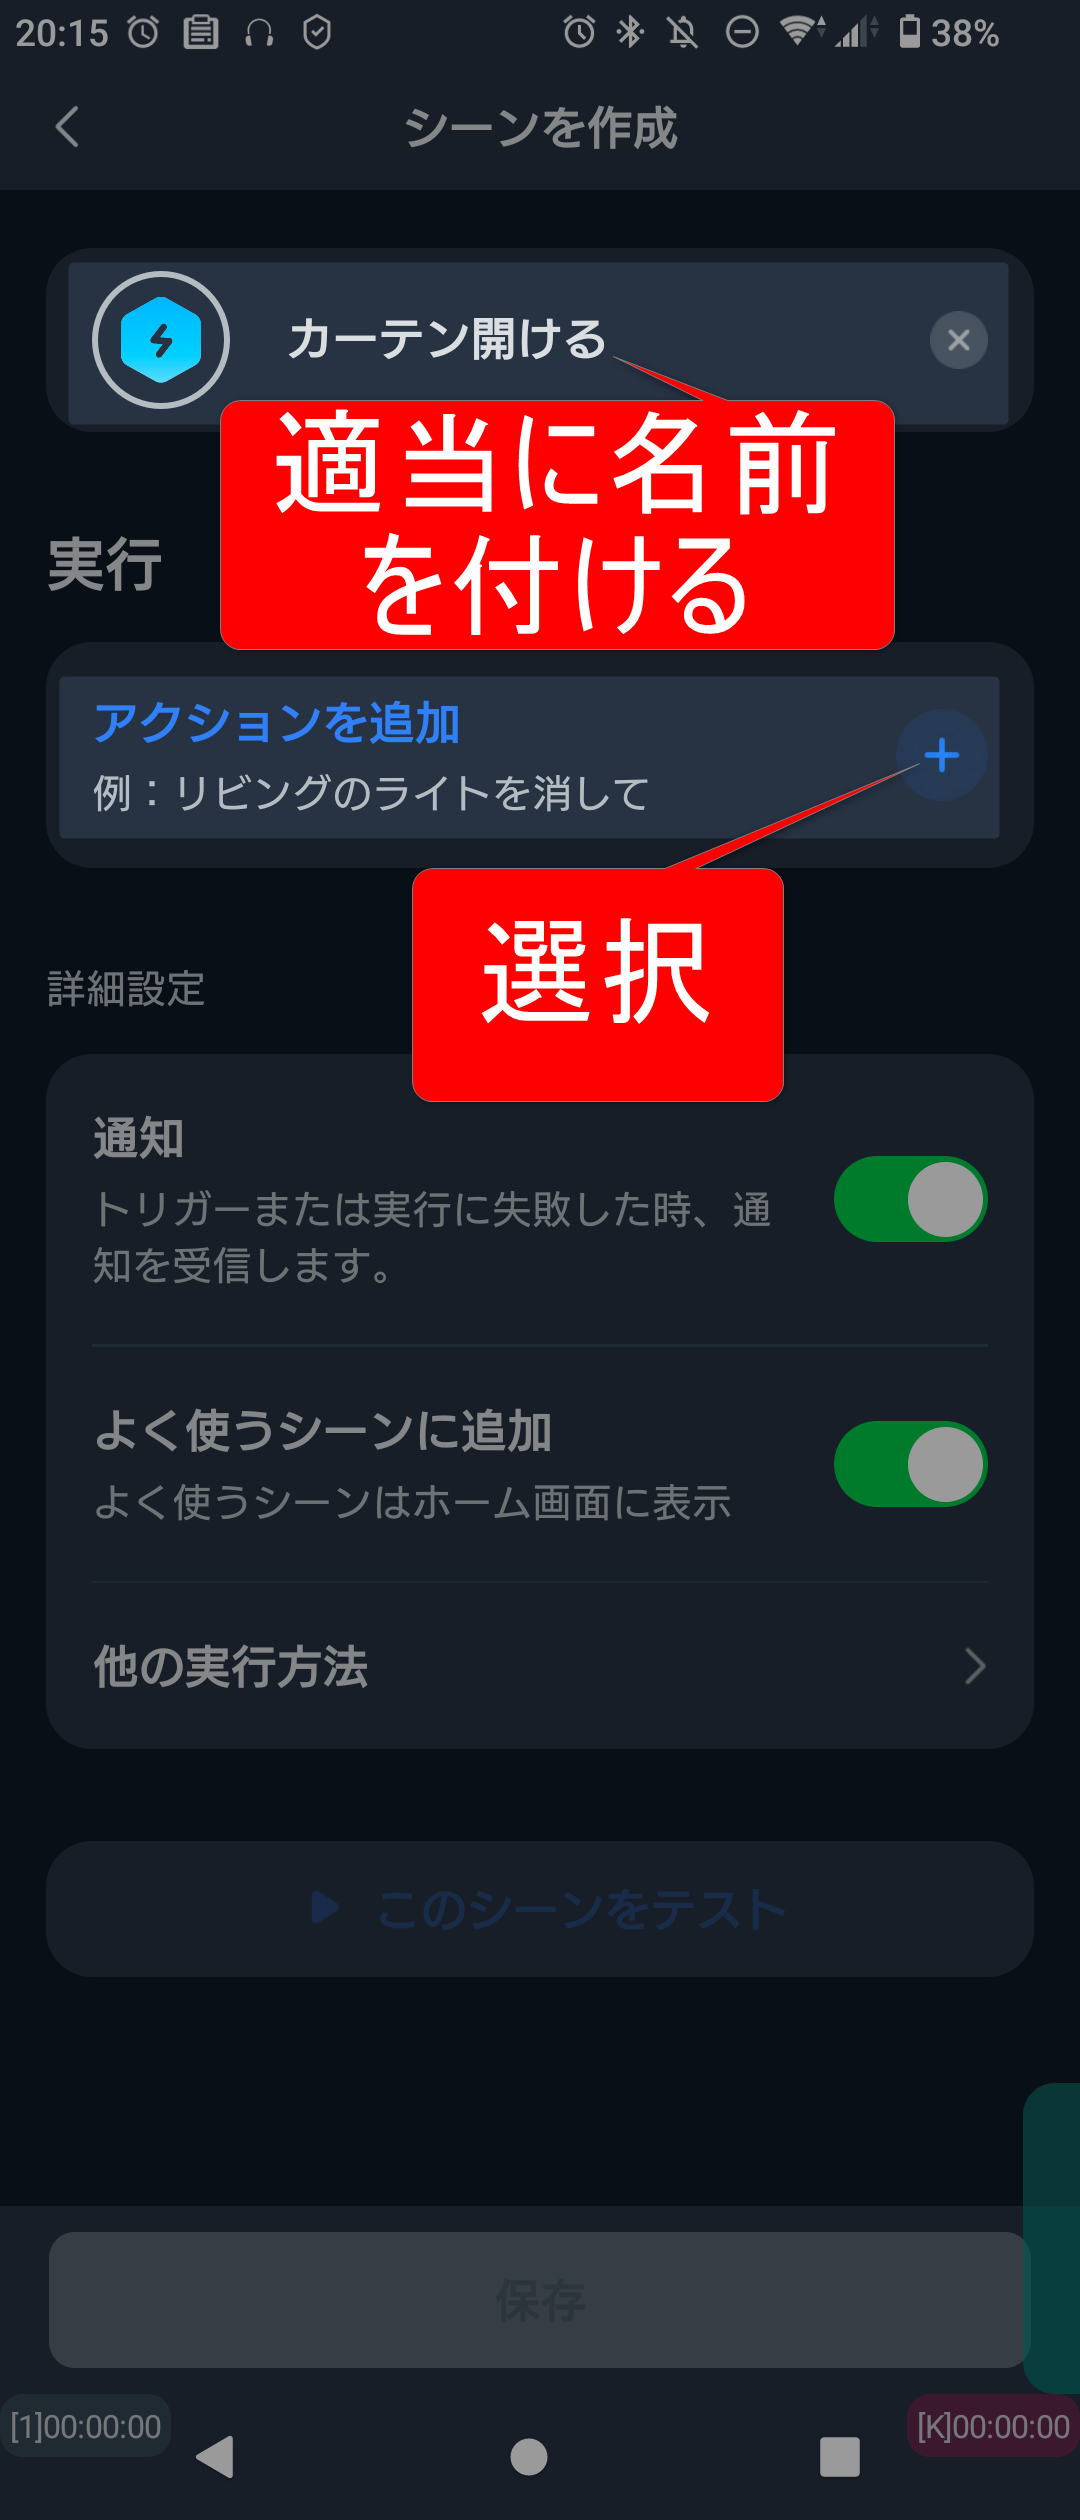
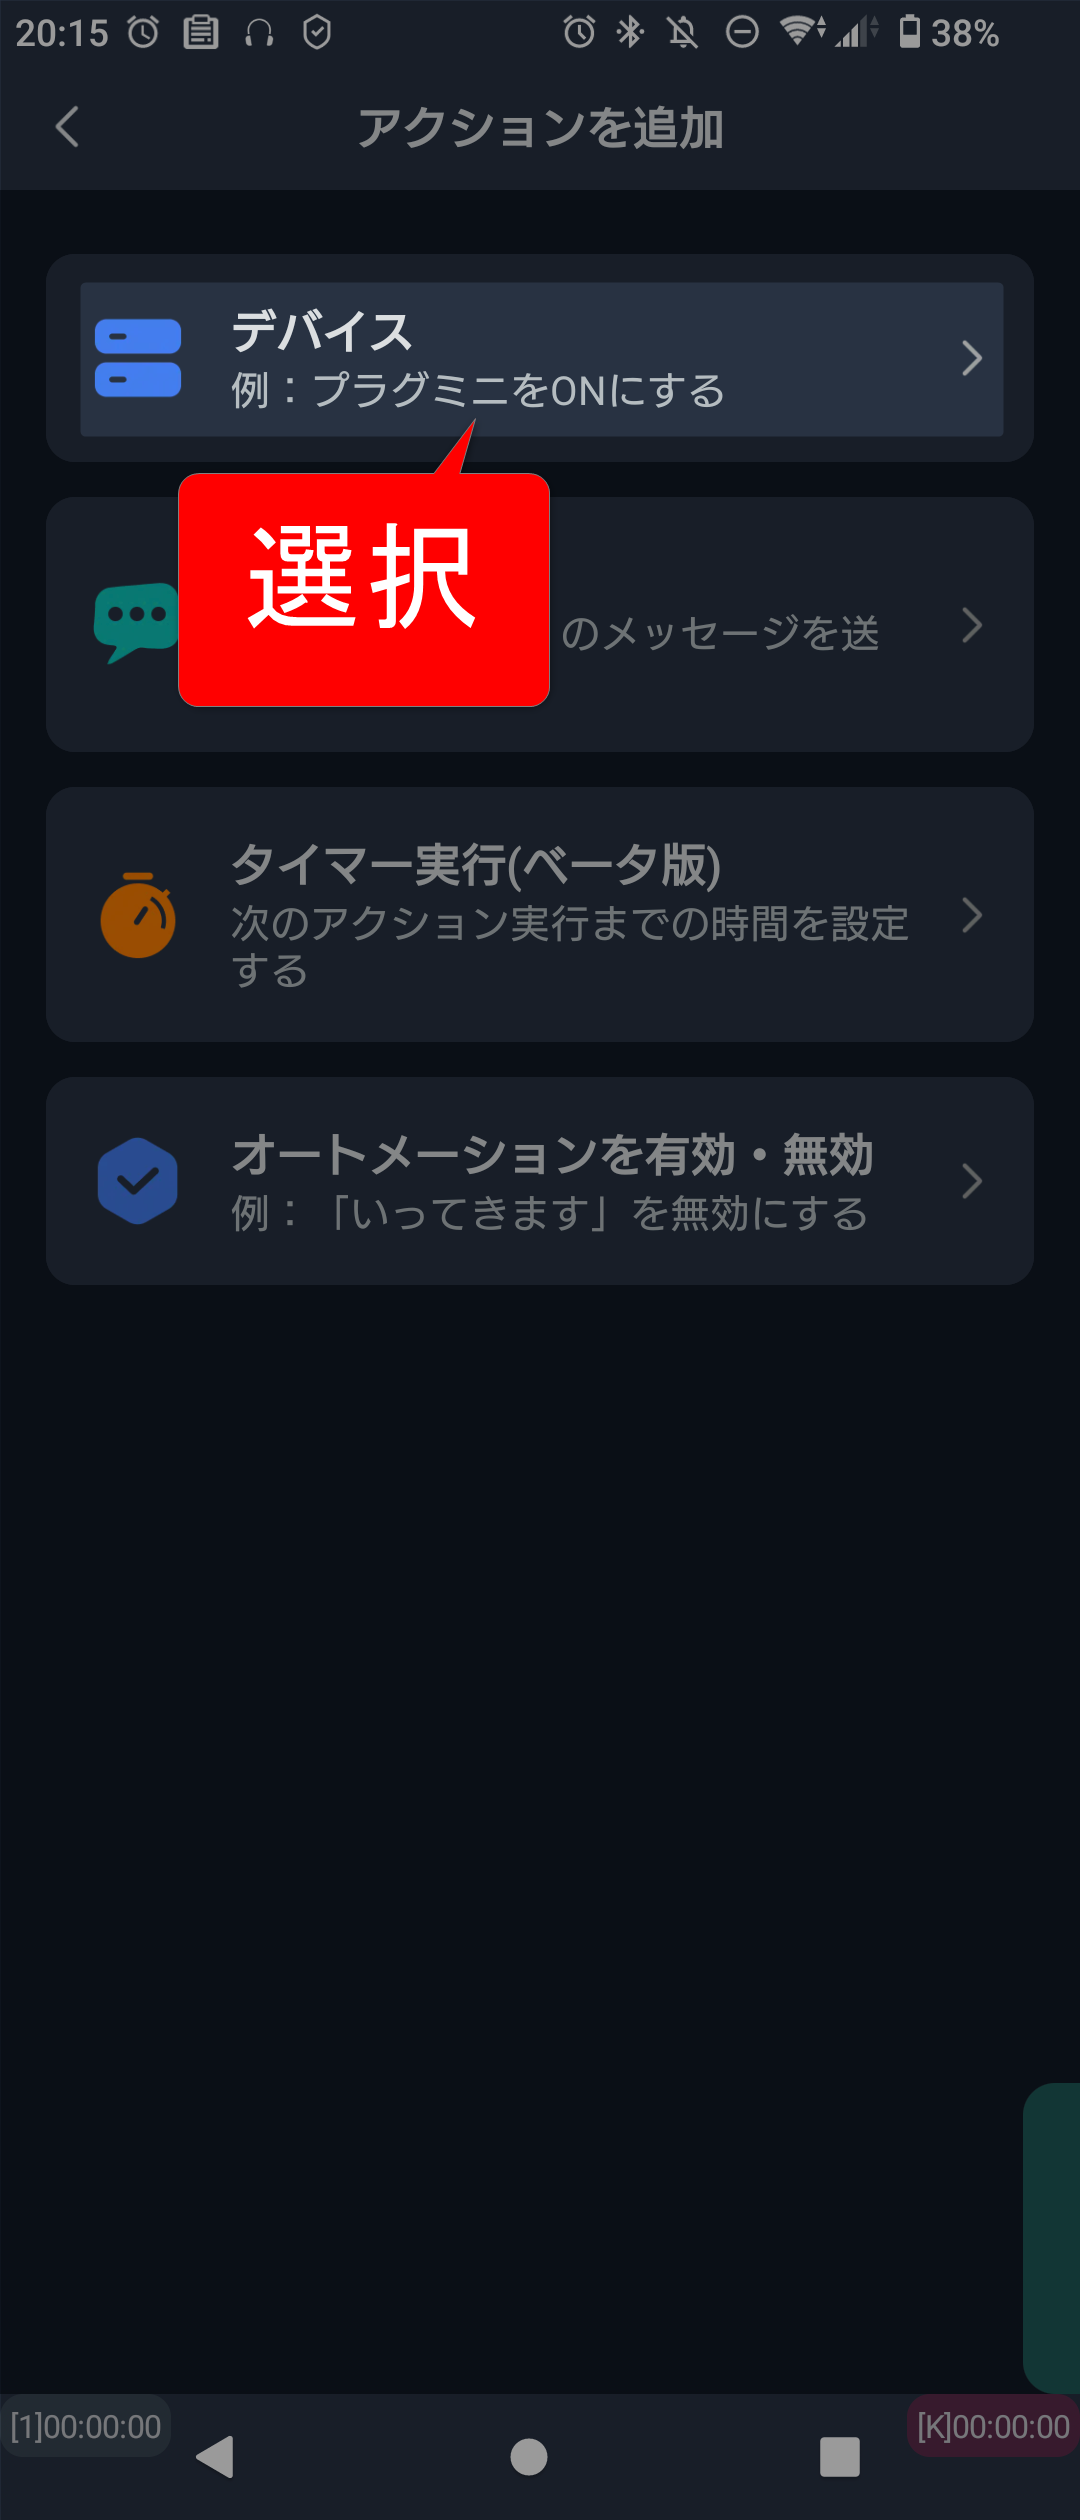
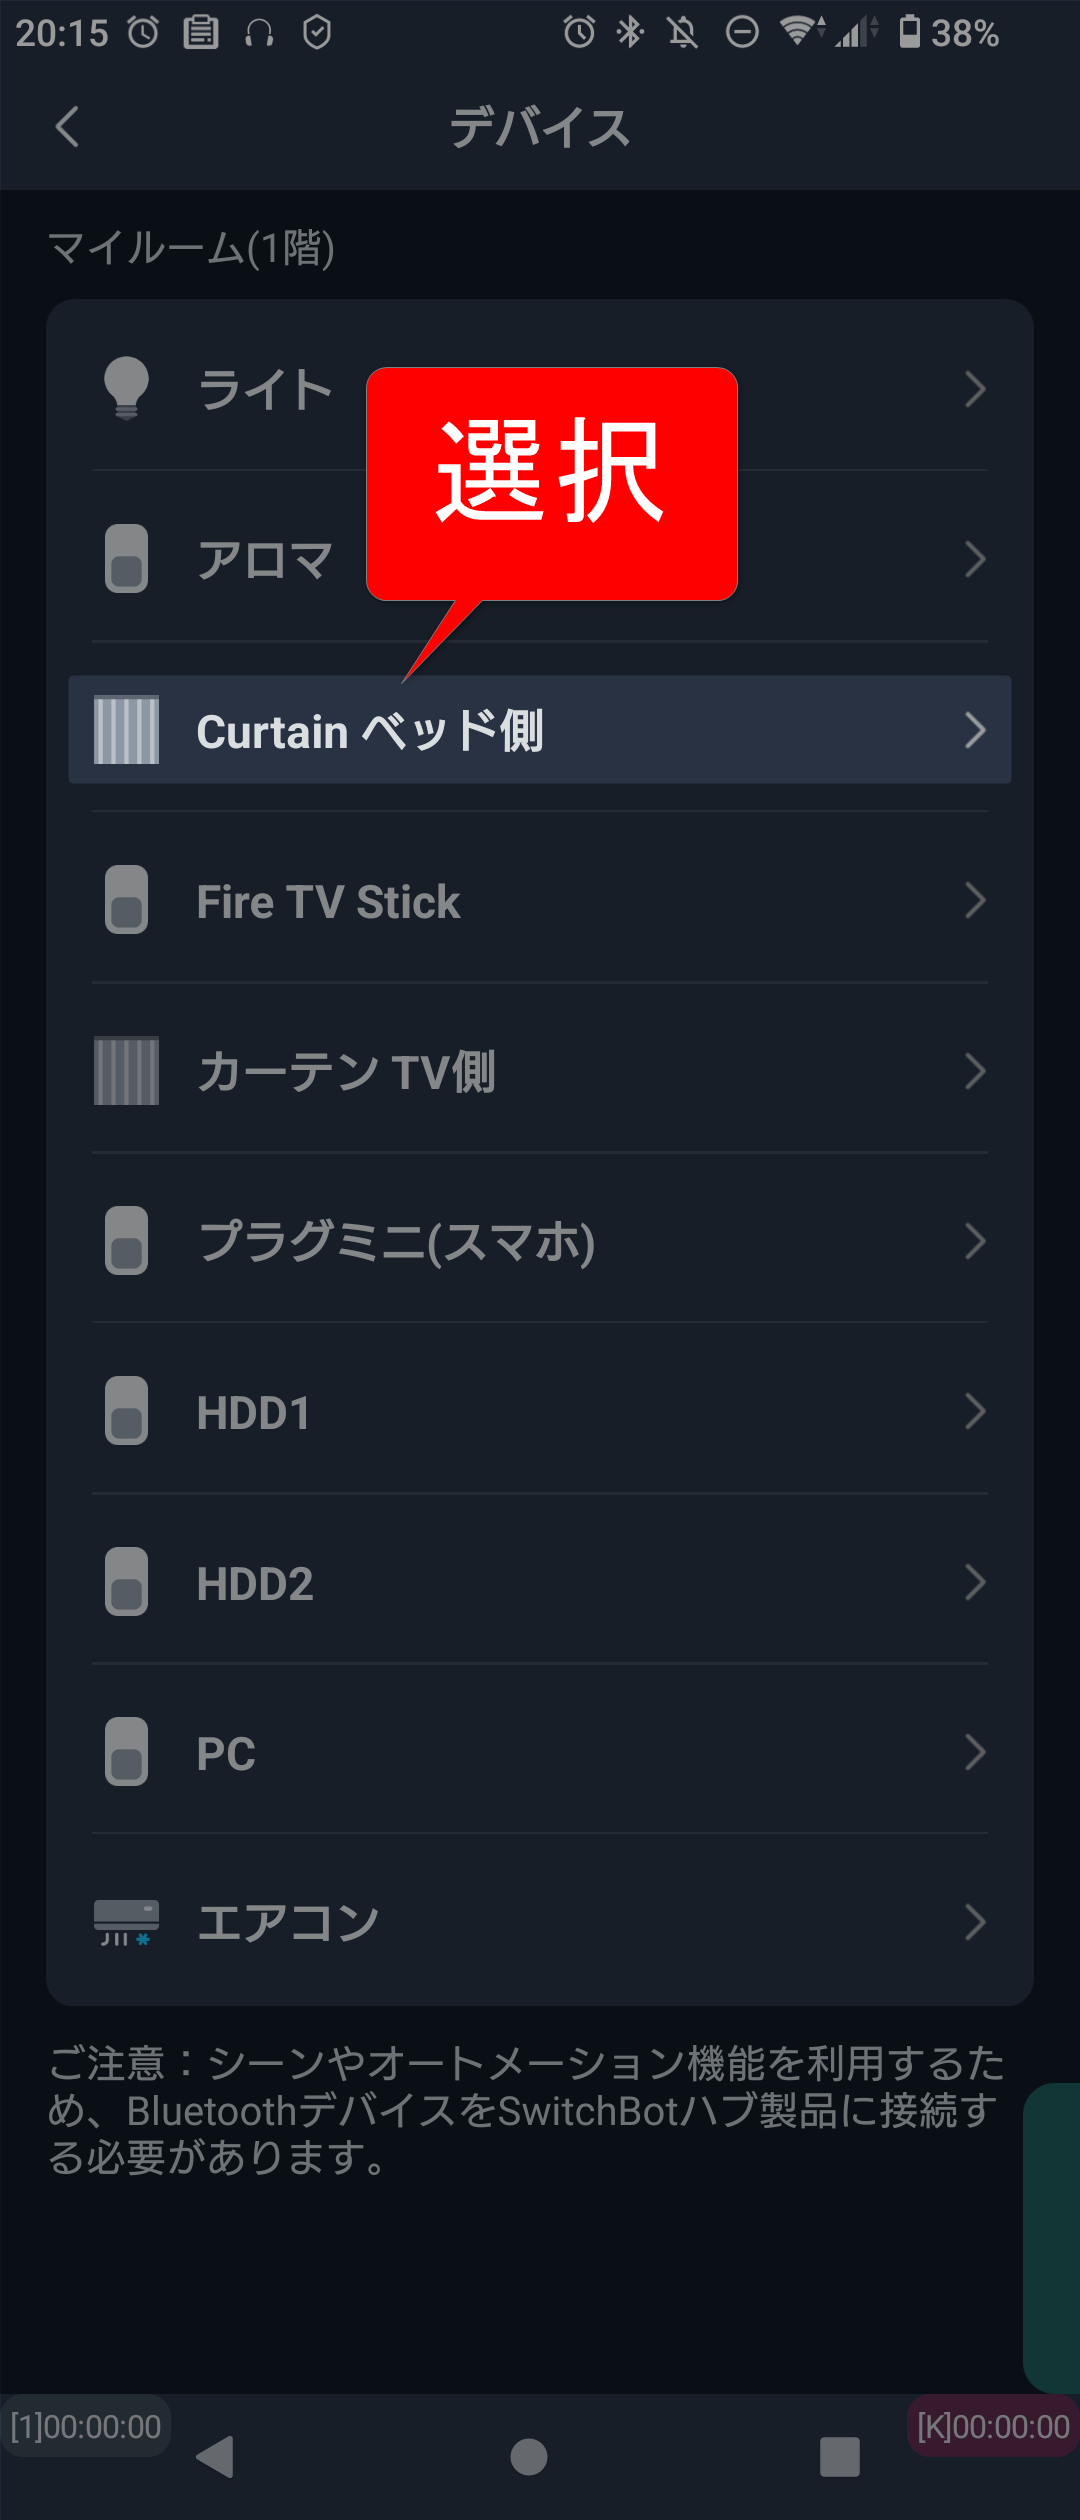
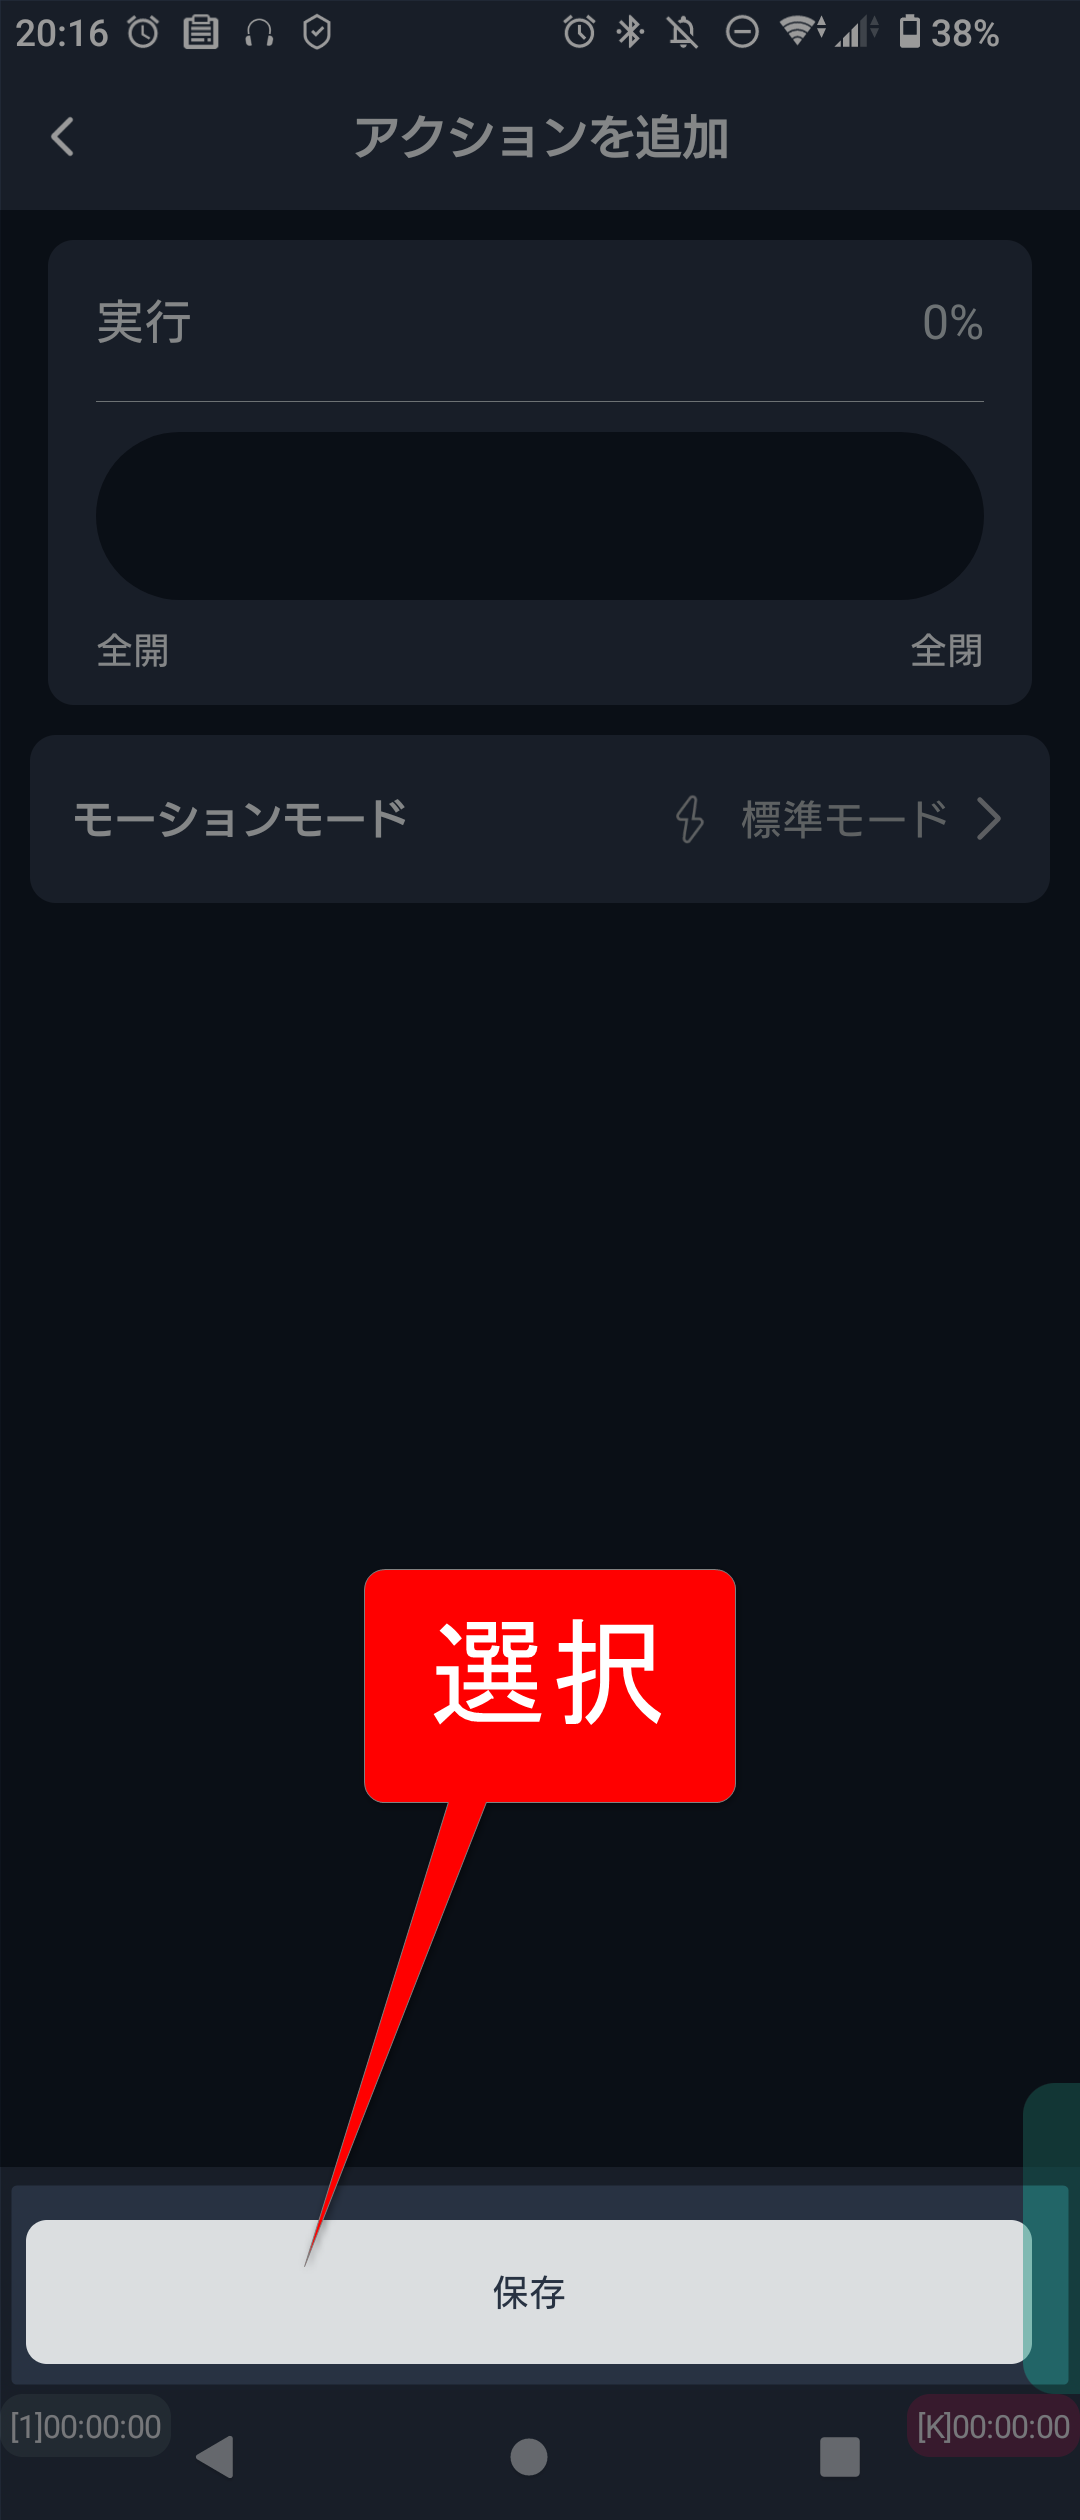
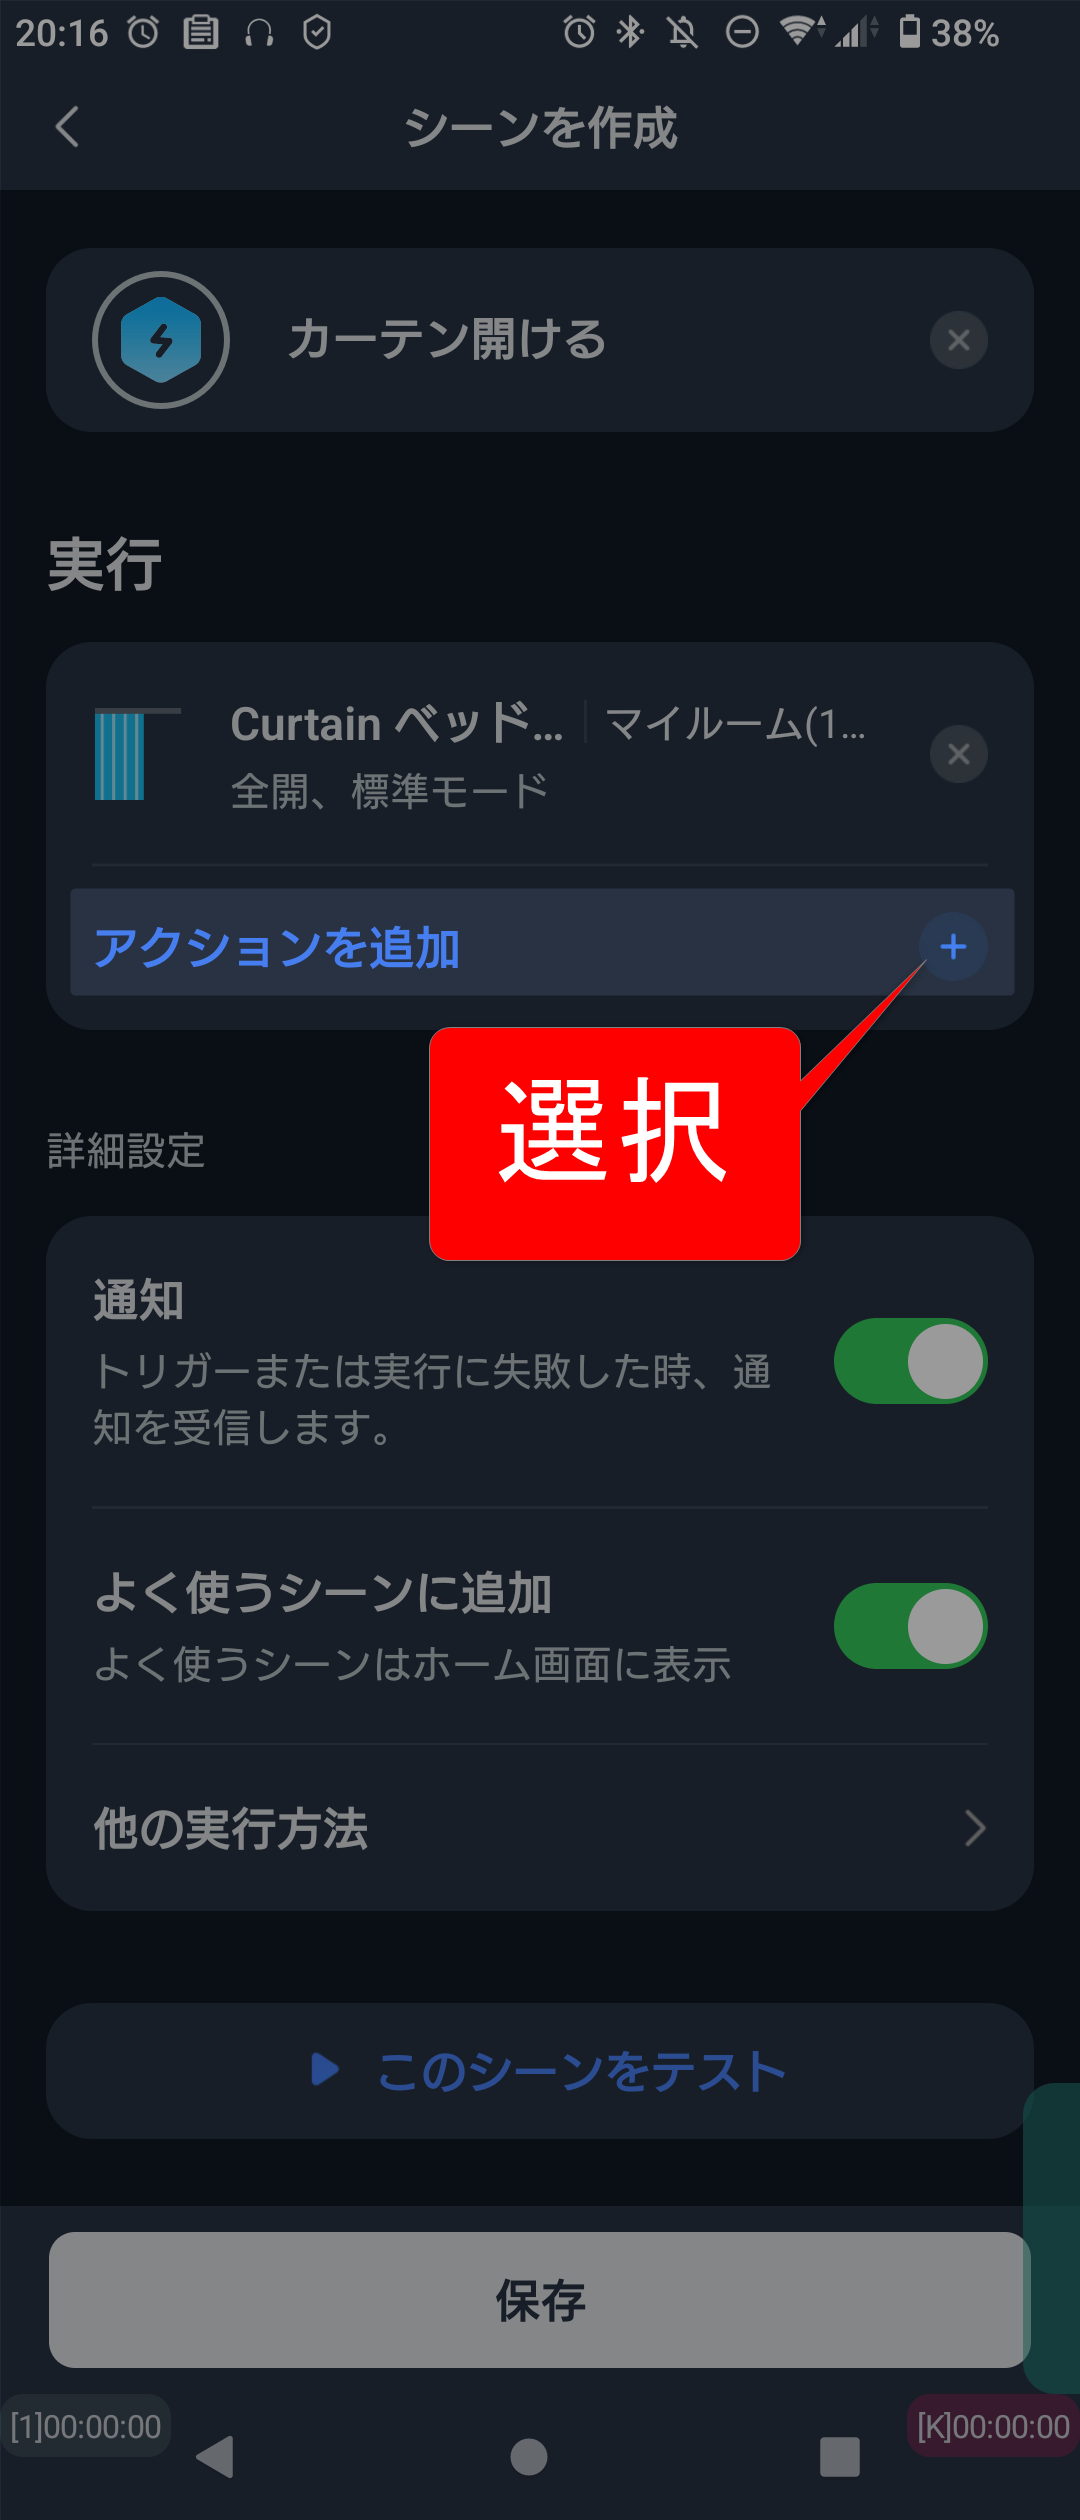
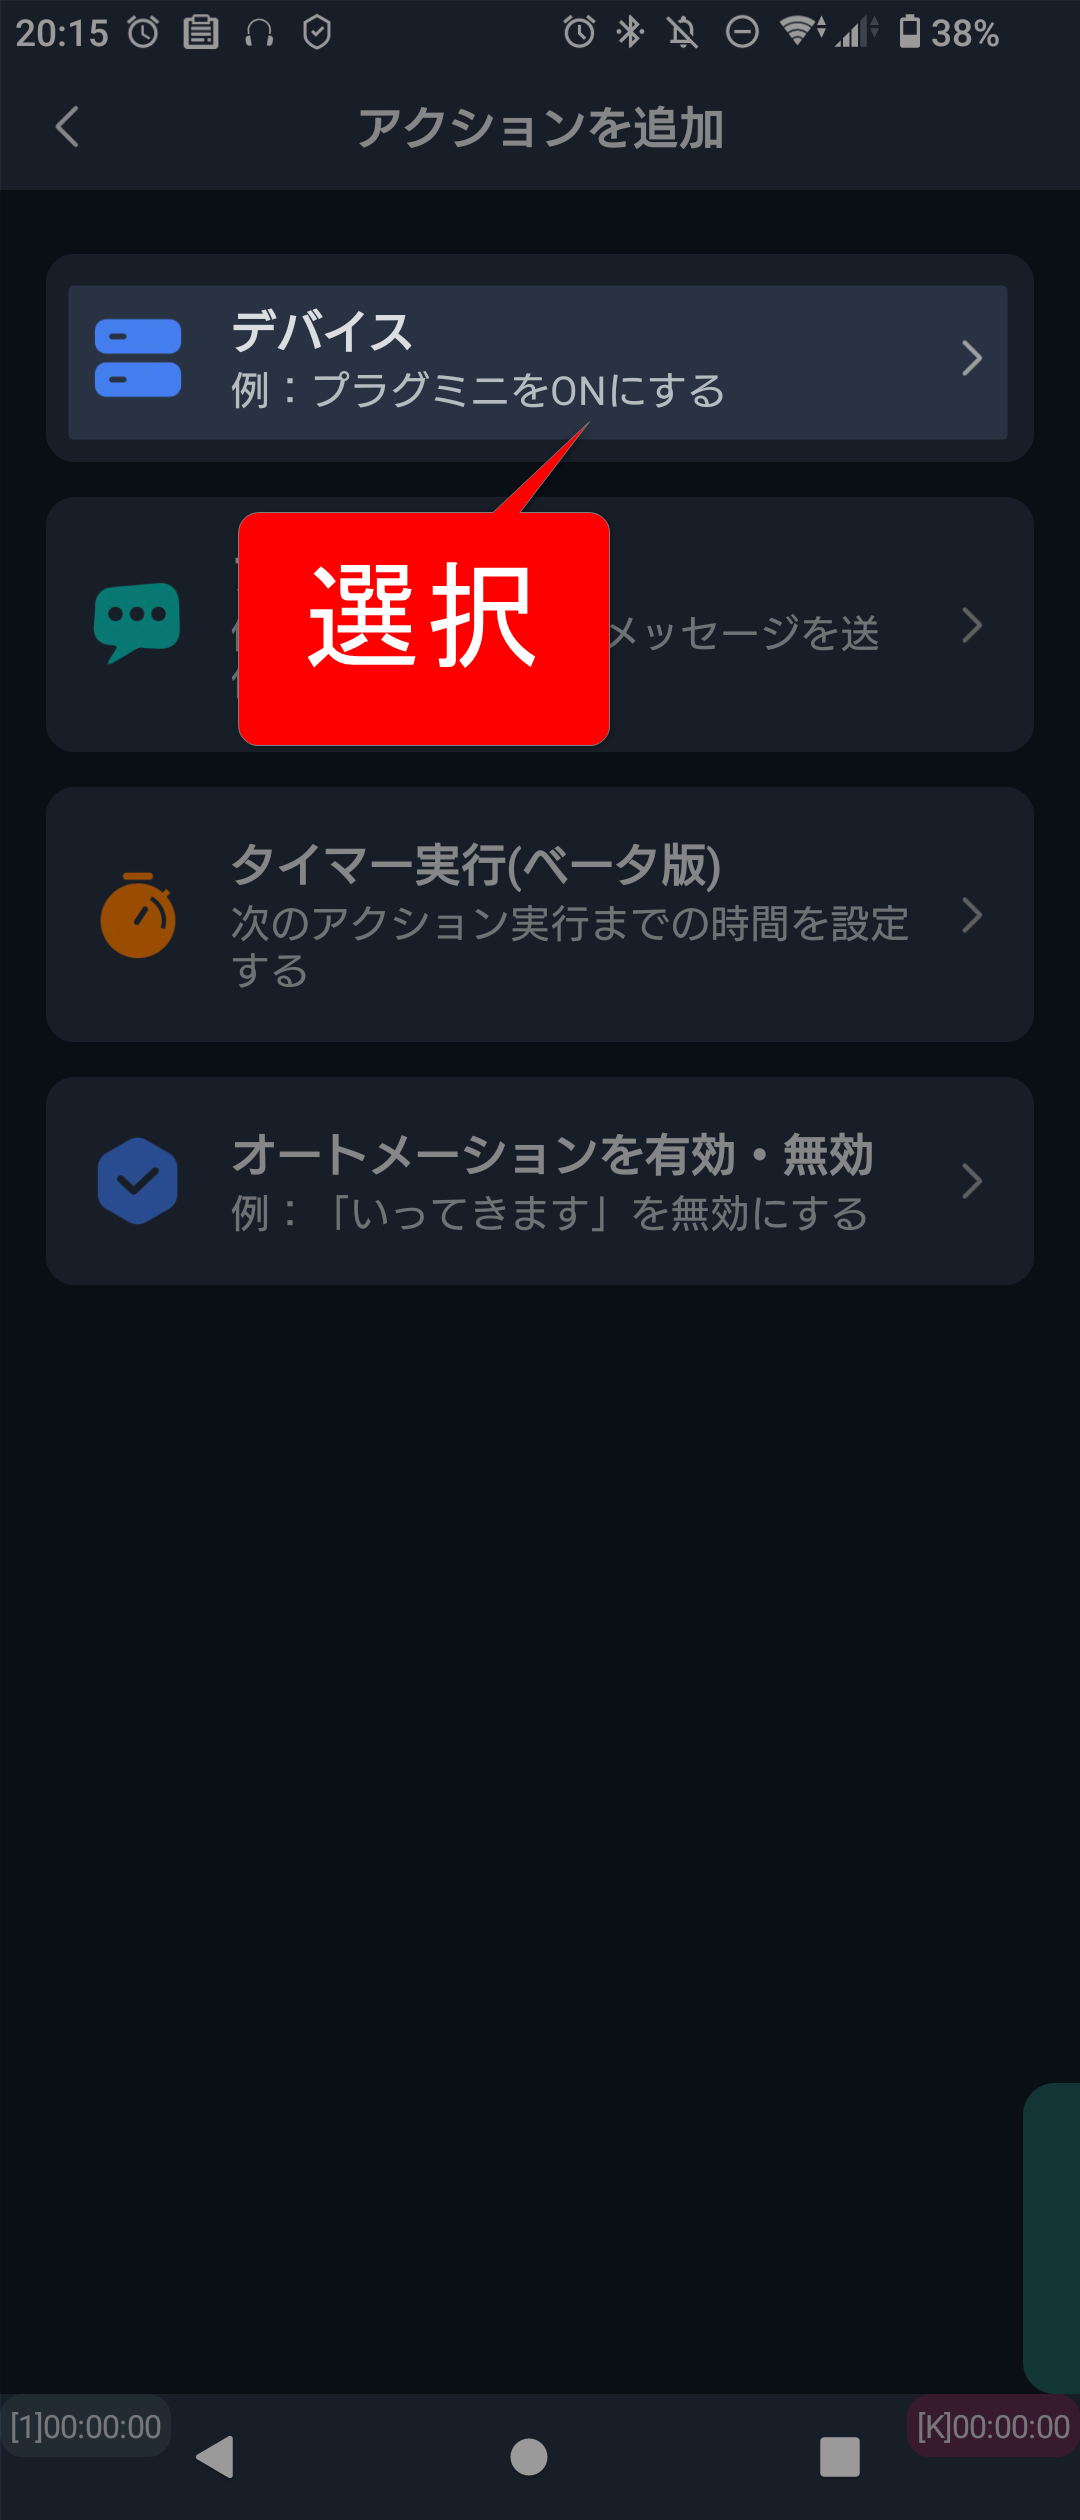
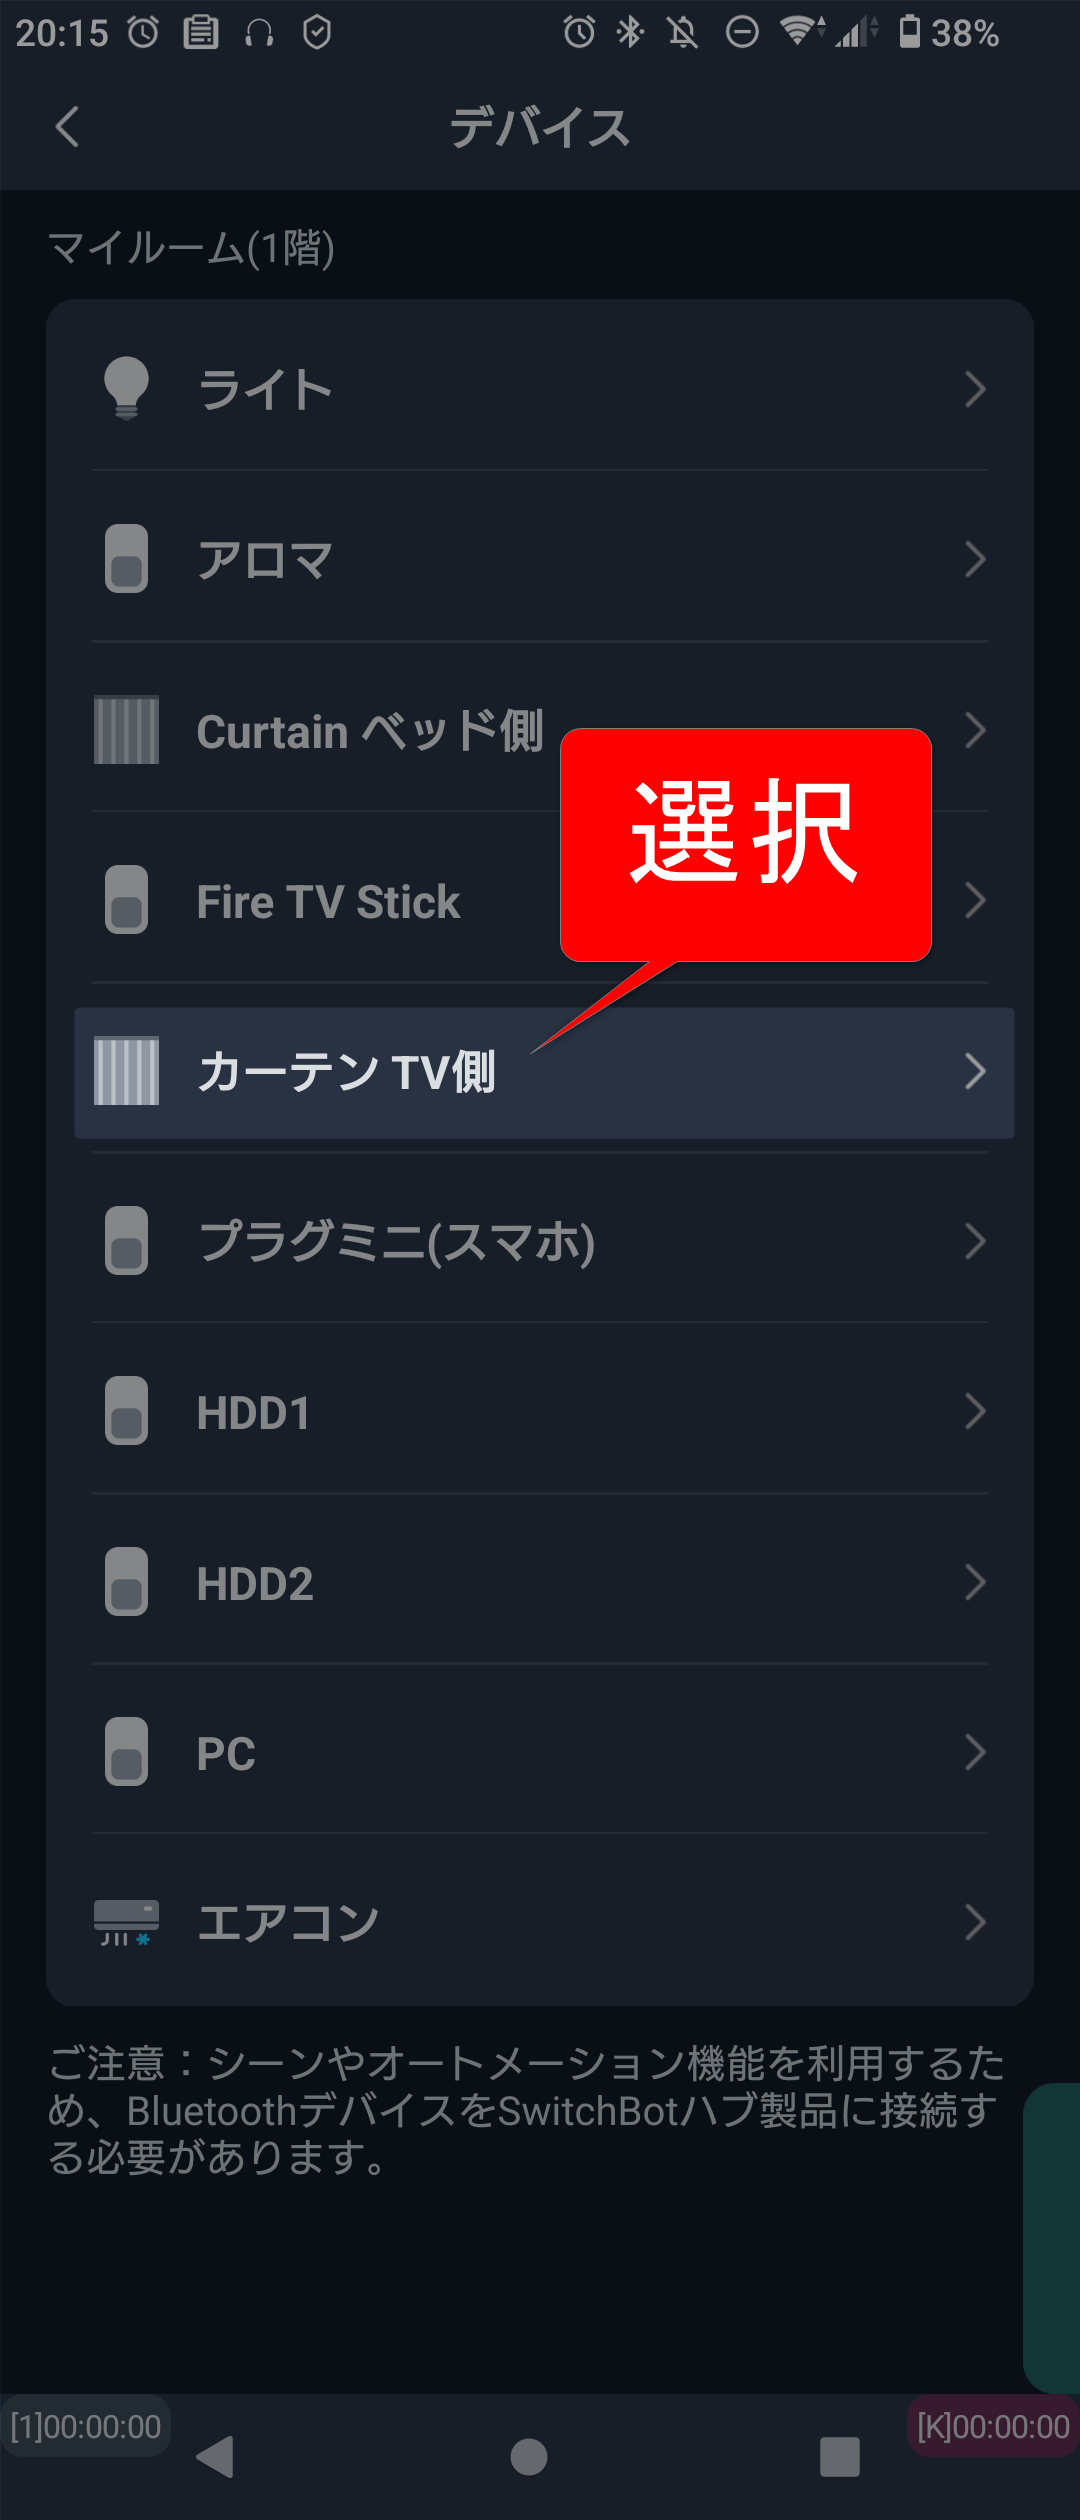
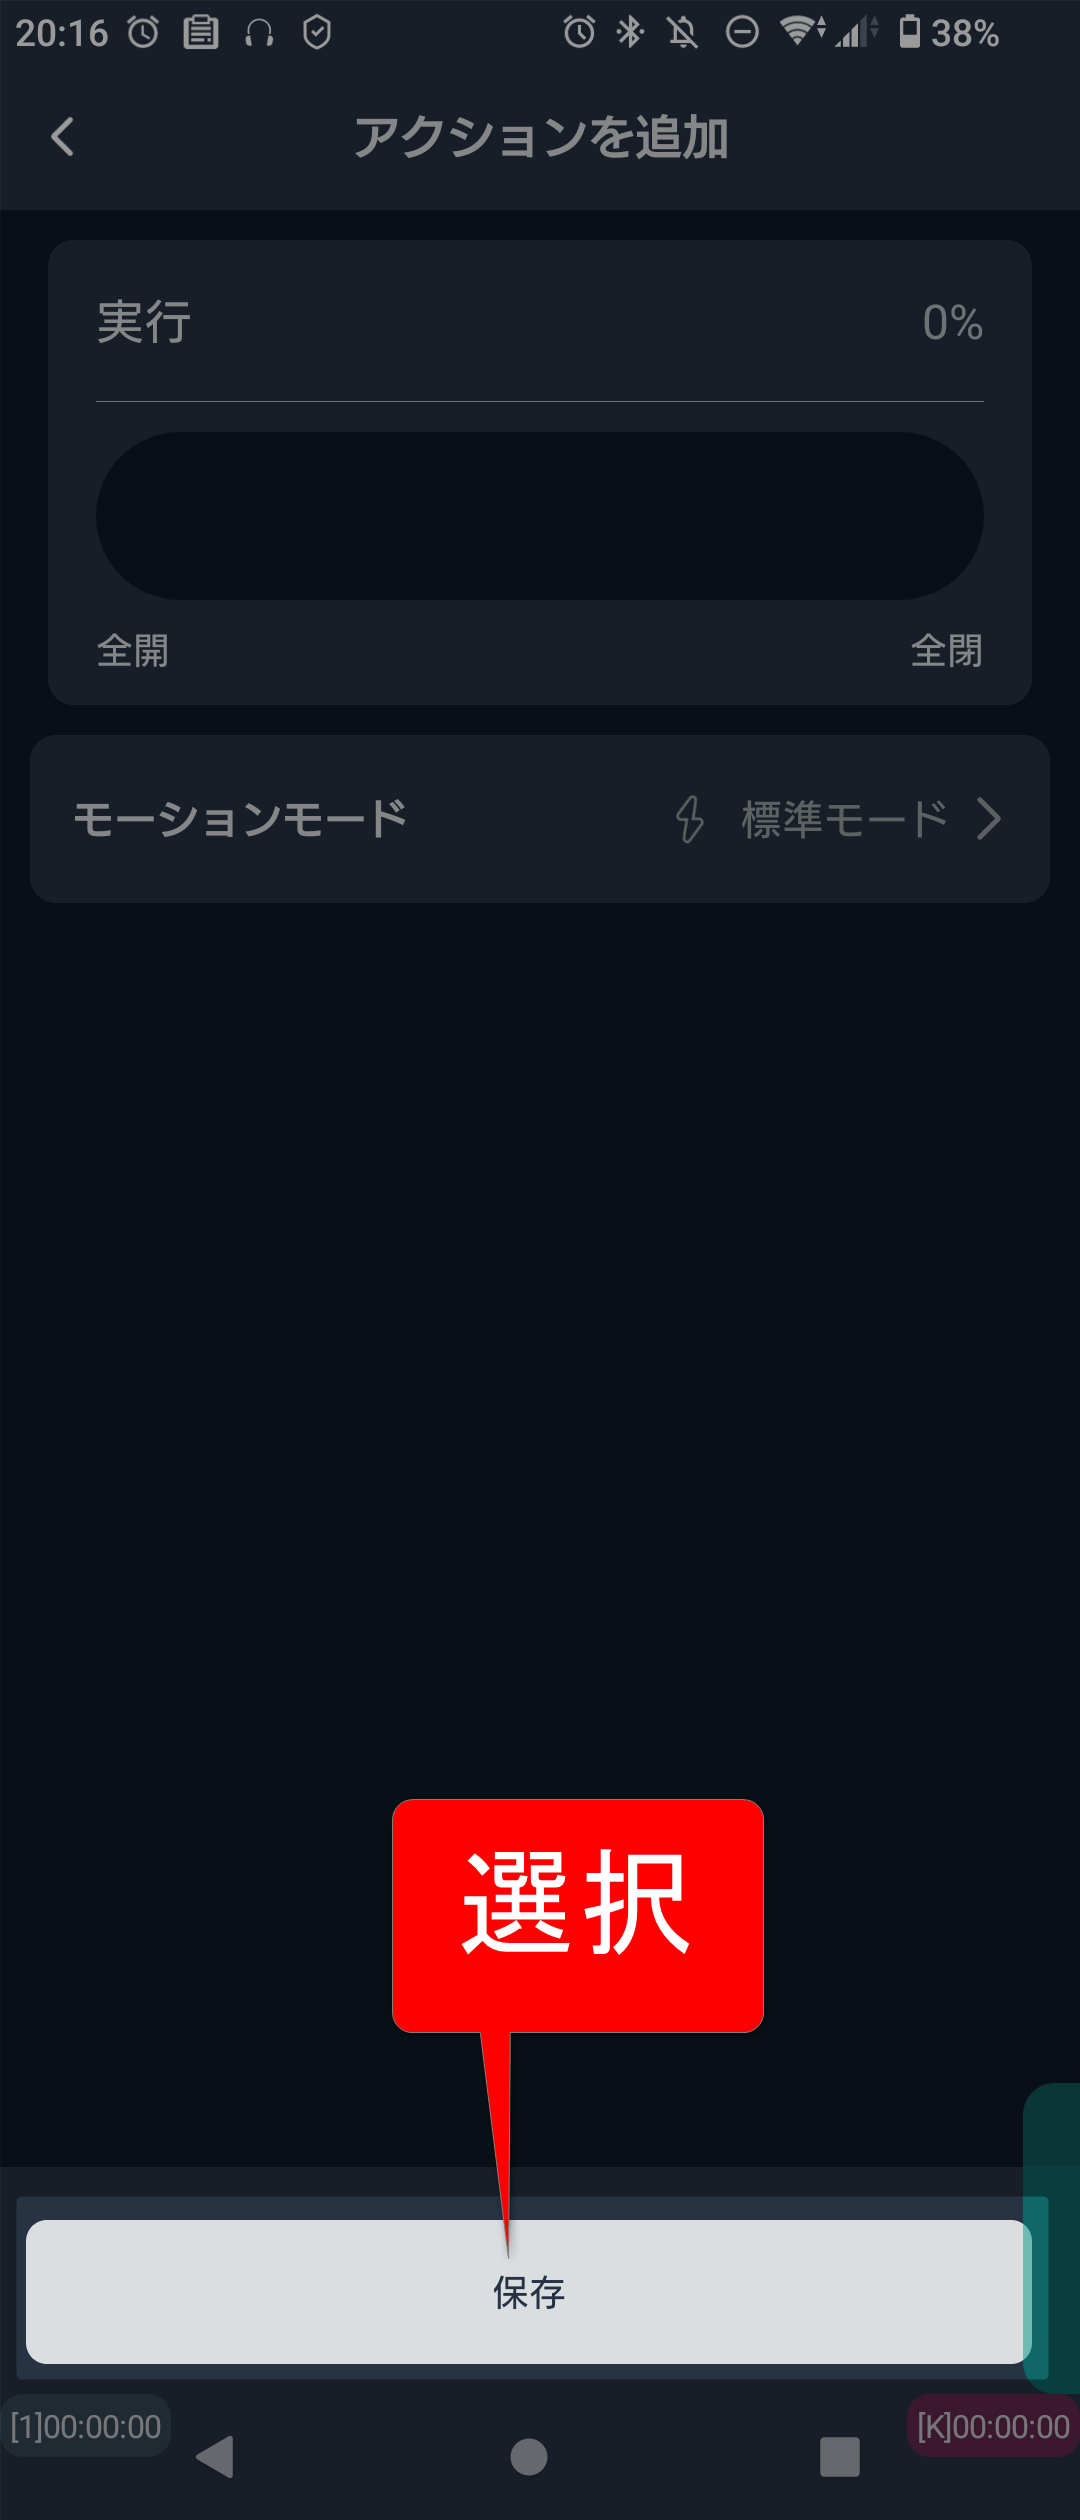
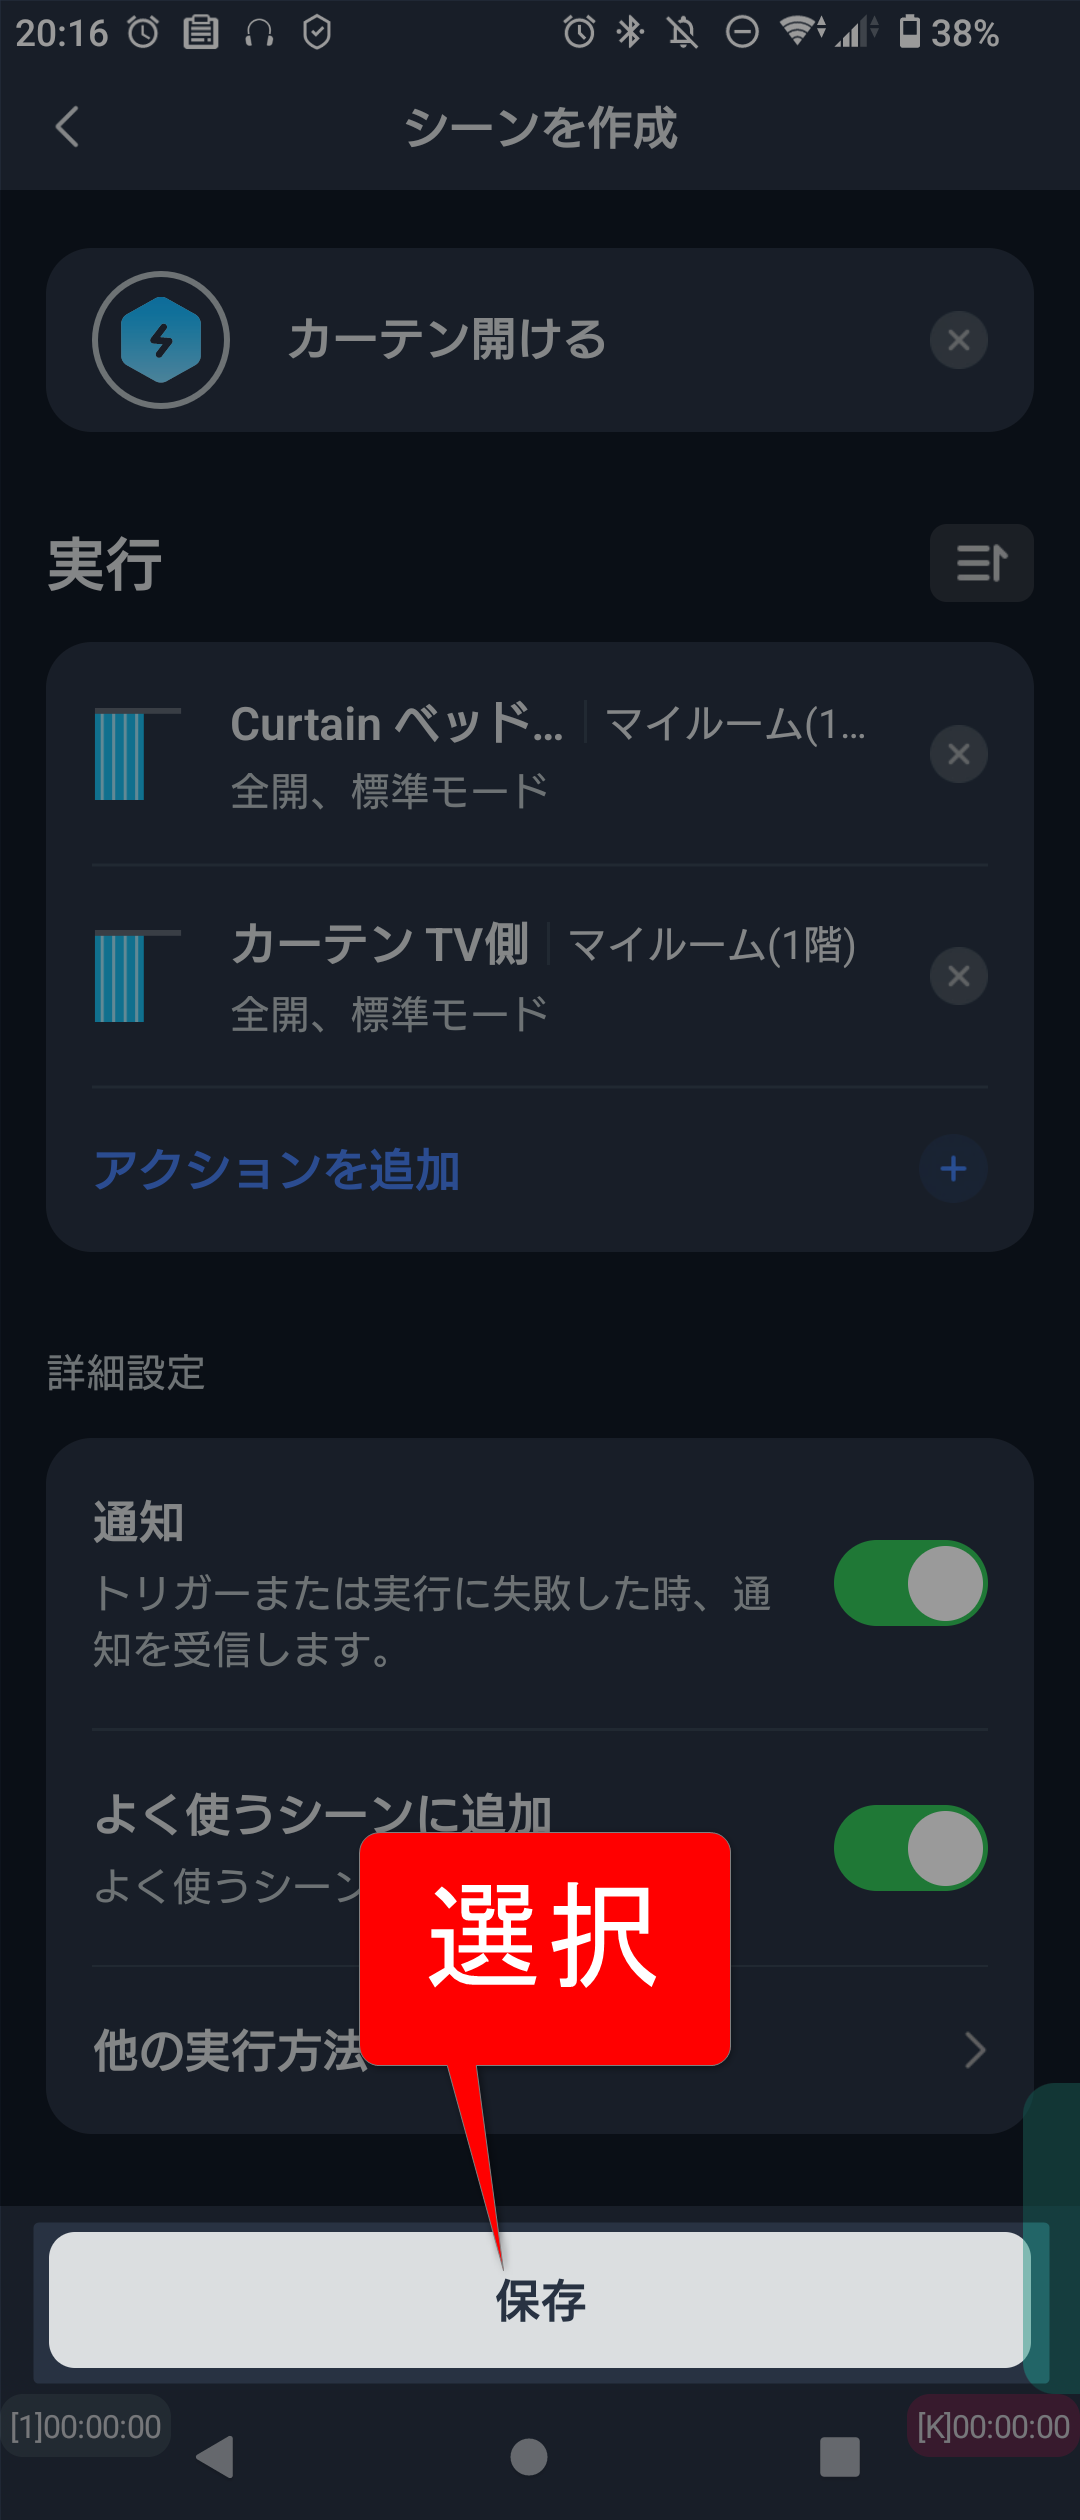
SwitchBotアプリでシーンを作成します。
※我が家では2つのSwitchBotカーテンを開けるのでシーンを作成します。
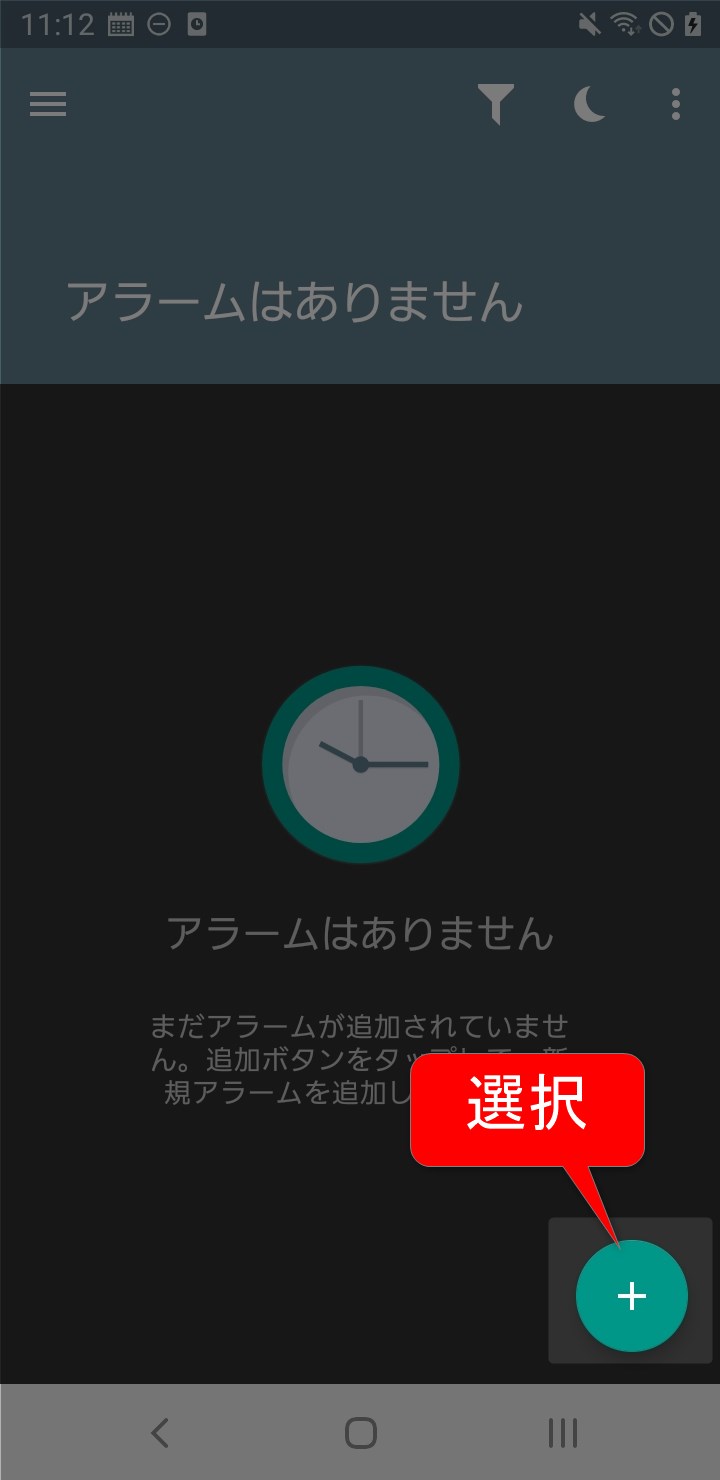
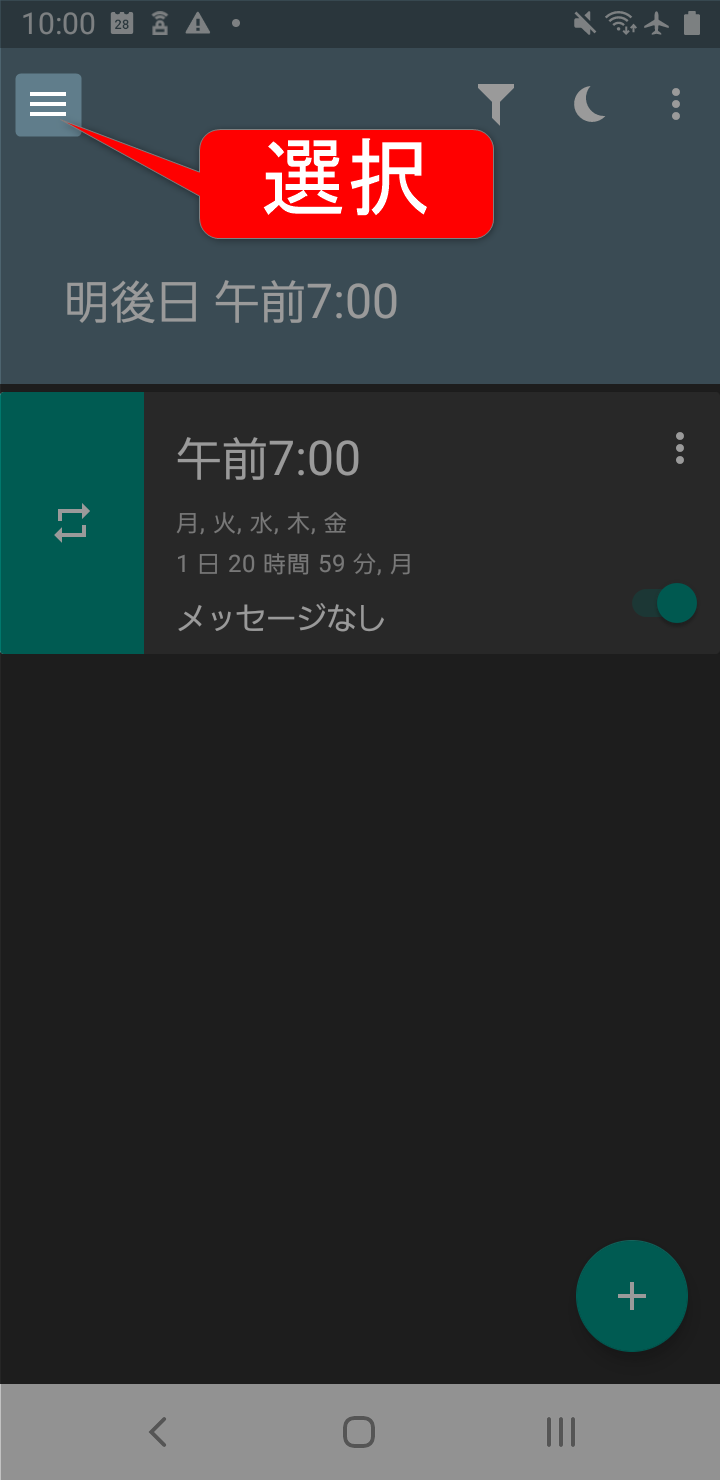
AMdroidスマートアラーム時計の設定
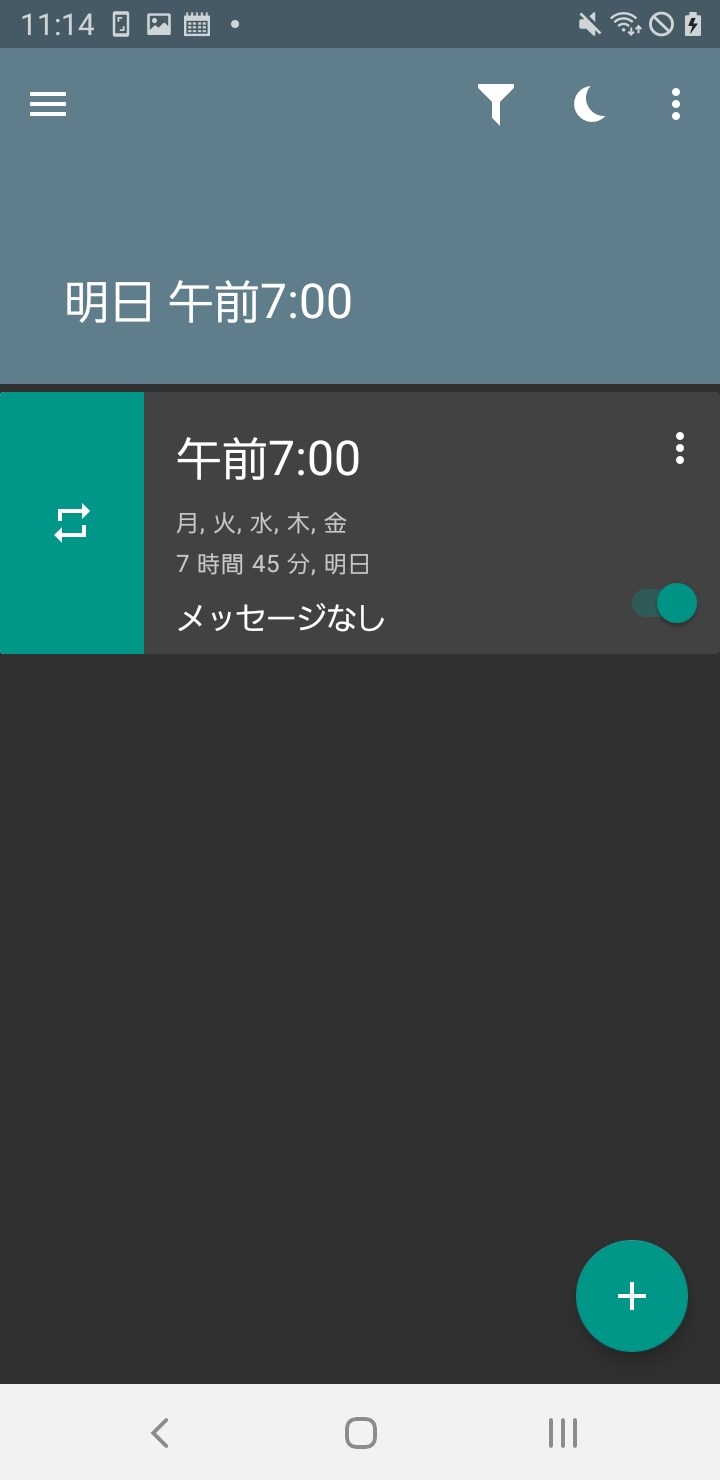
次にAMdroidでアラームを作成します。
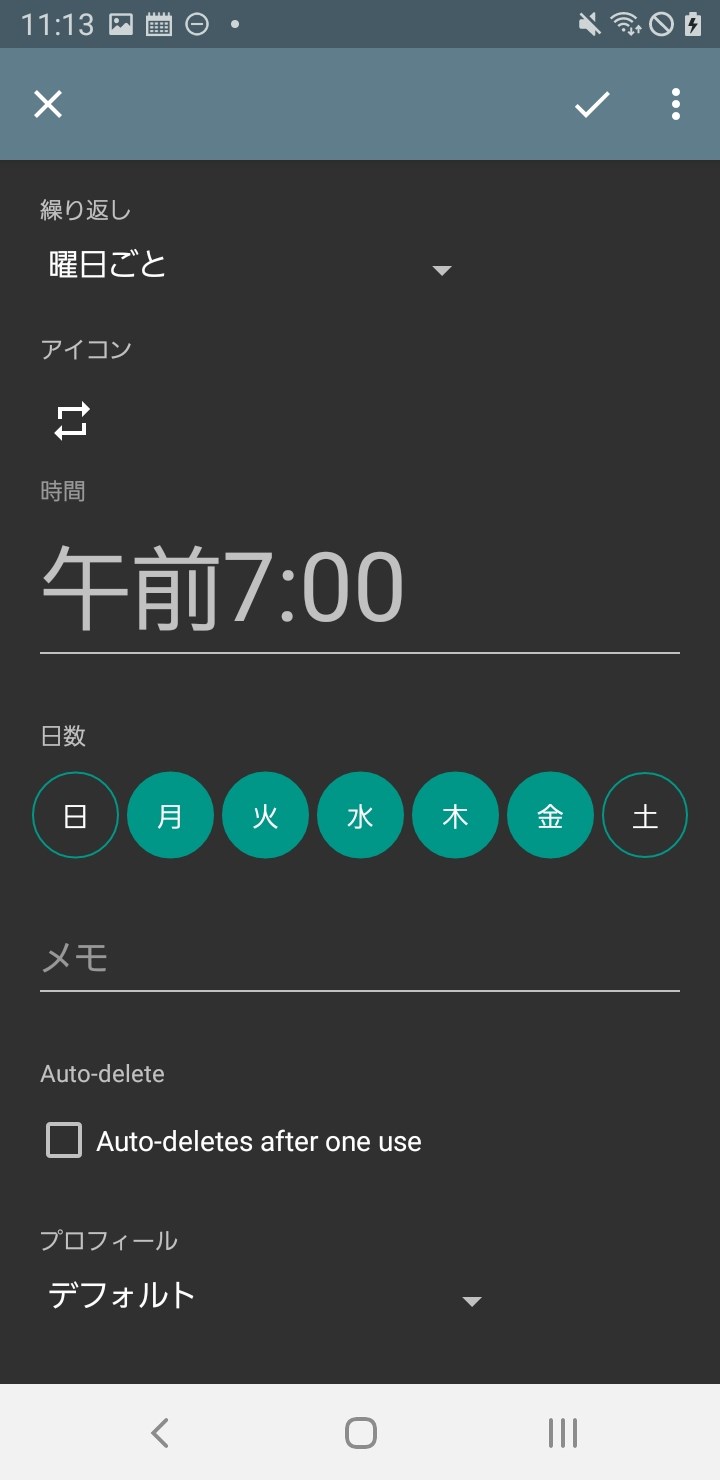
AMdroidは単体の目覚まし時計アプリとして、とても優秀なのでダウンロードすることをオススメします!
画面をタップしてアラームを止める以外に次のような方法が用意されています。
- NFCチャレンジ
→事前登録したNFCタグにスマホをかざすとアラームがストップ - バーコード/QRコード
→事前登録したバーコードをスマホで読み取るとアラームがストップ - 数学チャレンジ
→出題される数式を解くとアラームがストップ
位置情報を使ってアラームの使い分けが可能です。
- 自宅ではNFCチャレンジ
- 出先は画面タップでストップ
みたいに使い分けが可能です。
タイマニ外出先で「NFCタグがない!!アラームが止められない!」なんてことを防ぐことができます 笑
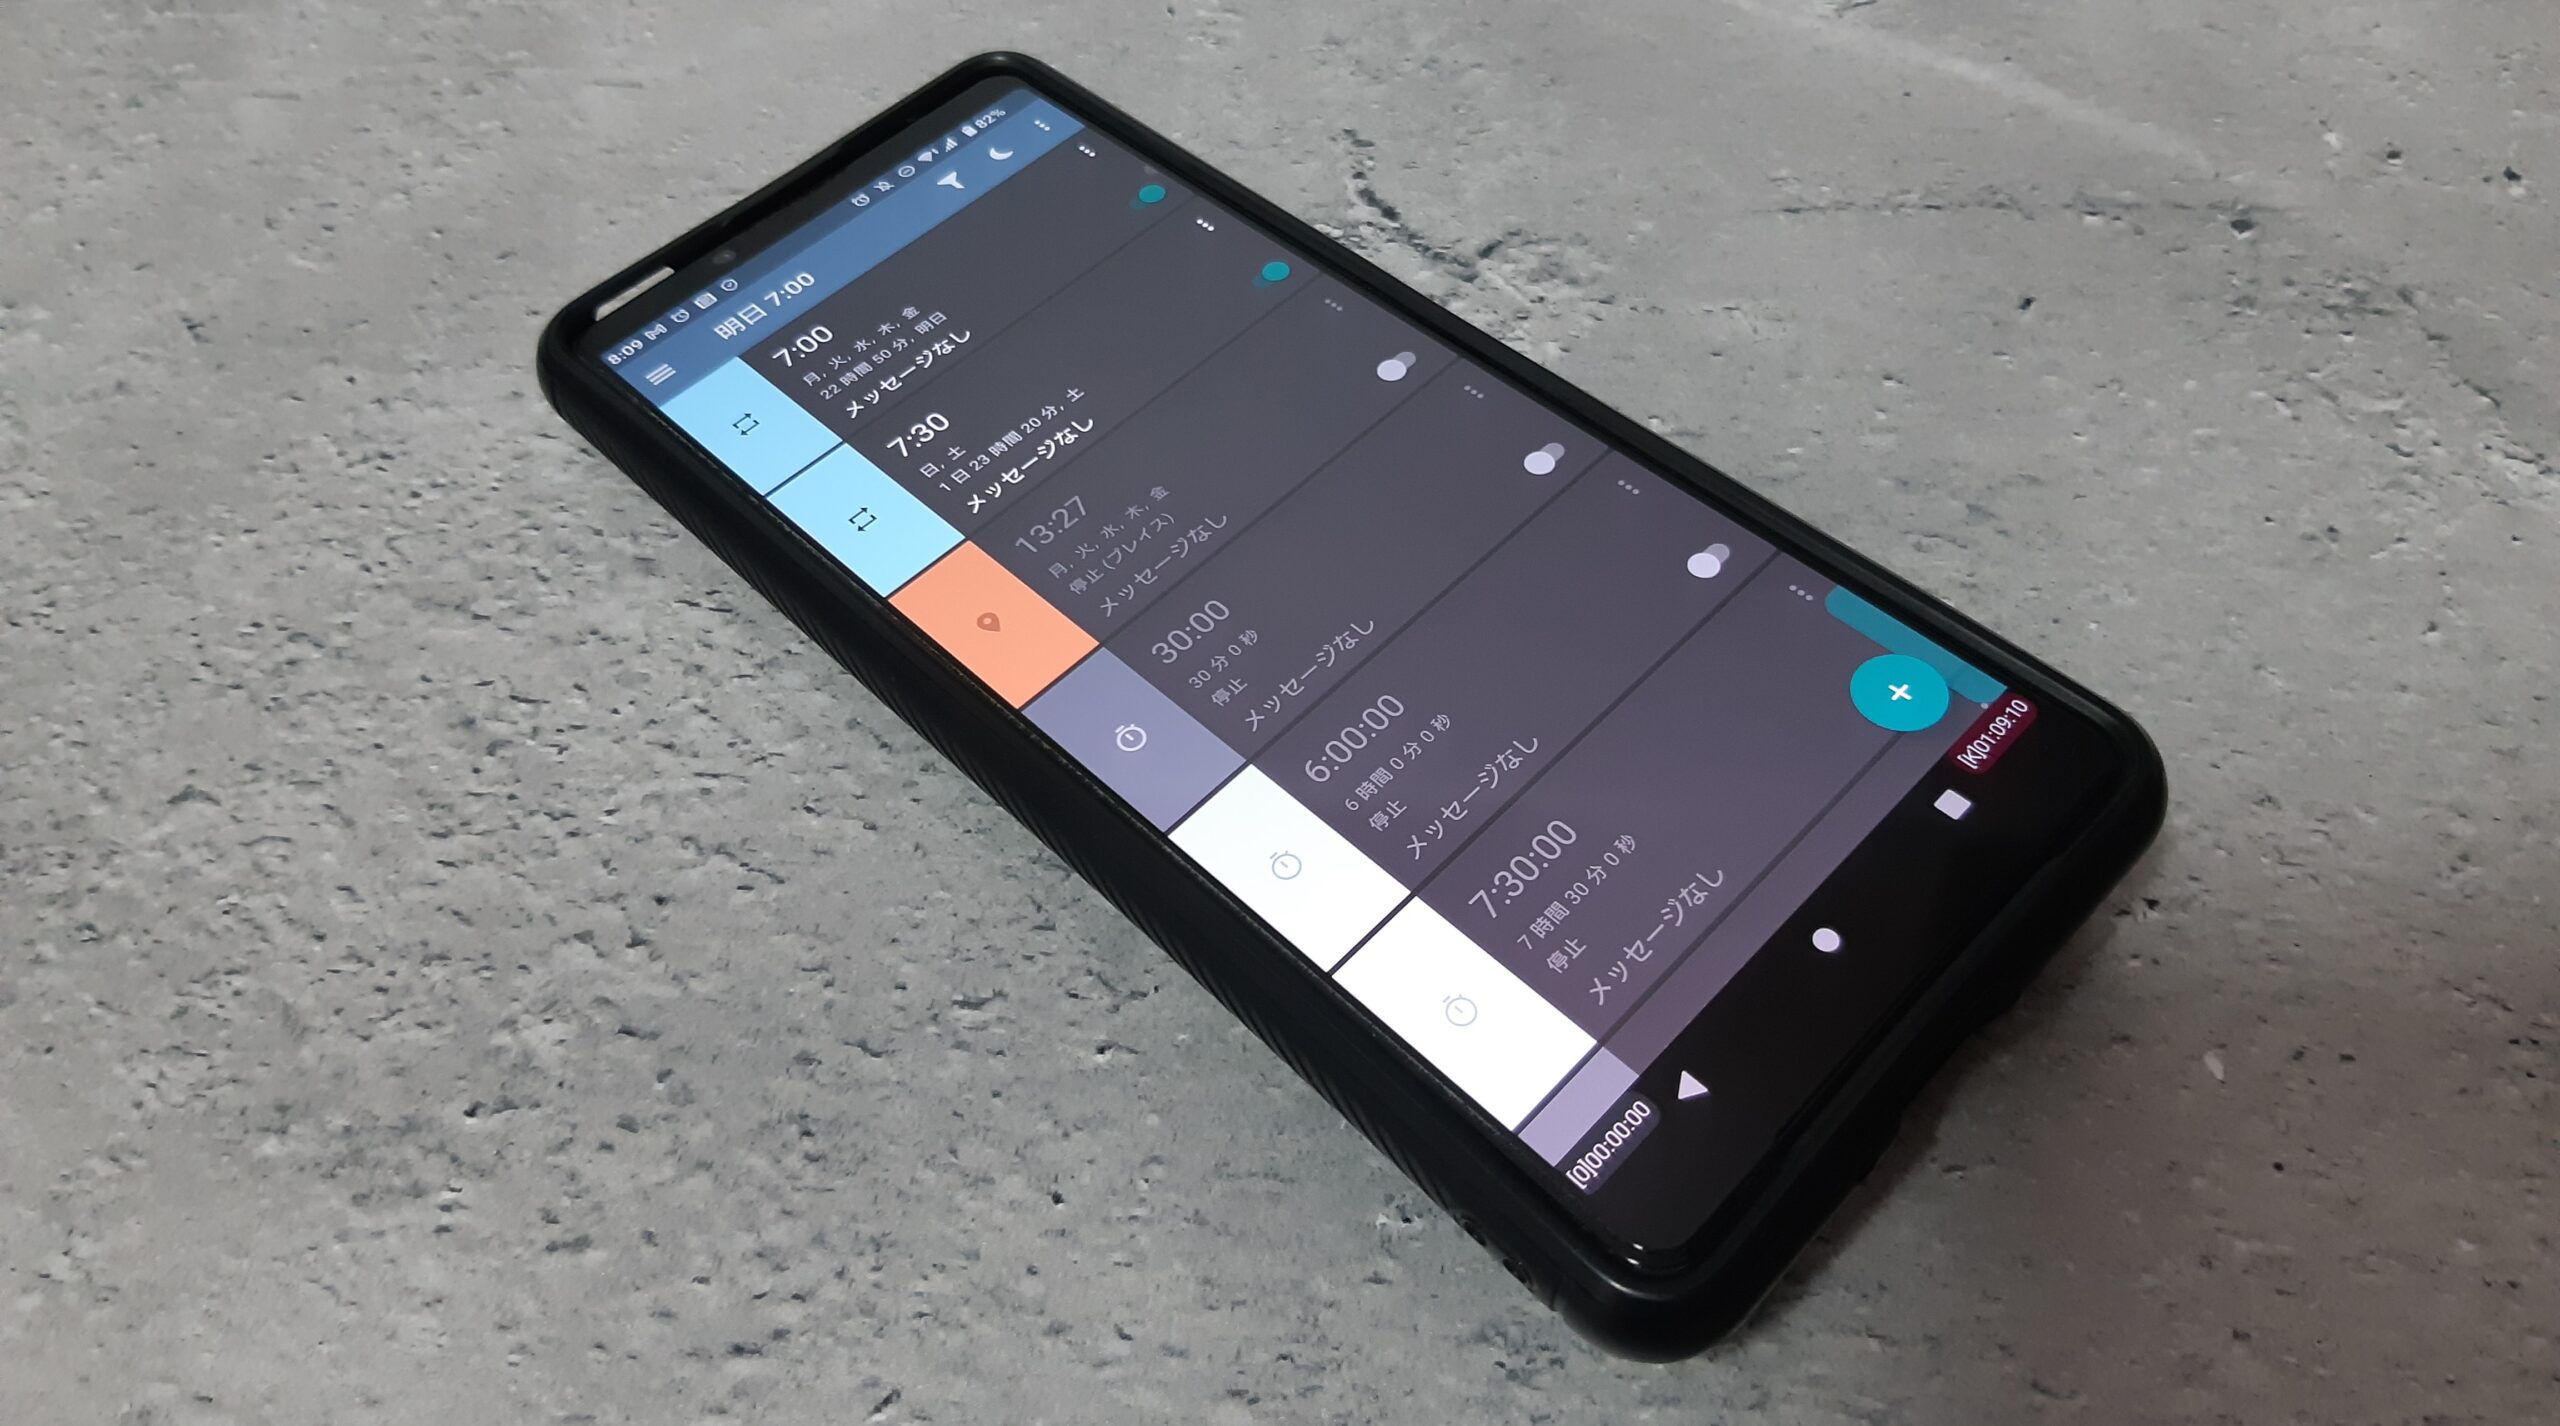
タイマーでも目覚ましをセットすることができます。
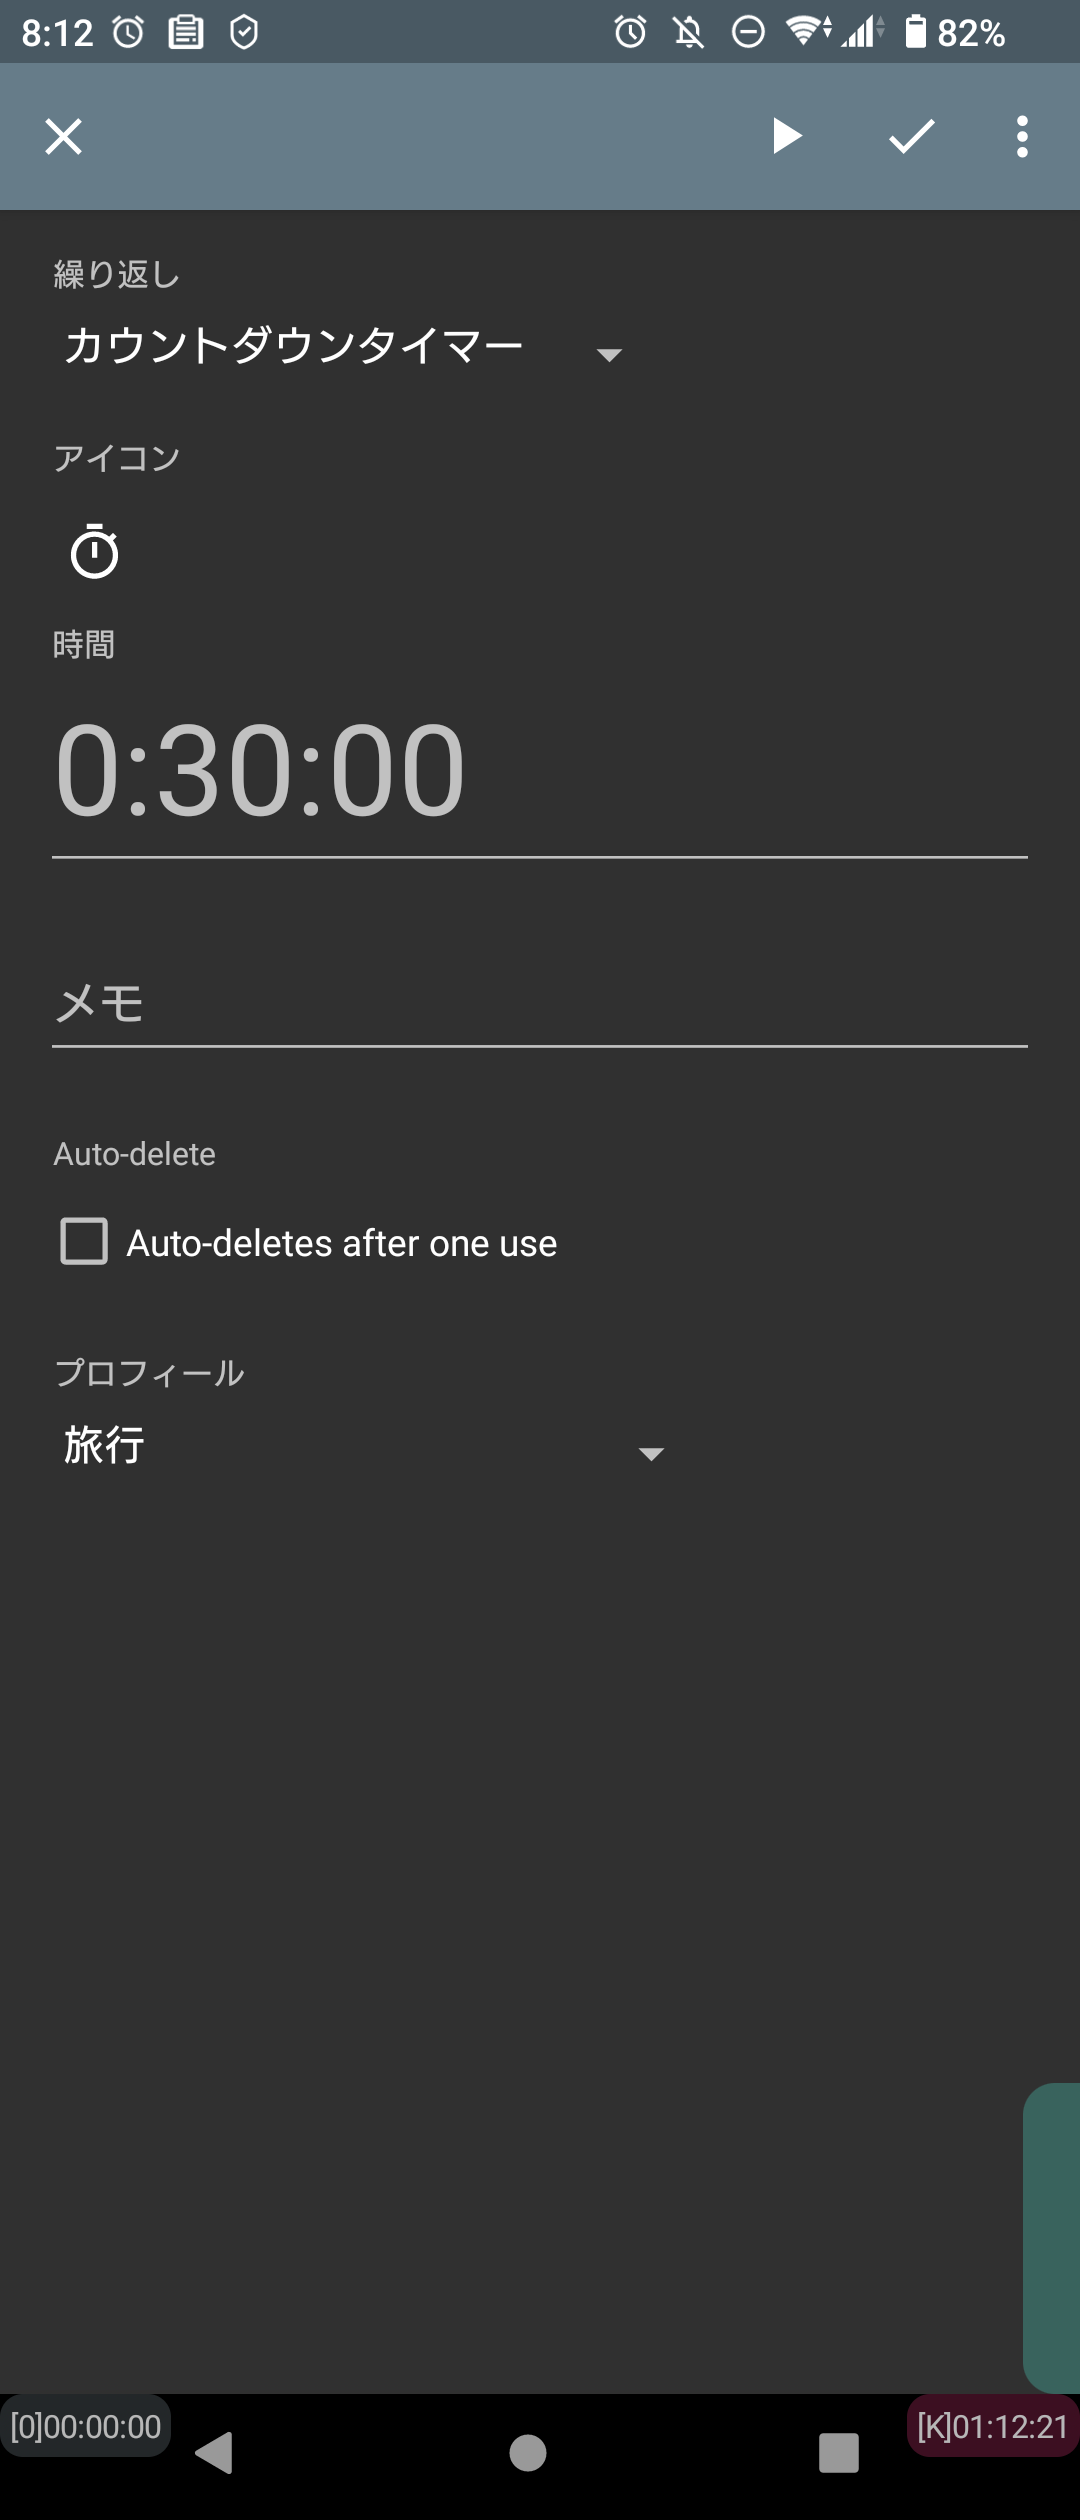
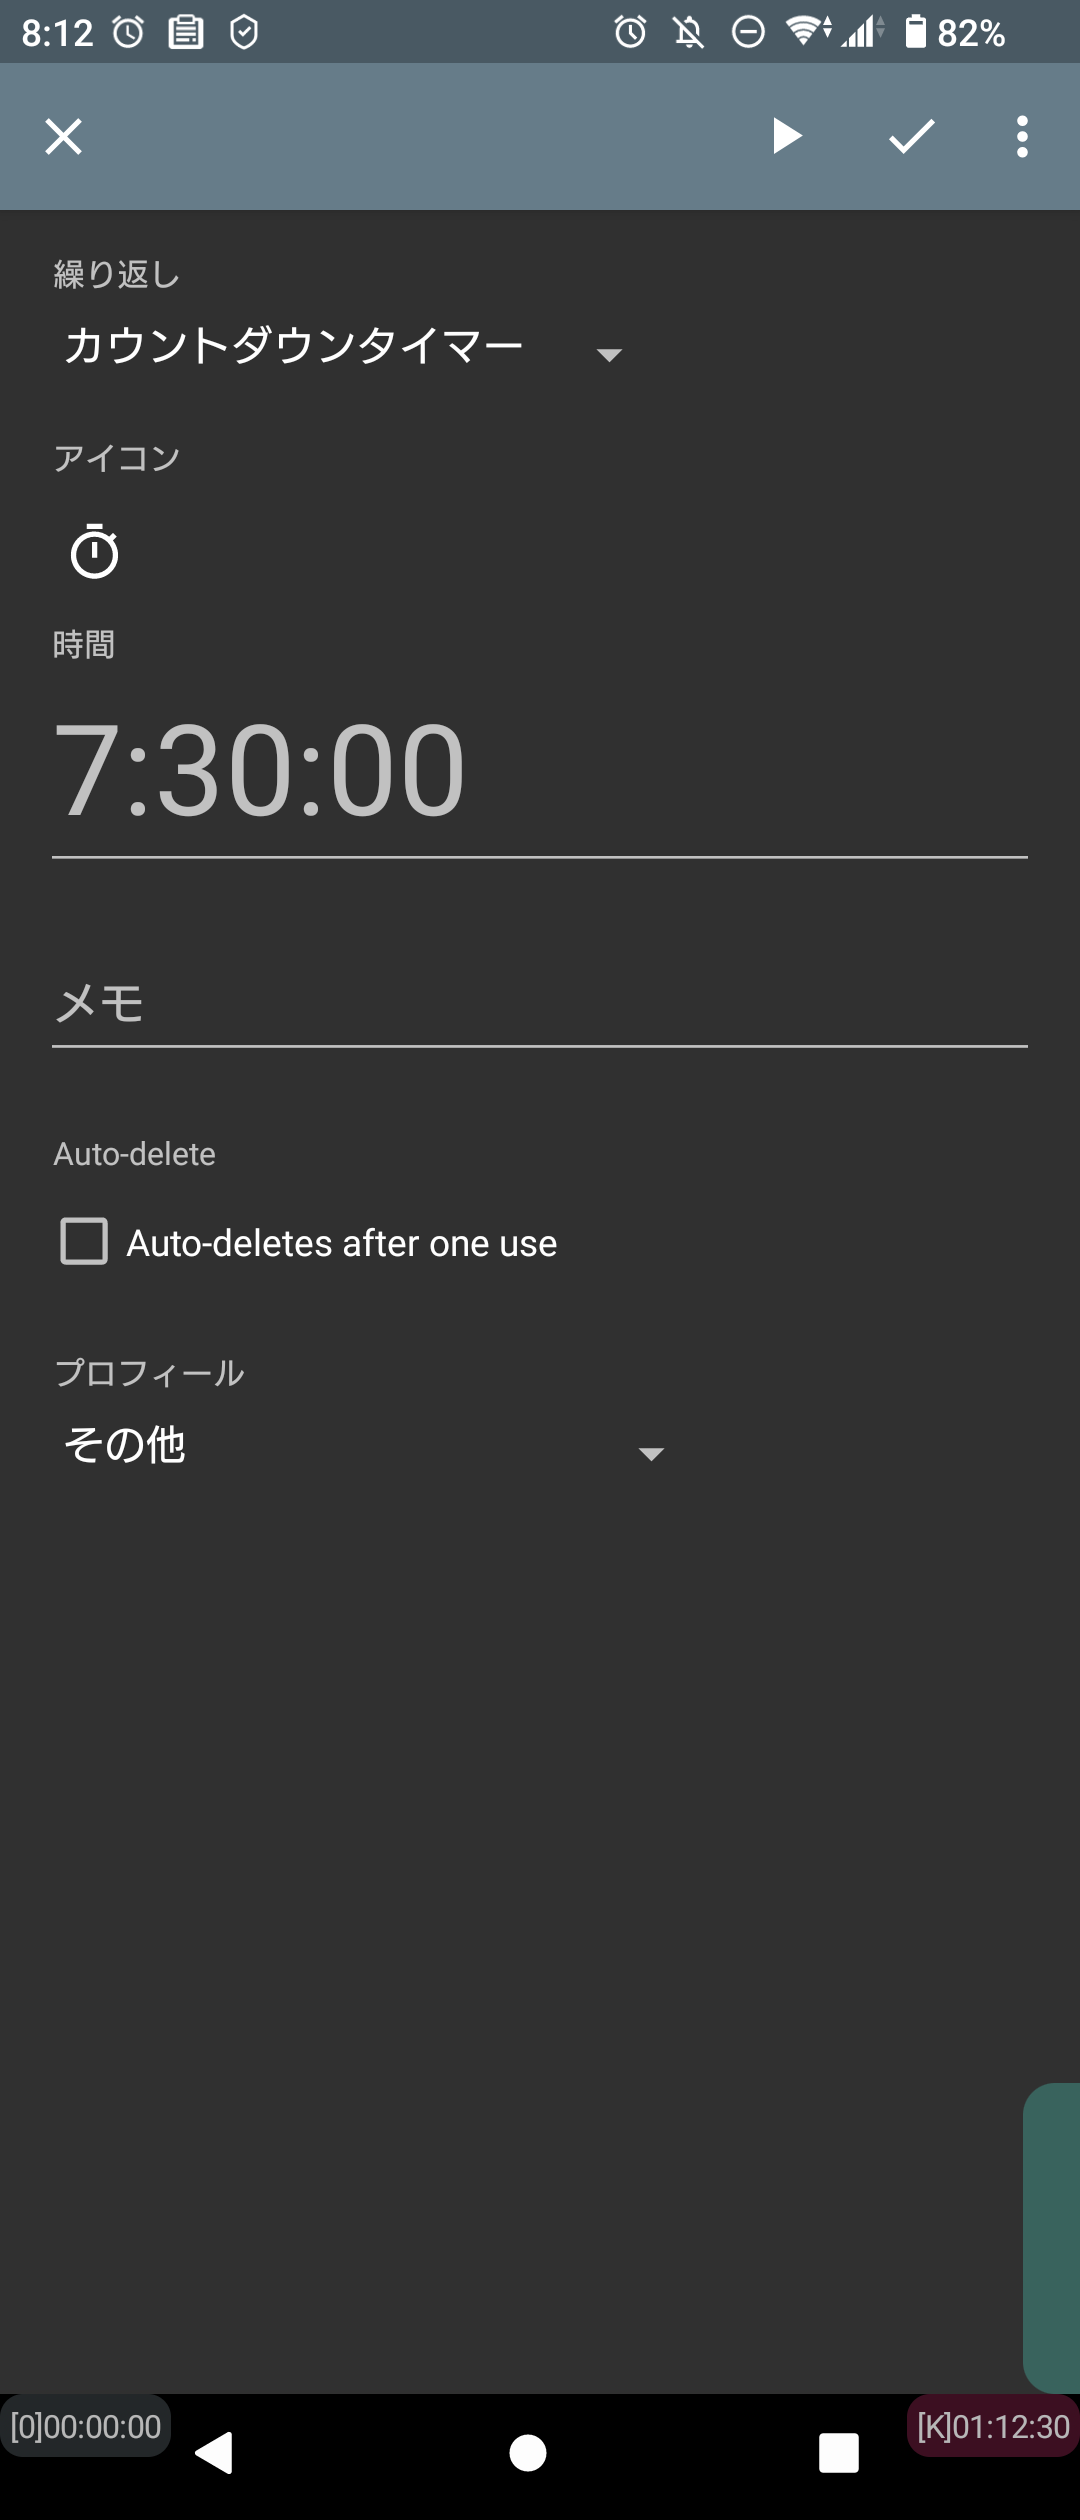 タイマニ
タイマニ「就寝が遅くなっても7時間寝たい」っていうときでもワンタップで設定できるので結構便利です。
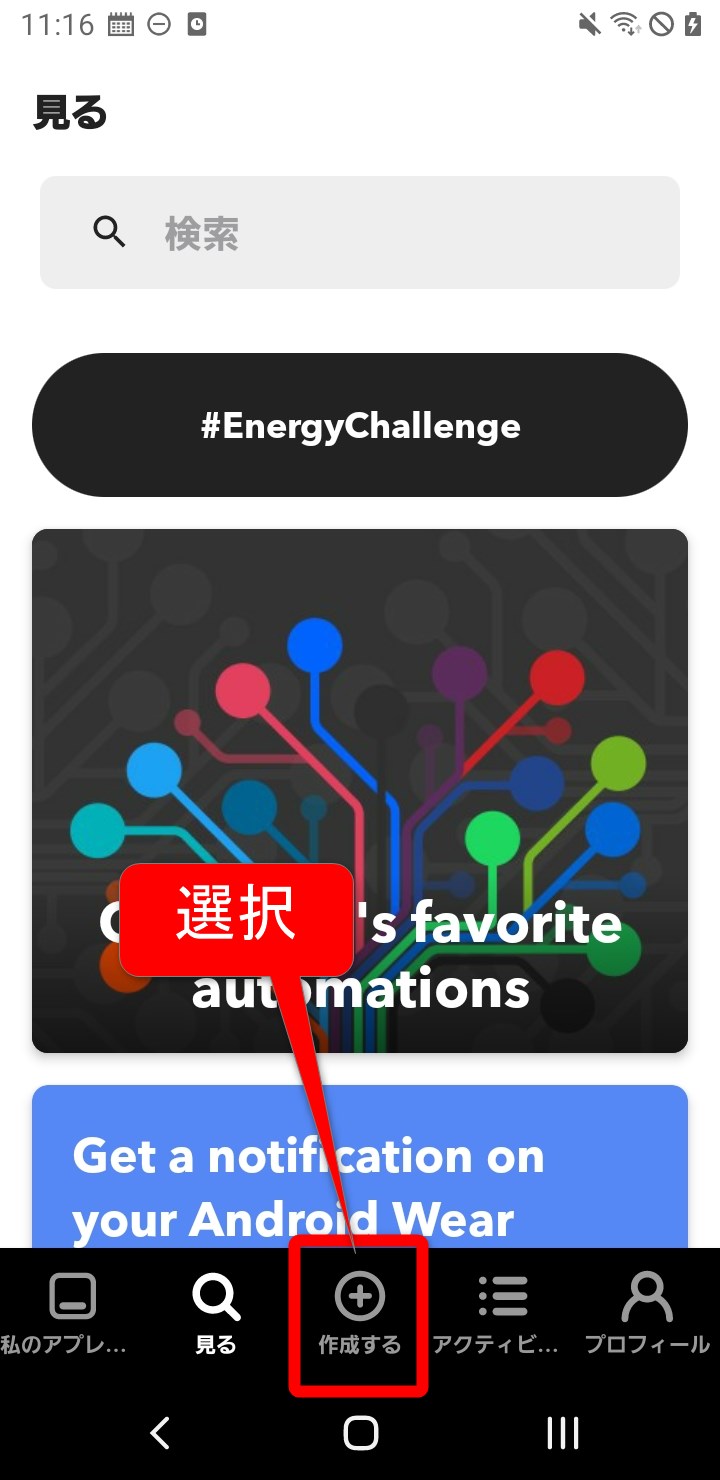
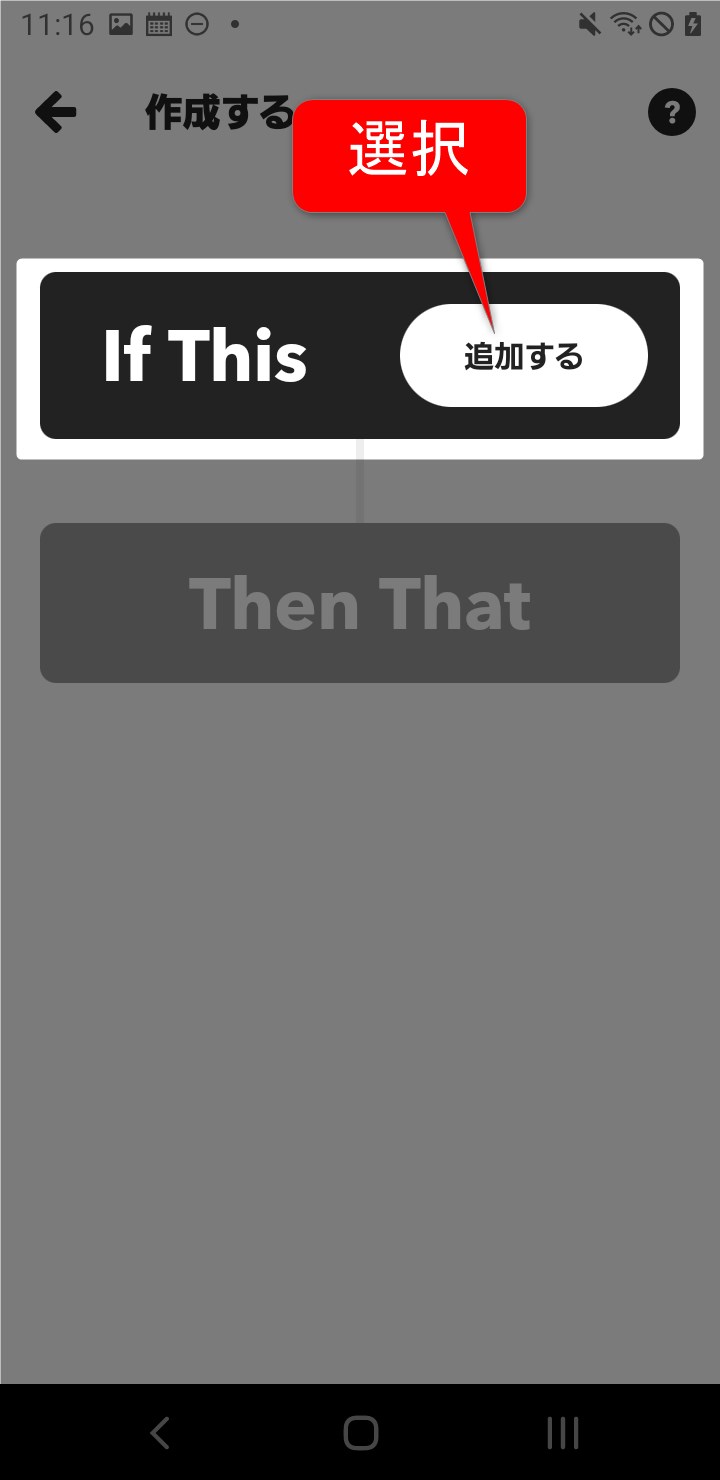
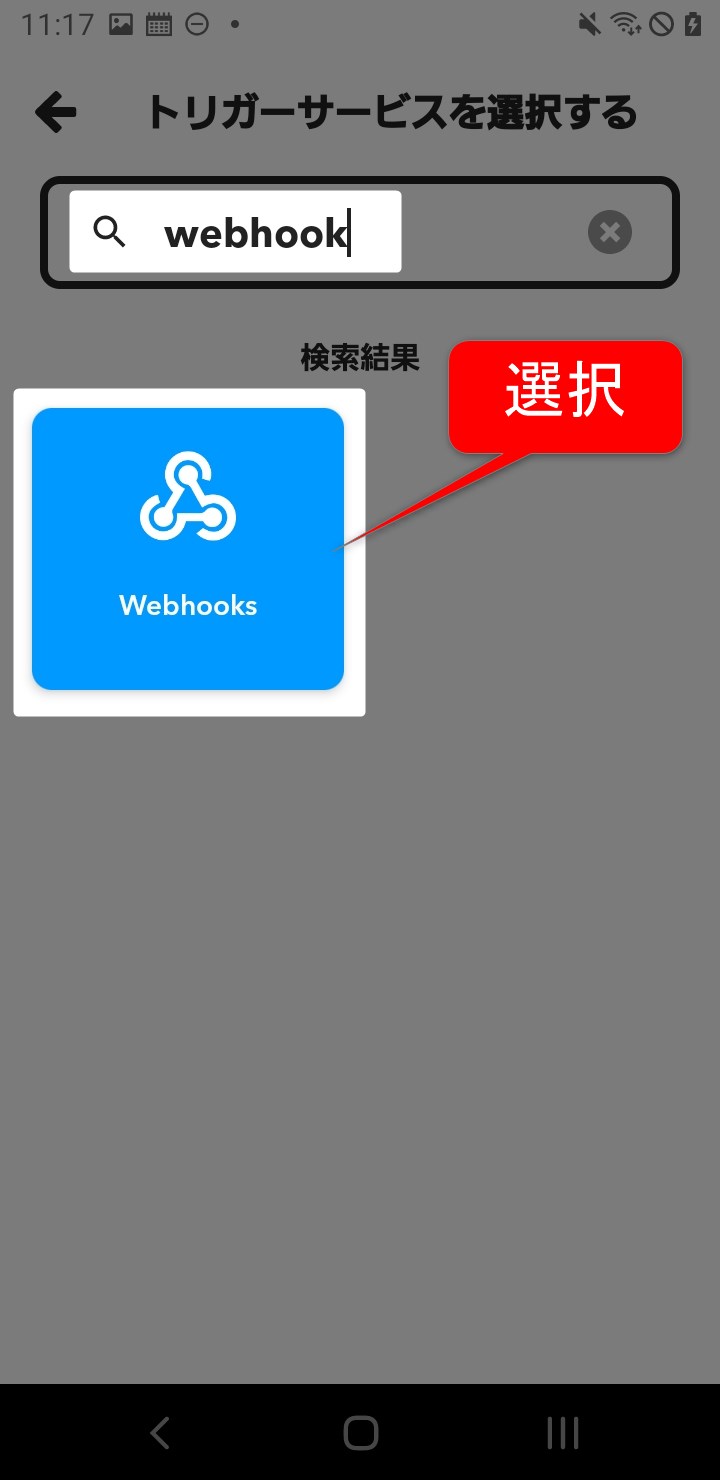
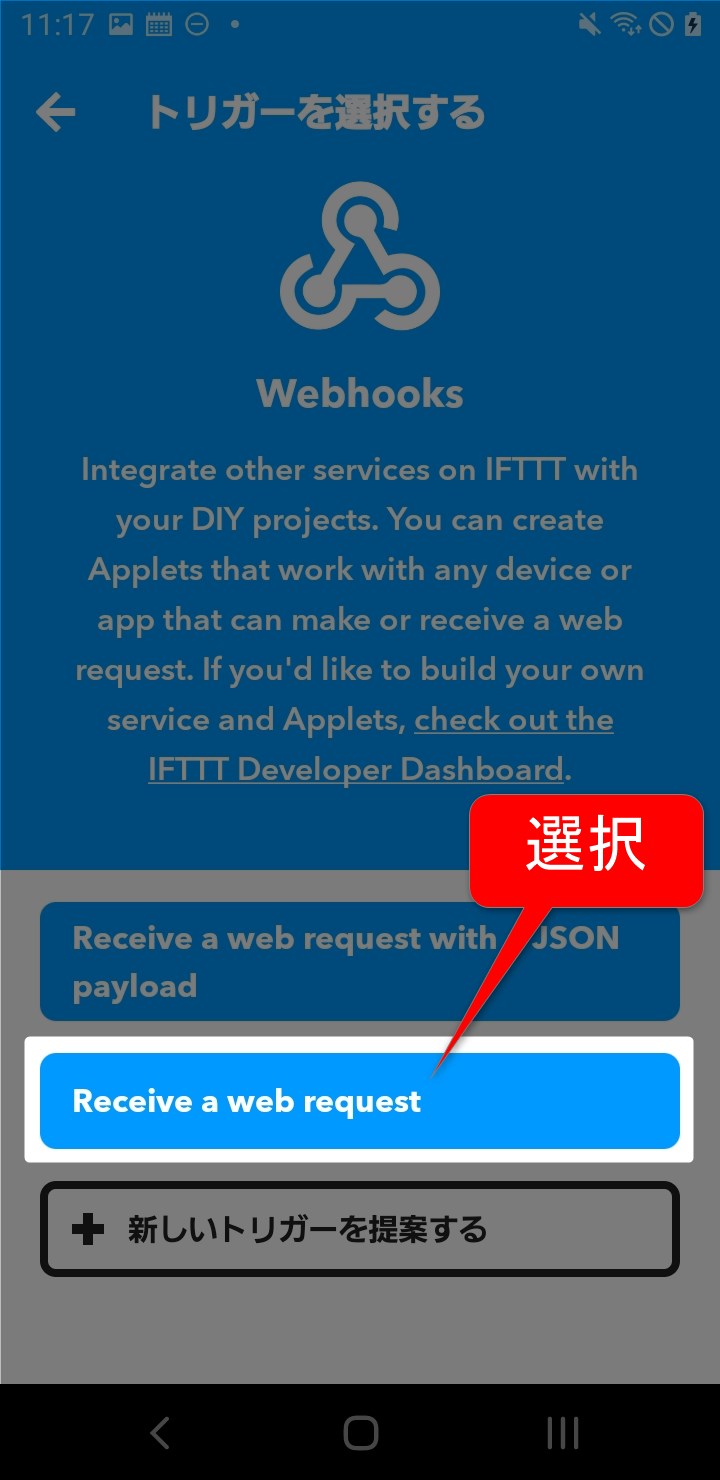
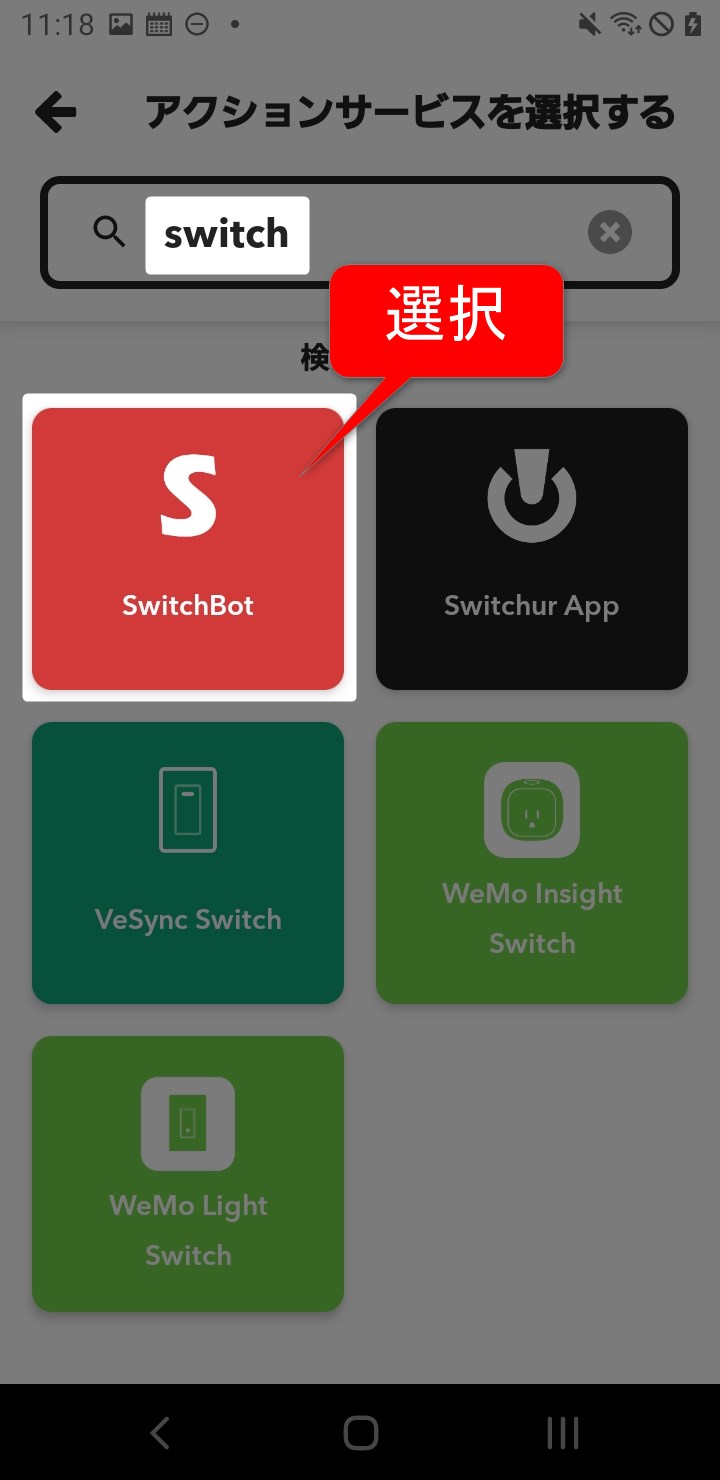
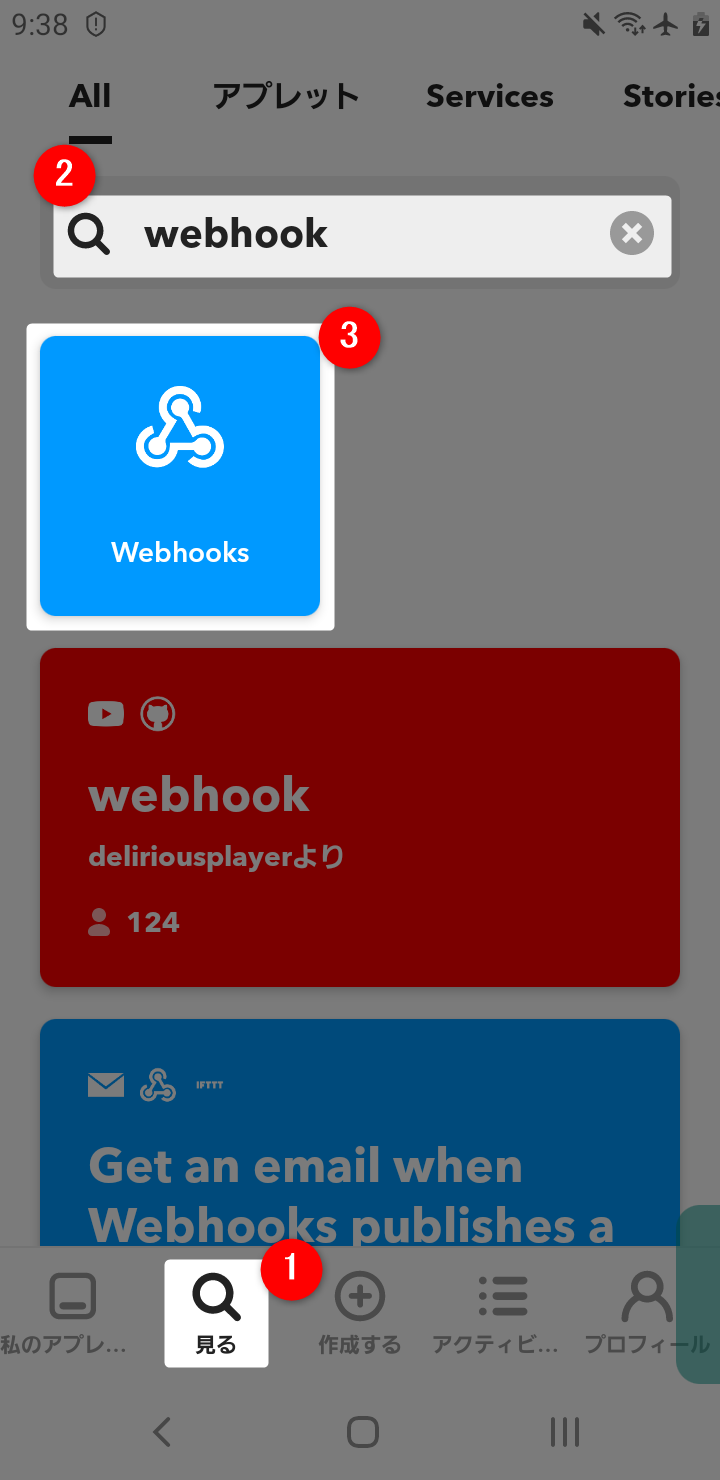
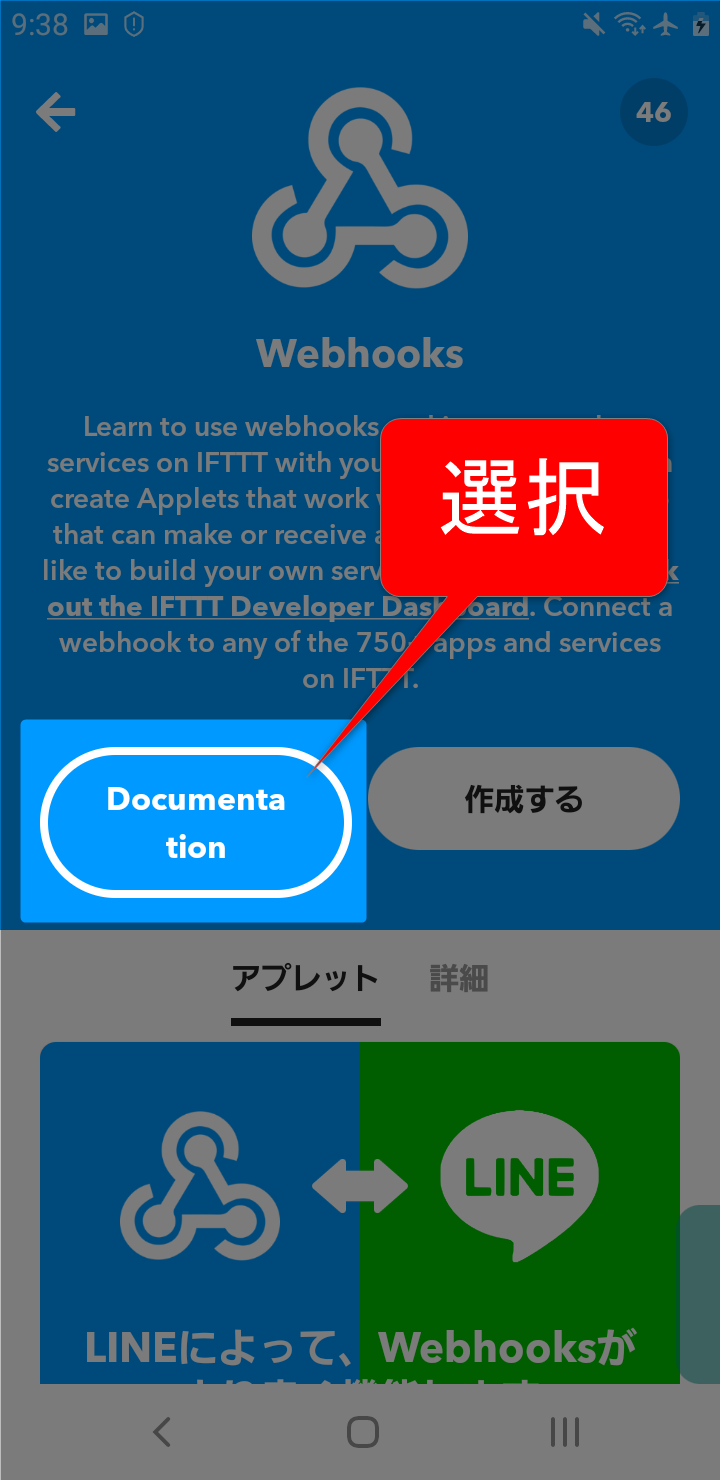
IFTTTの設定
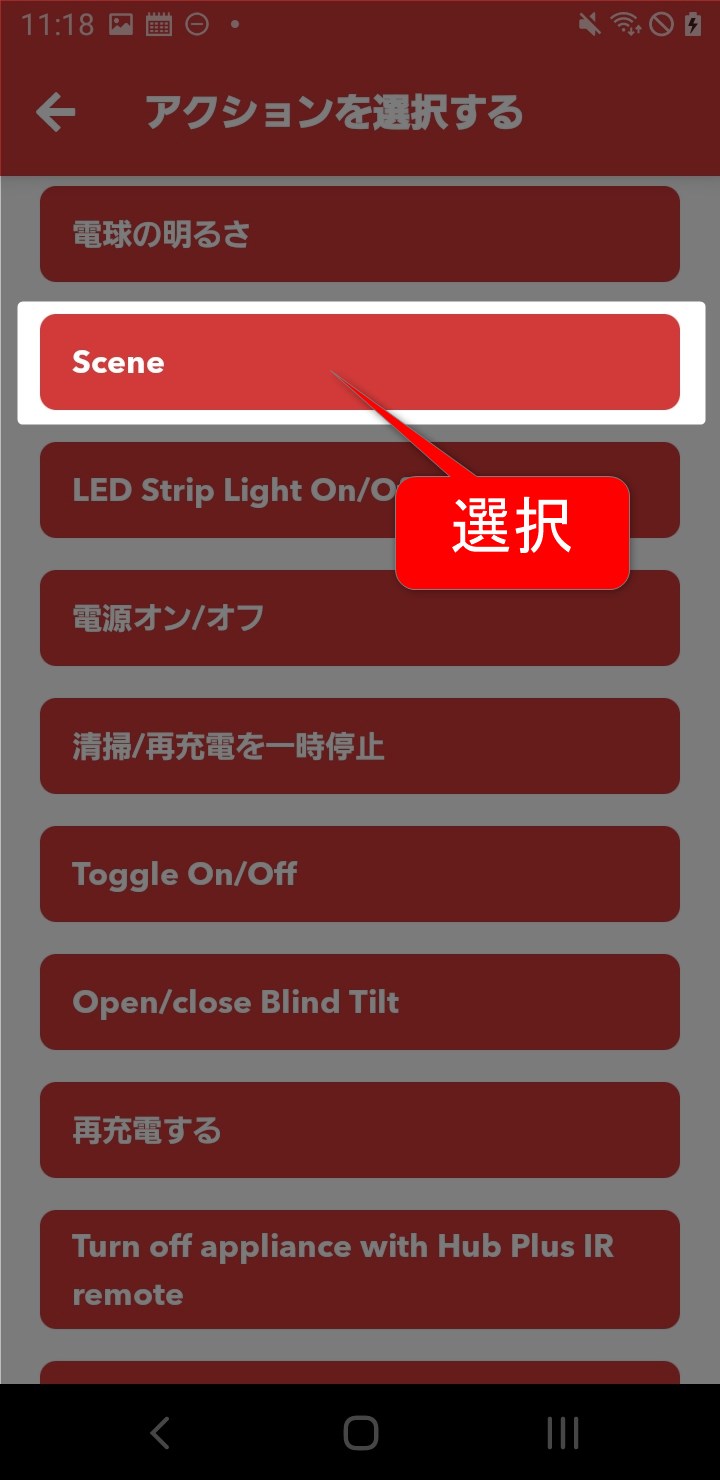
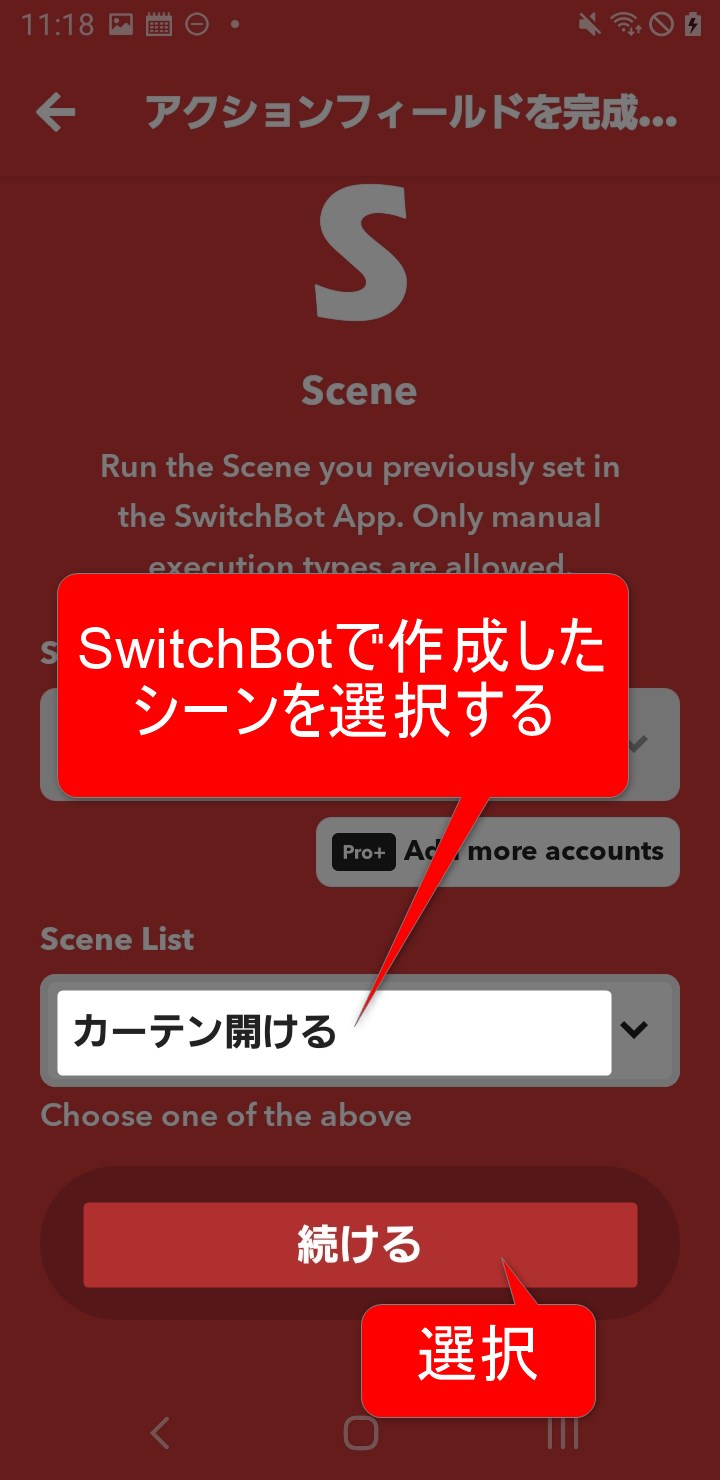
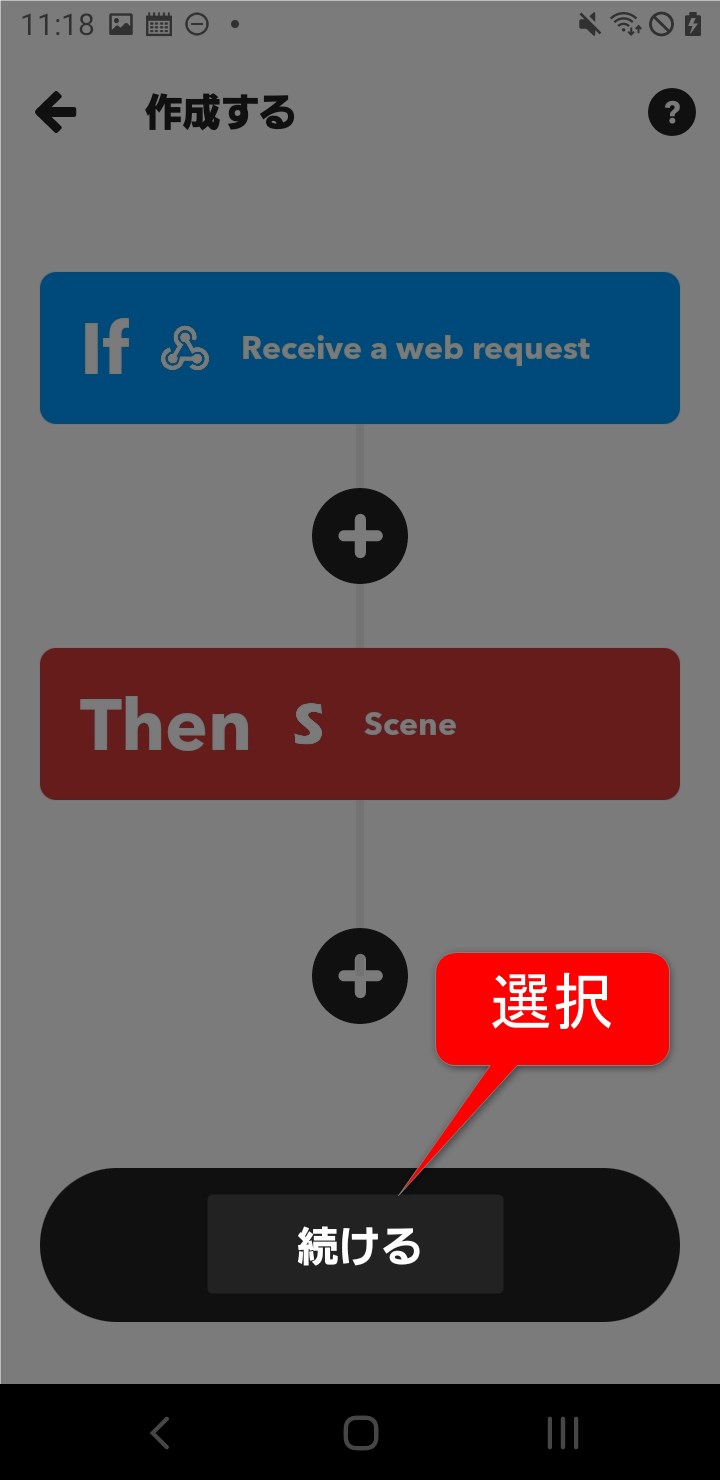
次にIFTTTでSwitchBotカーテンを連動させます。
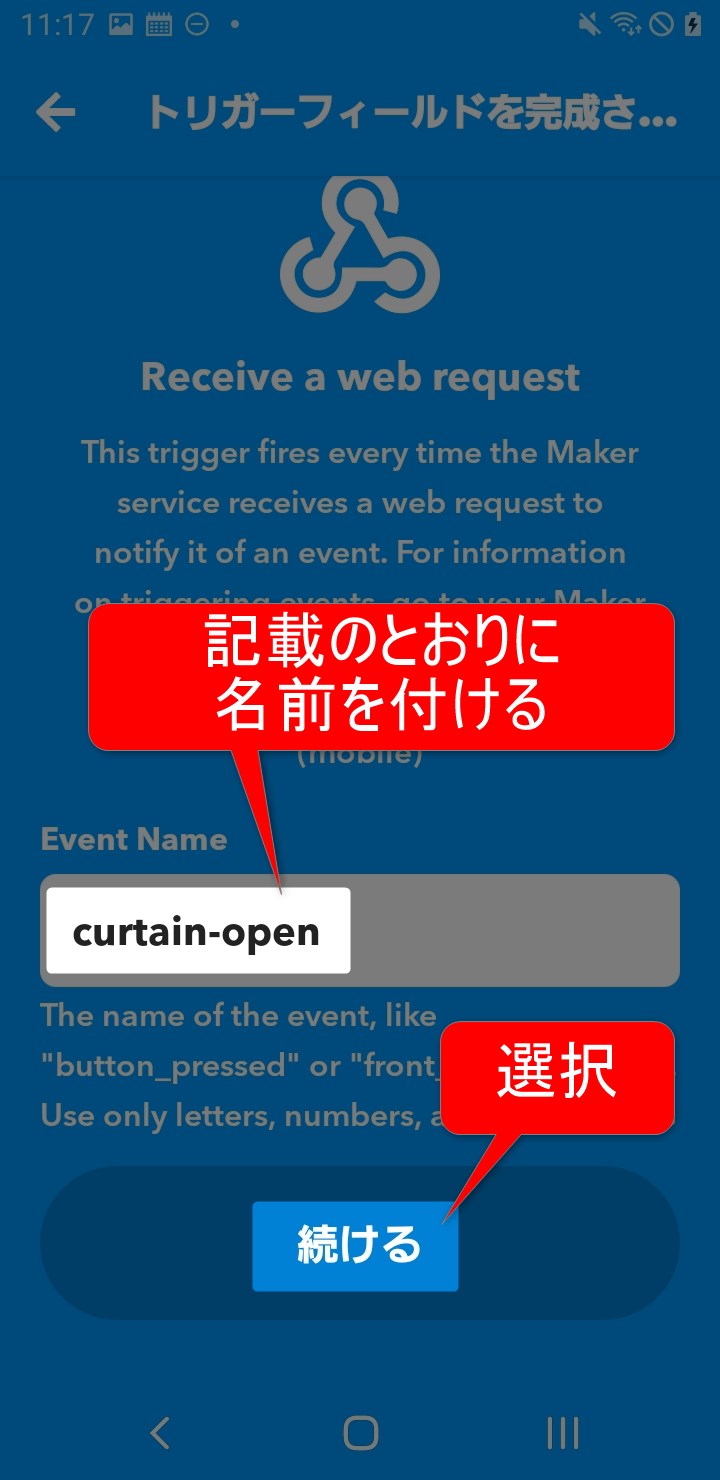

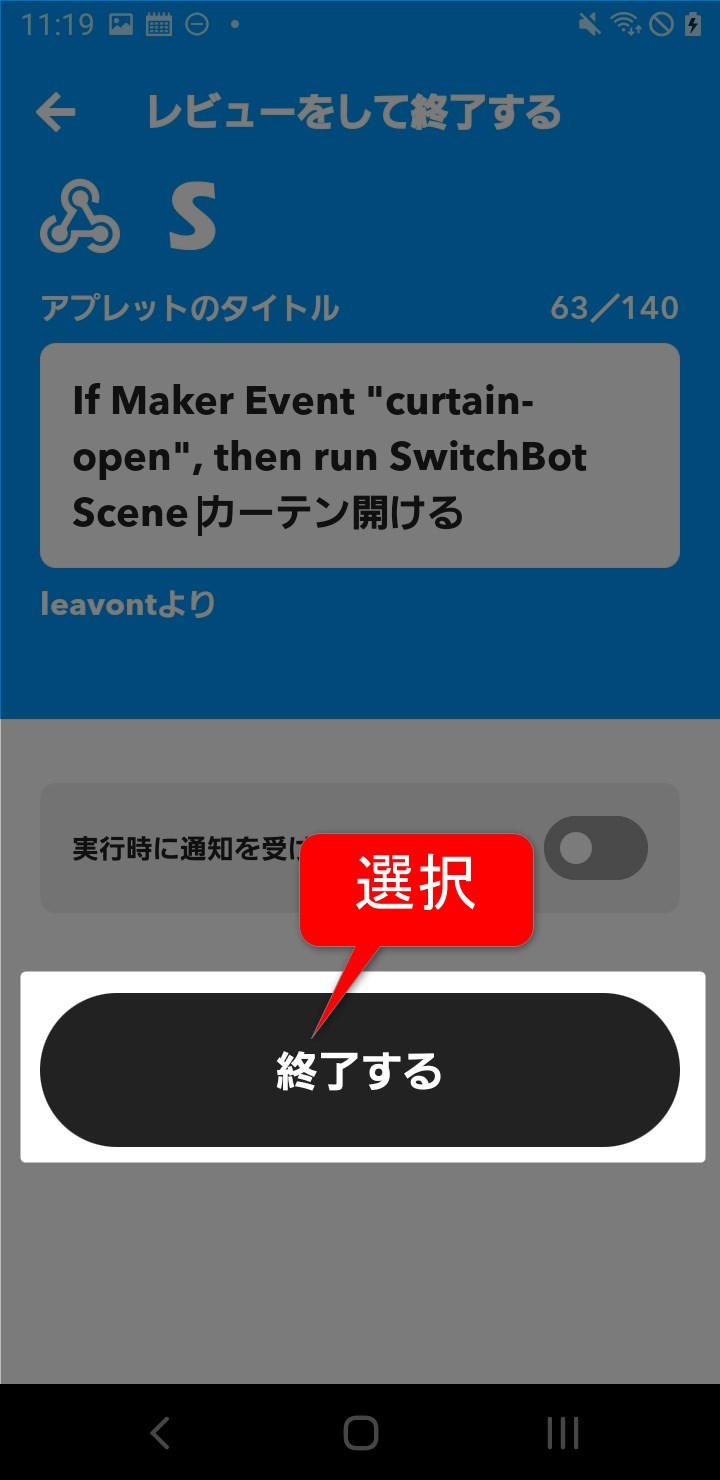
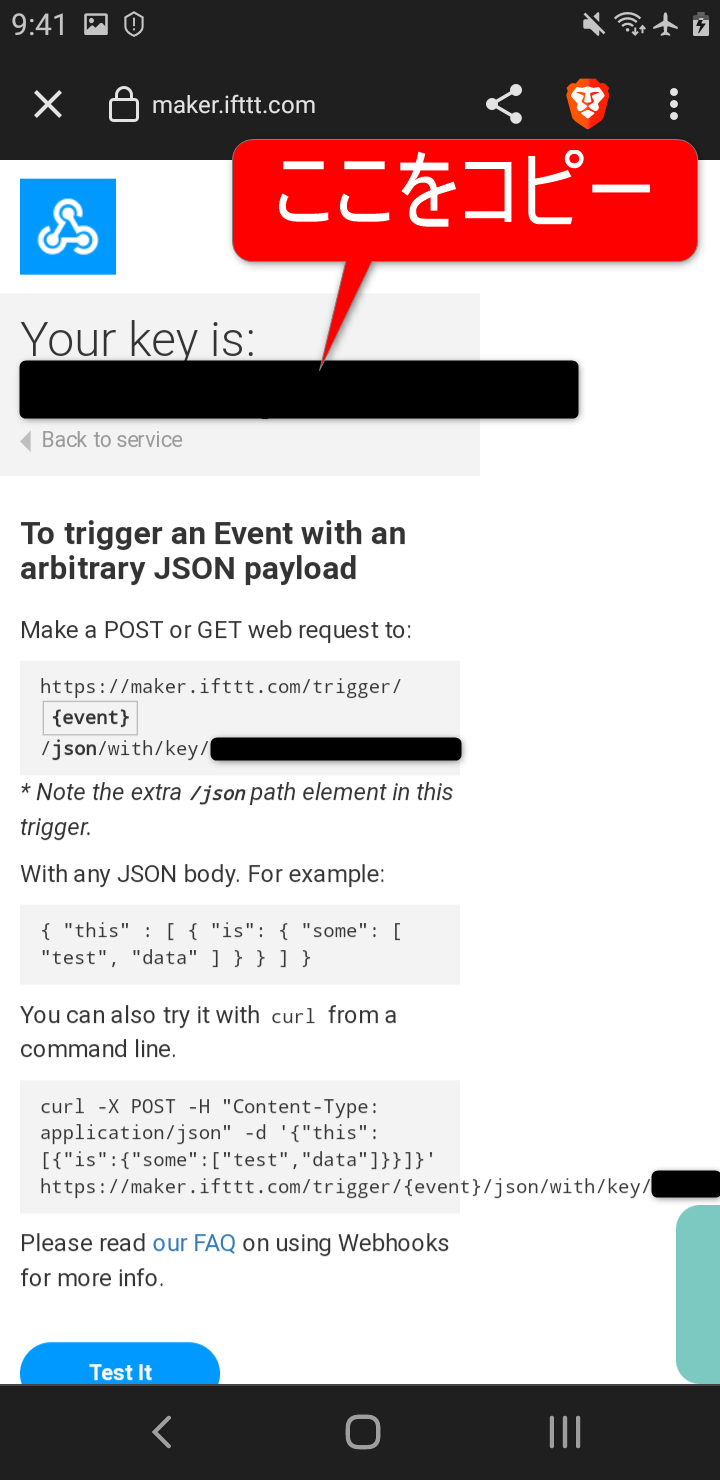
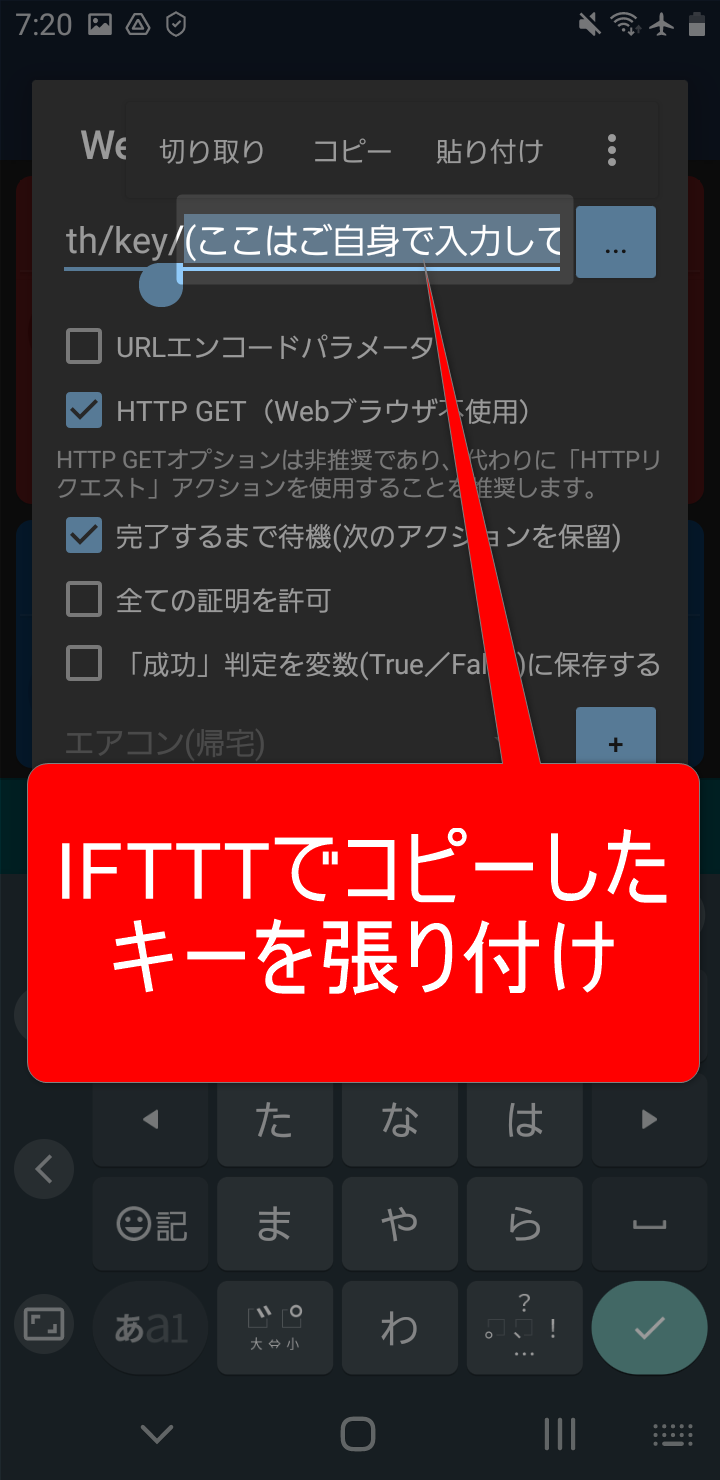
コピーしたキーは次の工程で使います!
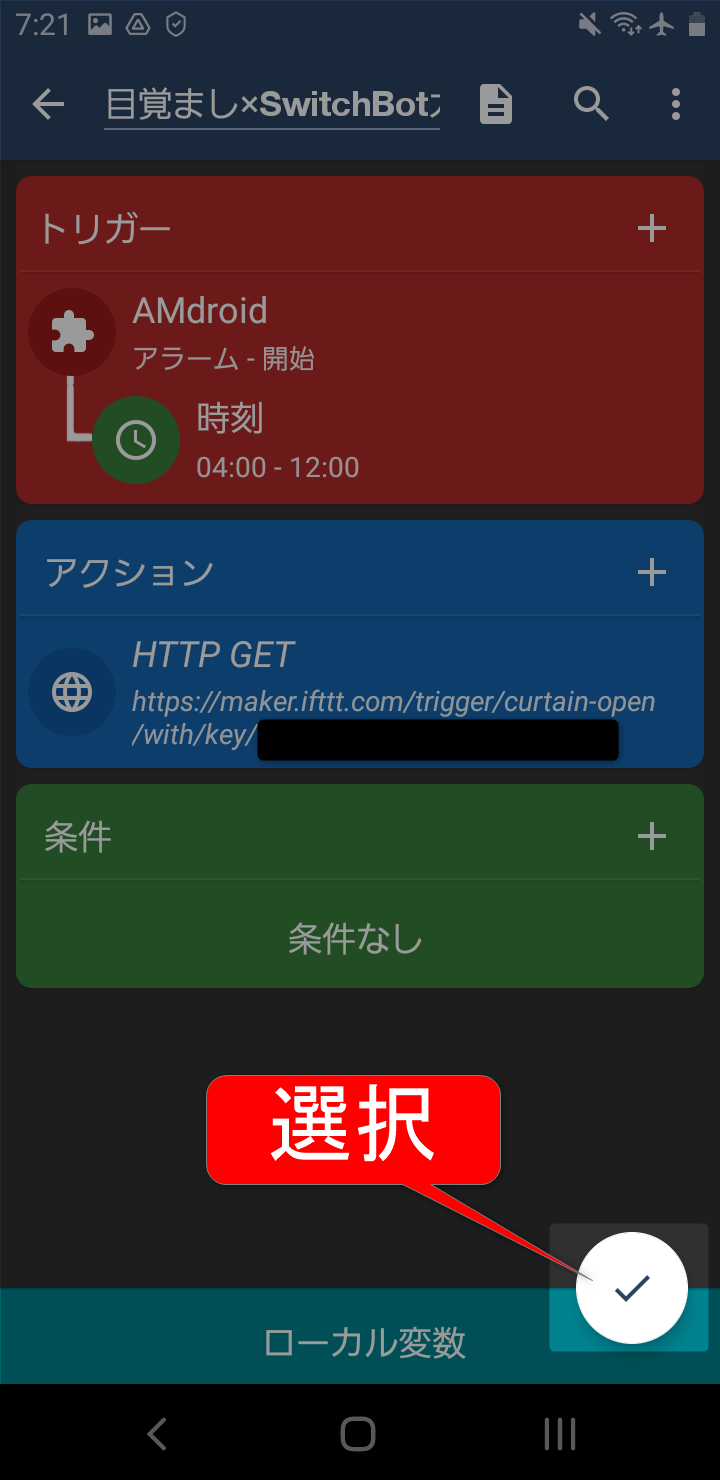
MacroDroidの設定
「目覚ましが鳴ったら」→「カーテンを開ける」を実行するための設定をしていきます。
まず下のリンクからマクロをダウンロードし、MacroDroidへインポートしてください。
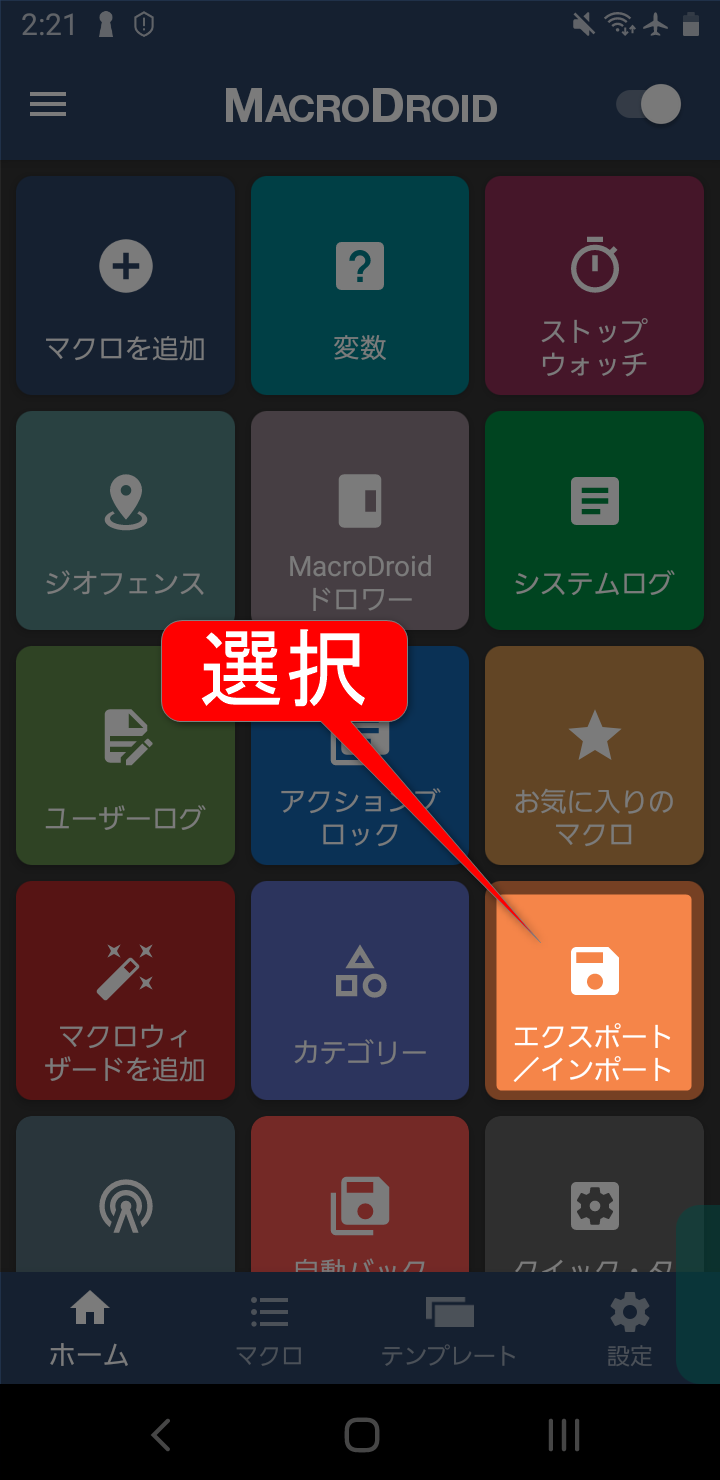
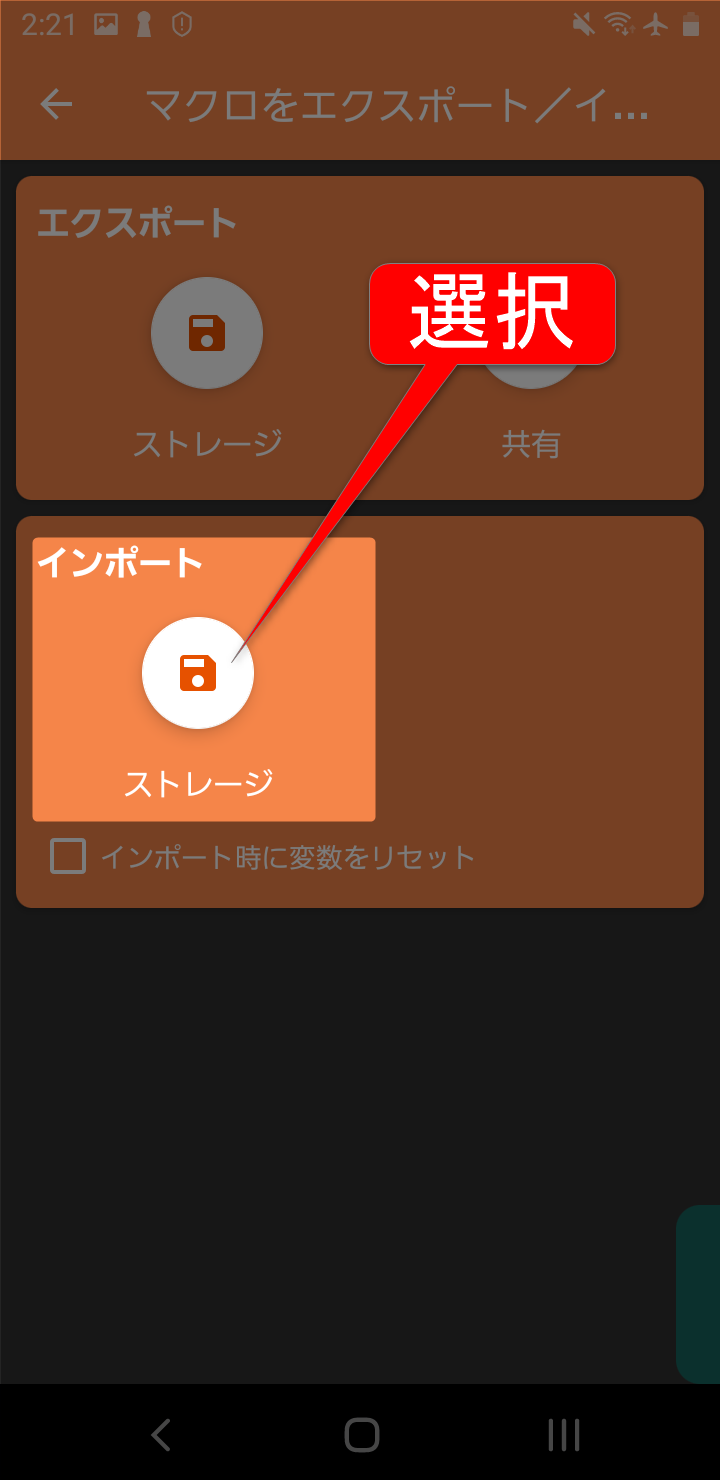
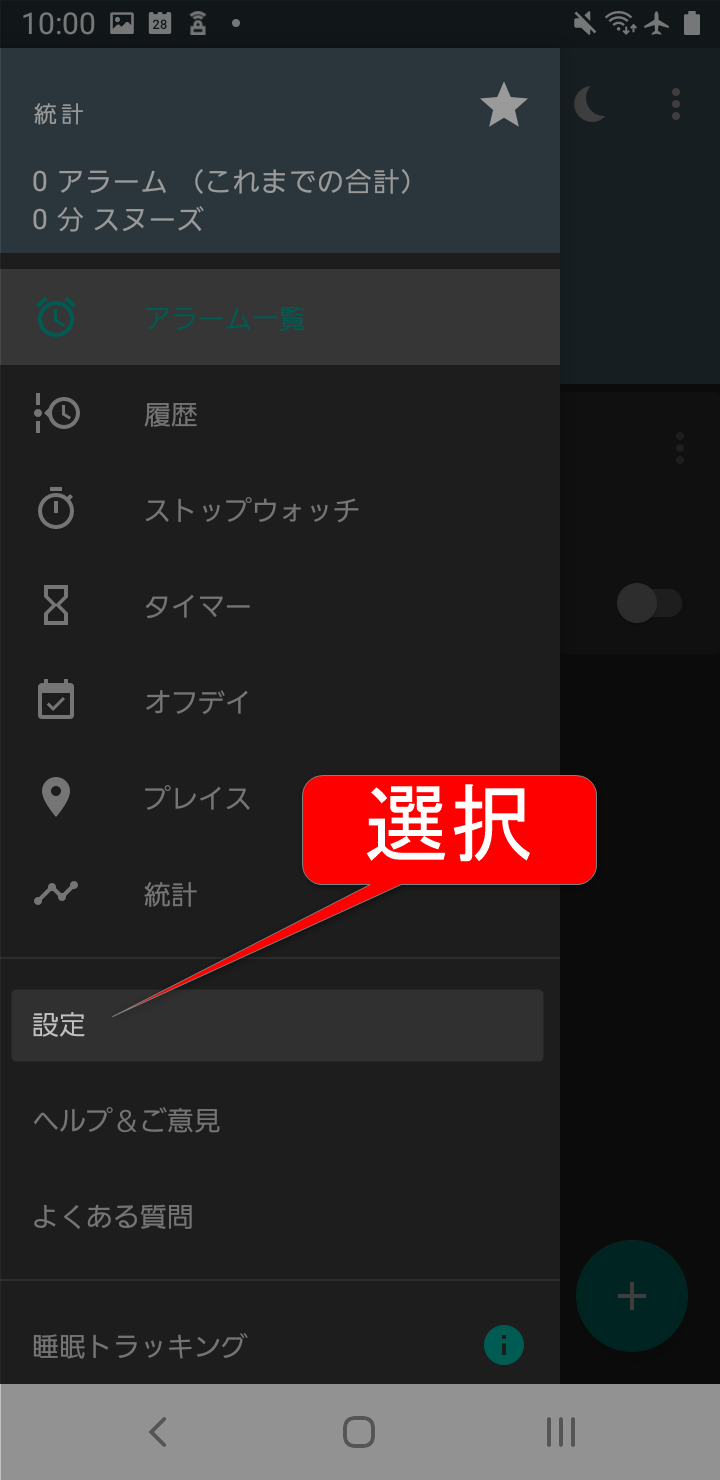
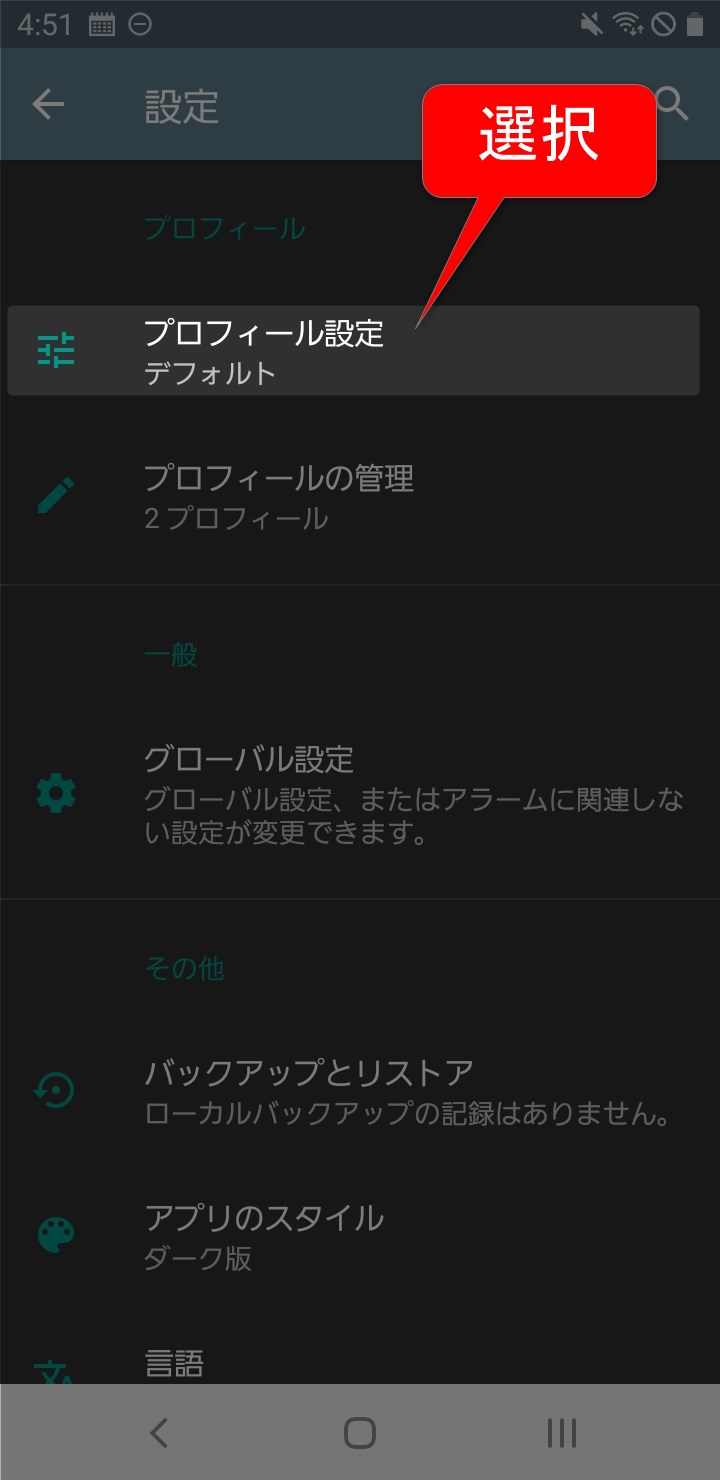
- MacroDroidのメニュー画面から「エクスポート/インポート」を選択
- インポートを選択し、ダウンロードしたマクロをインポート
▼インポートが完了したらマクロを開きます▼
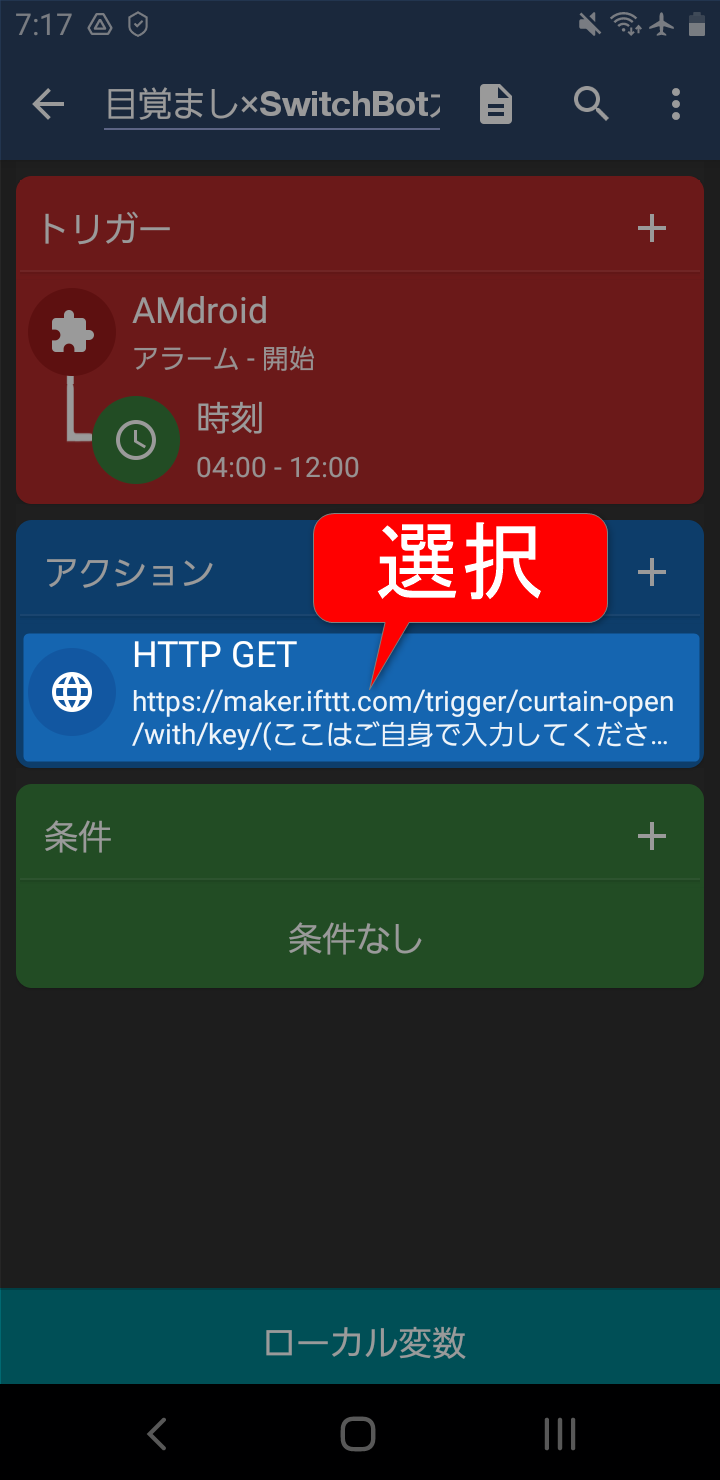
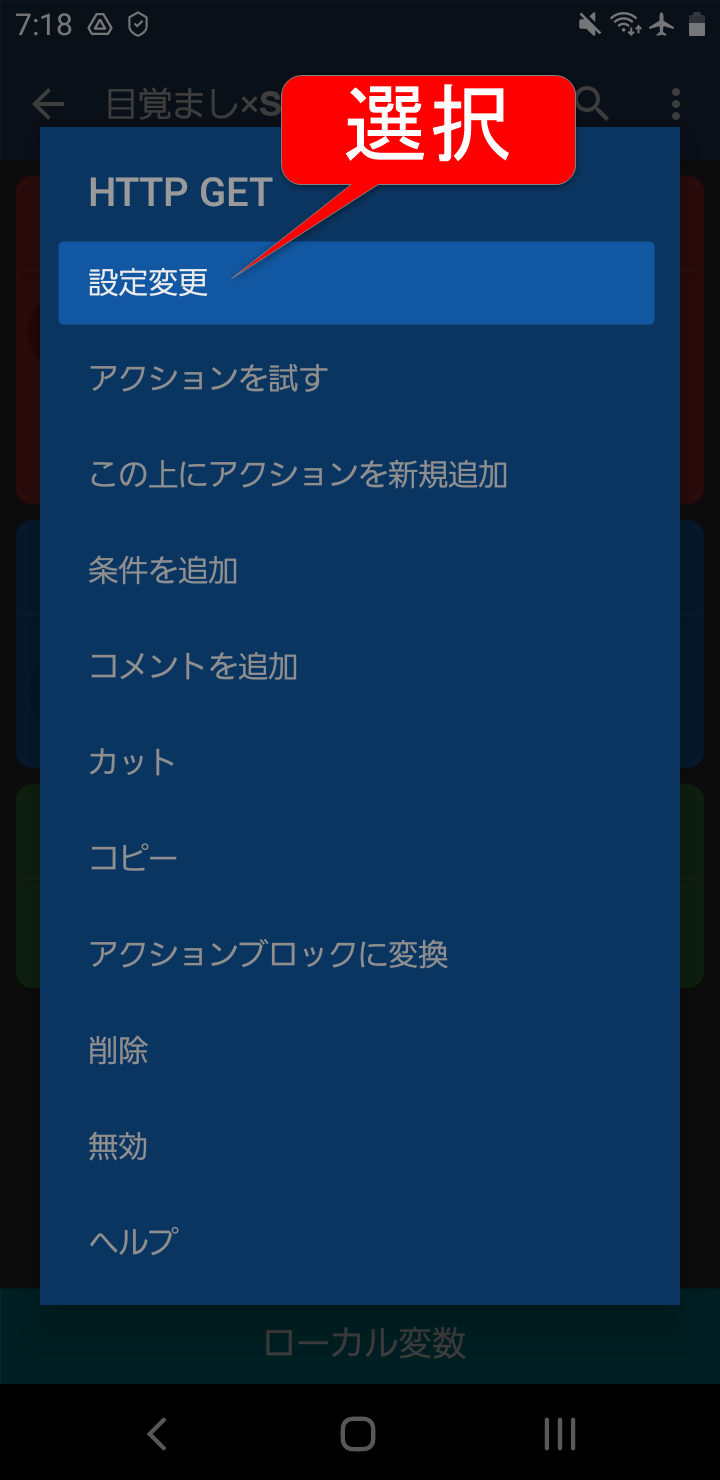
▼IFTTTでコピーしたキーを張り付けます▼
その他の設定(読まなくてもOK)
アラームの〇分前にカーテン開けたい
▼AMdroidの設定を変更します▼
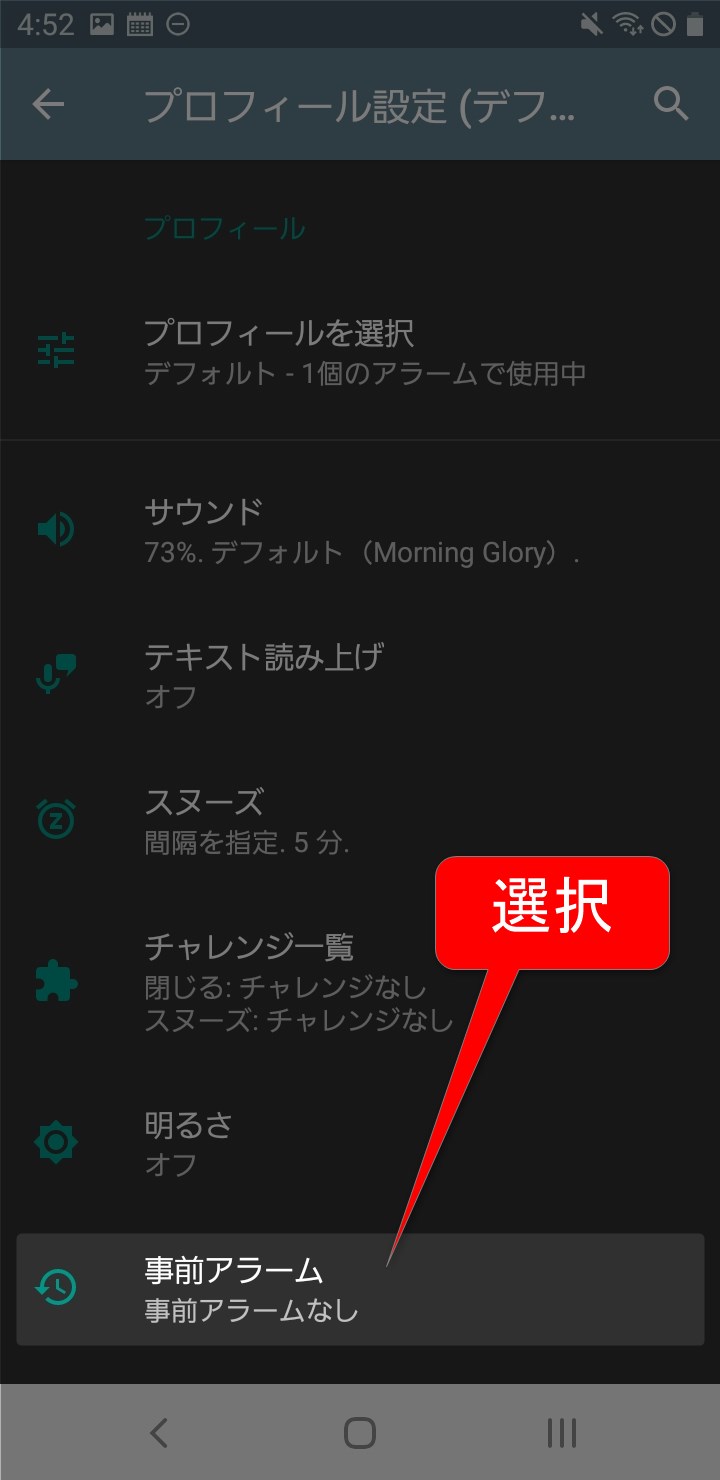
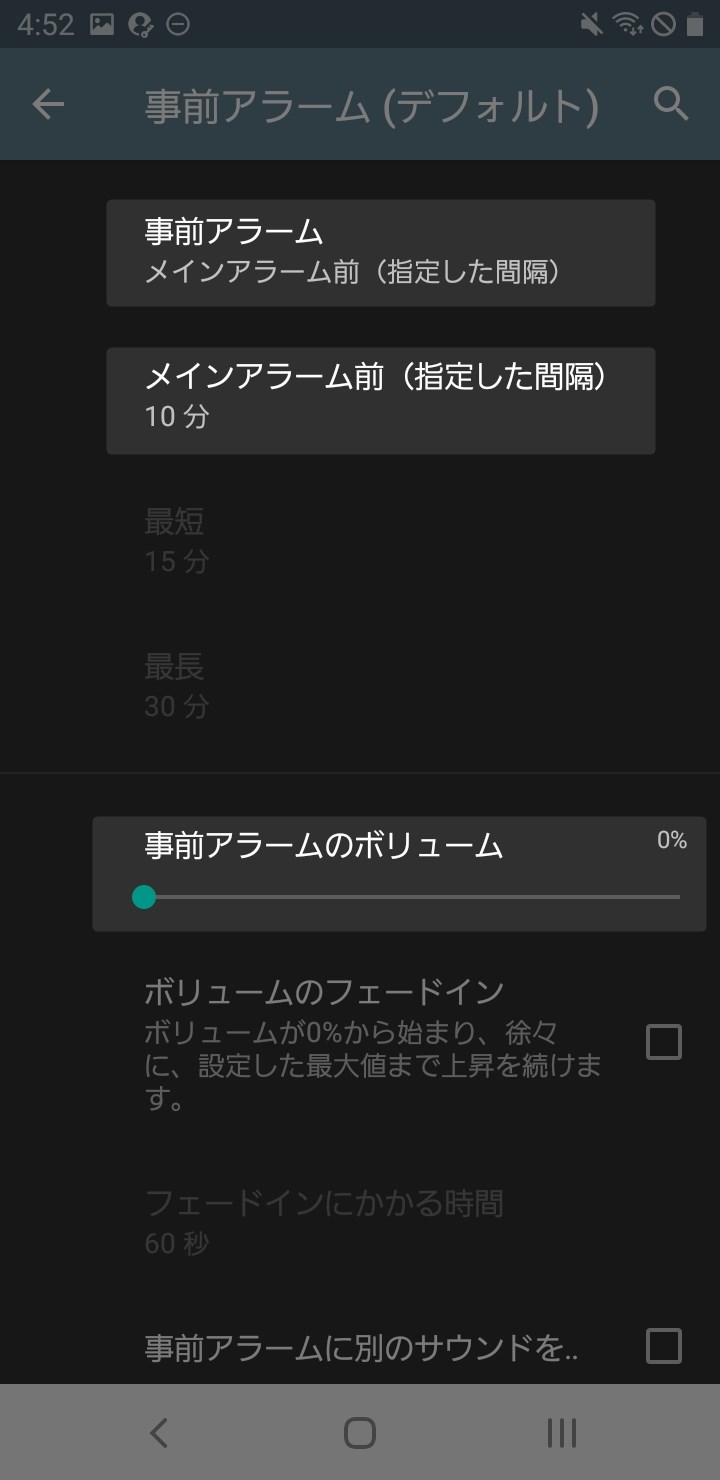
◀◀
- 何分前に事前アラームを鳴らすか設定
- アラームの音量は0
タイマニ音量が0なのでカーテンだけが開きます
家にいるときだけカーテンを開けたい
今の設定では、外出先でもアラームが鳴ればカーテンが開いてしまいます。
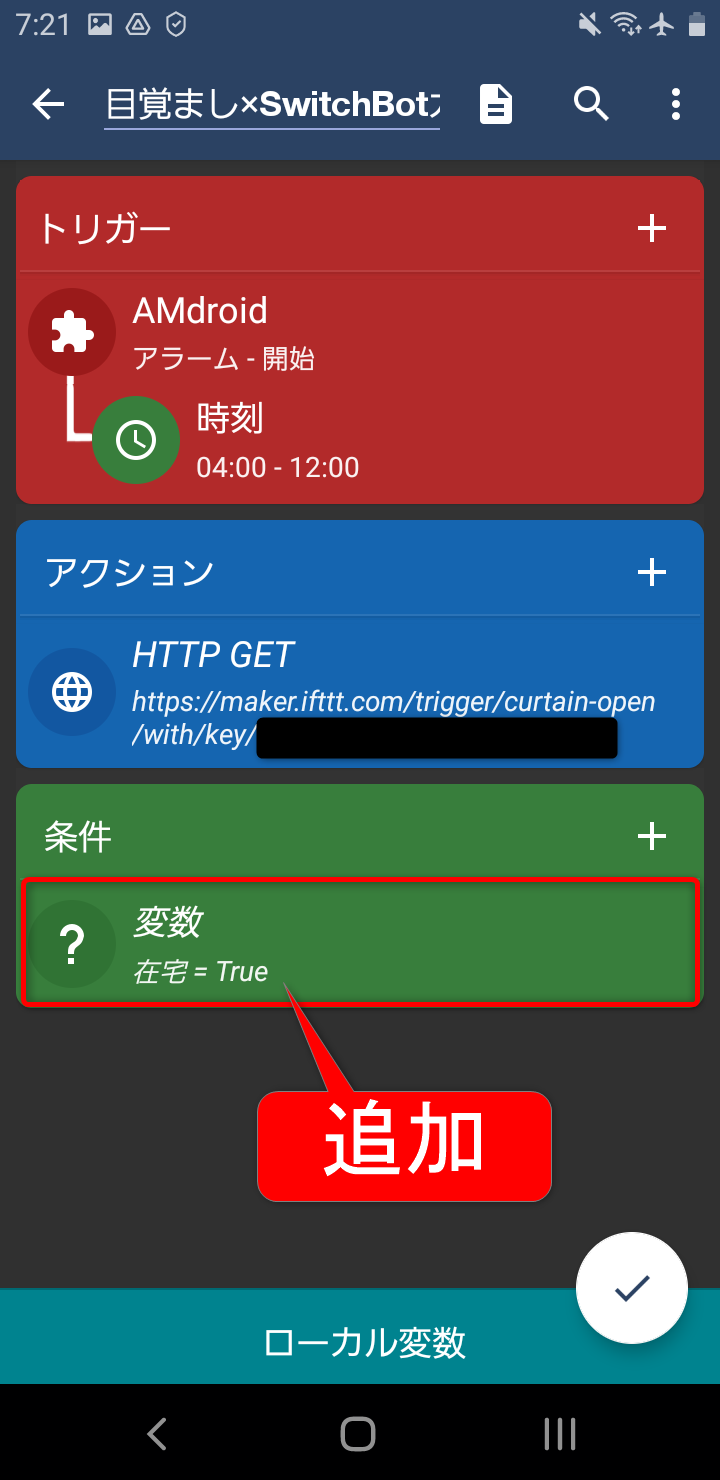
条件に変数を加えると簡単に設定できます。
詳しい設定方法は▼のリンクをご覧ください

以上、タイマニ(@taimanix)でした~